Sample
Plots of a Bridge
Since the bridge analysis software isn't
available on all computers on campus, it may be difficult to open a saved file
of your bridge outside of class.
Instead, save the bridge file on a local computer in the classroom and
then make an image of the file that can be opened on any machine to print.
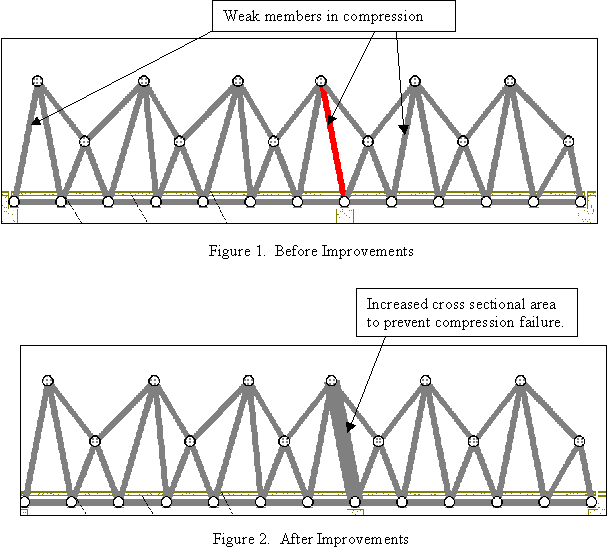
To make an image of the bridge as it appears on the screen, hit the "Print Screen" button on the keyboard. Then exit the program (or minimize it) and open a program like "Paint" (should be under Start/Programs/Accessories). Select Edit/Paste to view the image and use the cut tool to save only portions of the image. Finally you can Edit/Paste the image into a Word document. A sample bridge is shown in the figures below:
WEST POINT BRIDGE DESIGNER SOFTWARE
A copy of the software can be
downloaded at http://bridgecontest.usma.edu/
Loading the bridge
Open the program and select
"Load a Sample Bridge Design." Then select "Sample 1: Haupt
Bridge." After the bridge appears on the screen, select the icon with the
moving truck as shown in Figure 1.
![]()
Figure 1.
Drawing Board and Load Icons
The red
members are in compression and the blue members are in tension.
As the truck drives across the bridge, the colors will become darker as the
forces increase.
Reviewing the Data
Go back to the drawing board
by selecting the icon with a ruler and pencils, as shown in Figure 1. Grab the
table that appears on the far right of the screen and drag the mouse to the
left so you can see all the columns. This table shows the maximum forces
developed in the members.
Building a bridge
To build a bridge, go to
"File/New Design." Then select "Single Span Truss (24
meters)." On the next menu screen, select "none" (other options
create a truss template in the background). On the next screen, type your team
name and make up a project number. This information will appear in the bottom
corner of drawing.
To build the bridge, use the
small floating "Design Tools" menu as shown in Figure 2:
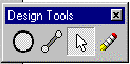
Figure 2. Design Tools Menu
- The circle icon allows you to create joints.
- The bar icon allows you to connect the joints with members.
- The arrow icon allows you to grab and move existing joints.
- The eraser icon allows you to erase.
Adding Joints
To add joints, click the
mouse in the location you desire as shown in Figure 3:
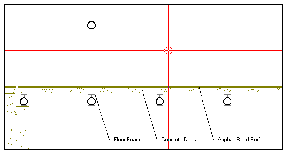
Figure 3. Method
to add joints
Adding Members
To add members, click and
drag the mouse between the joints as shown in Figure 4:
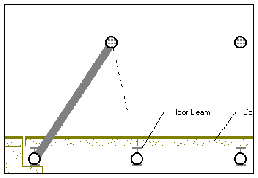
Figure 4.
Method to add members
Failures
If your bridge fails, go back
to the drawing board to see the failure members (red or blue). There will also
be notes at the bottom of the page as shown in Figure 5.
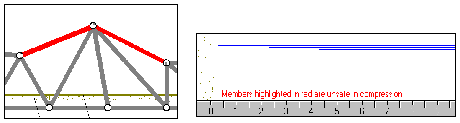
Figure 5. Failed members and warning
Fixes
To strengthen a bridge:
- Move joints so that the compression members are shorter.
- Add additional members.
- Increase the size or shape of the bar.
- Keep the overall shape symmetrical.
- Change the material type.