Importing Unit Survey Into
RoadEng
or
HOW TO PUT
PEGGED ROAD INTO ROADENG
Survey P-line in Pegger
- Open the road shapefile you
will be using.
- Setup the pegger function in ArcView.
- Under the “Roads” menu, select “Setup Pegger”. Set the contour file and the other options as you
normally would, making sure to add the grade and
name
- First, make sure to save
the pegged line in its “un-merged”
conditions, then proceed
- Merge the section of road for which you want to import
into RoadEng. This is important because a P-Line Survey in Pegger can only make a file from one polyline. In order to merge a line segment, select all
the sections of the road that will be merged.
- Under the “Roads” > Start Pegging, select “.
- ” Again under the “Roads” menu, select “Merge.” The many components that were selected
should now be combined into one segment of road.
- Add the DEM file for your particular section, and add
it to the active view
- . Make sure to look for
files that are Grid Data Source
- Make the road of interest active, turn on
editing, and select the road.
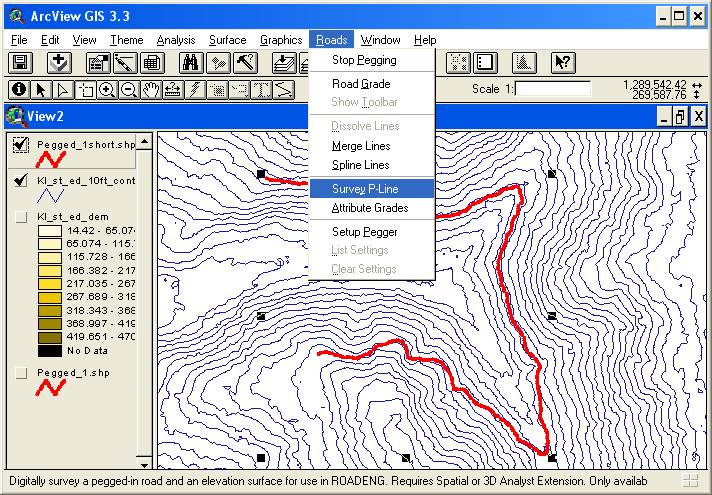
- Under the “Roads” menu, select “Survey P-line.” If it does not let you,
make sure the DEM file is active, and also that the road wanted is
selected, and the editing is turned on. Then try again.
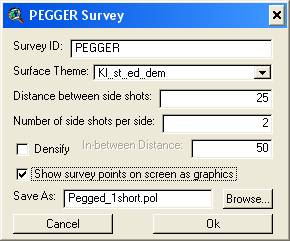
- Select the surface theme as your DEM file.
- Set distance between side shots to desired distance, usually 25 ft.
- Set number of side shots to typically 2 to 4.
- Don’t Densify.
- Check on show survey points on screen.
- Set your save location.
- Click OK
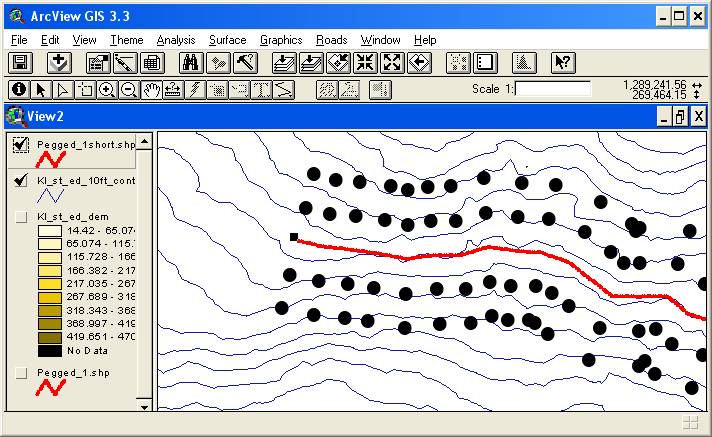
- A .POL file will be made and saved.
Open the .POL file in RoadEng
- Open the “Terrain Module” under “RoadEng ” in the start
menu.
- “File” select “Insert File.” Multiple files can be selected.
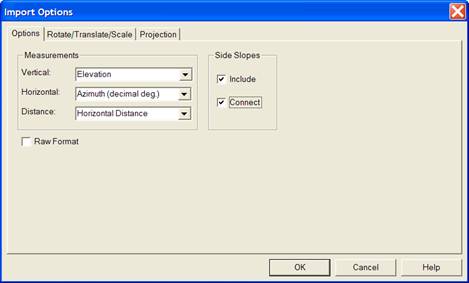
- An Import options dialog box will open. Set the settings as shown below:
- Options
- Vertical = Elevation
- Horizontal = Azimuth
(decimal deg)
- Distance = Horizontal
Distance
- Under Side slopes
- Check “Include”
- Check “Connect”
- Uncheck “Raw Format”
- Rotate/Translate/Scale
– No changes necessary
- Projection
- Datum Transformation
Method = None Required
- From Projection = no
change
- Current Projection:
- Projection = Lambert
Conformal Conical
- Datum = North
American Datum 1983
- Lat/long Display Prop
= No change needed
- Press the OK button.
- The selected road section should now appear in the Plan
view in the Terrain Module.
Create the Survey File
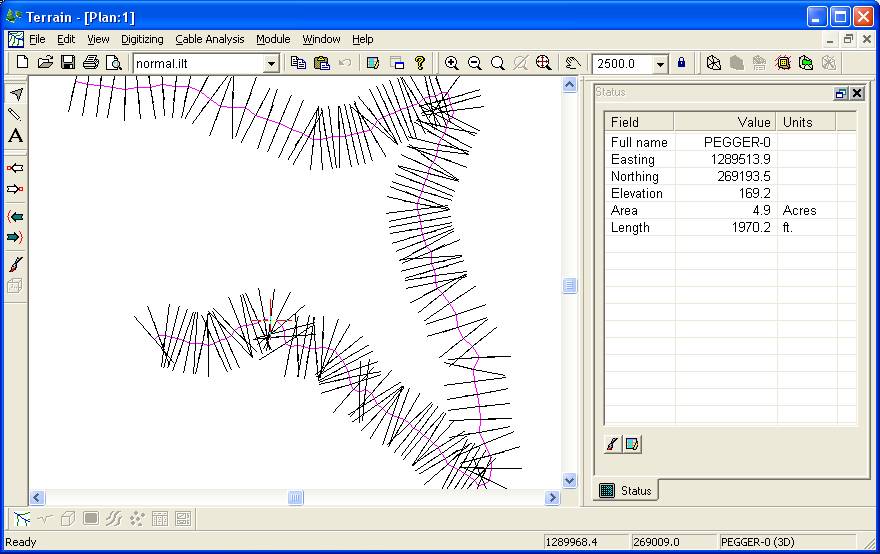
- With your road in the Plan view, select the road only (not the side shots). To clear the selection,
click in white space.
If the Status
window does not show numbers (e.g. length 1970.2 ft)”, you have to restart the process

Under “EDIT >
Terrain Modelling > Calculate terrain model”

- Ignore all the options
for changes exept those under “Contours.” The
changes needed are the following:
- Check “Remove all
existing Contours” (unless for some reason you don’t want to)
- Ignore Triangles
Section
- Check “Smoothing”
- Check “Major contours”
- Interval = 20
- Make sure “Start” and
“End” seems logical
- Check “labeling”
- Check “Minor contours”
- Interval = 5
- Make sure “Start” and
“End” seems logical
- Uncheck “Labeling”
- Click OK

- Under the file menu, select “Save As.”
- “Save as Type” = (Softree
survey file).tr1
- Put a file name and
location, and press OK
- An export options box
opens. Make the following changes:
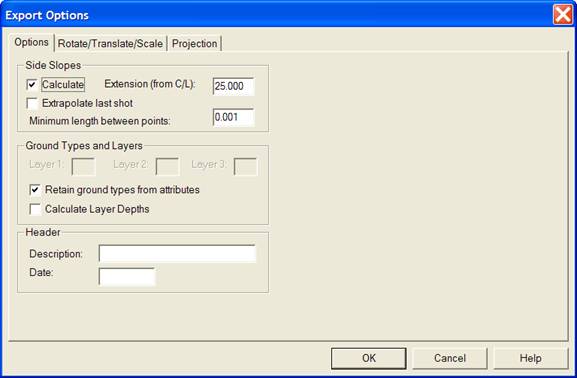
- Options
- Check Calculate,
- Enter an extension
from center line (how far sideshots are),
usually 50 to 100 ft is typical
- Uncheck “extrapolate last shot”
- Make sure to have “Retain ground types from attributes”
checked under “Ground types and
layers”
- Otherwise you will get
an error message “Value out of bound”
- Ignore “headers”
- Rotate/Translate/Scale
– No changes necessary
- Projection
- Datum Transformation
Method = None Required
- From Projection = no
change
- Current Projection:
- Projection = Lambert
Conformal Conical
- Datum = North
American Datum 1983
- Lat/long Display Prop
= No change needed
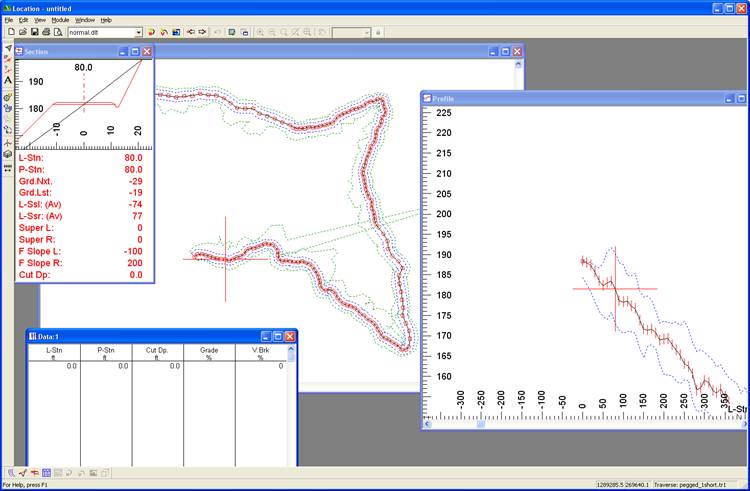
Open the .tr1 file in the “Location” module
- In the “Terrain” module, select “Module” and then click
on “Location Module”
- The location module will open with nothing in it.
- Under the “File” menu, select “new”
- Open the “.tr1” file you saved earlier.
- Your road should load
into the Location design.
When done, that is you close Pegger, do not save the road, since that will save the “merged line, loosing all the grade information.
Typically when done pegging a route, first save it before proceeding to anything else.