Lab 0 - Making and Editing Your Web Page
(do mostly on your own)Objective
- Developing the web skills you will use on each subsequent lab.Note:
If you already build your own web pages, feel free to ignore these steps and just add a /fe423 site discussing of how you do it (including screen captures).Step 1.
Starting your web pageConsider:Take a look at the source code of your preexisting web page (in a web browser). Do the markup tags make sense?
Step 2
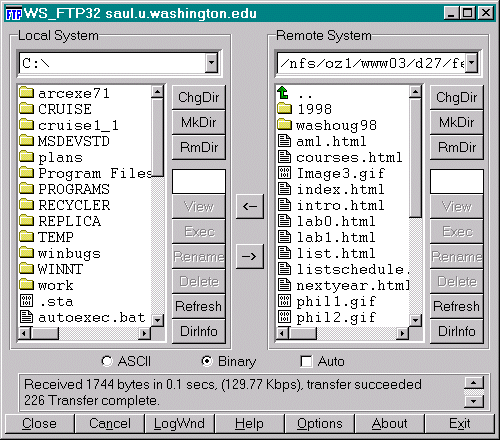
. FTPConsider:The public_html directory appears as one of the possible sub-directories in your home page. Is it a 'real' directory?
Step 3
. Word->.html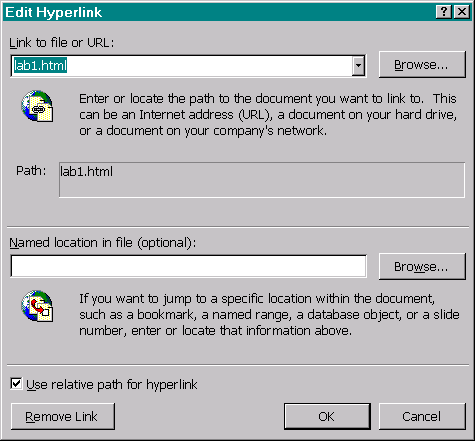
Web pages can be linked together in Word. If you want to build a link to your
lab 1 report, you just block out the text you want linked, pull-down Insert/Hyperlink, then browse to the document you want to link to. If you find a web page on the net that you want to link to, you can just highlight the page address on your browser, copy it, and paste this address into the Edit Hyperlink box.When making your web page, you will find it very helpful to make a duplicate copy of you fe423 directory on what ever machine you are currently working on. That way, all your images are labeled before you begin and all your existing files are right there to link to. If you check the 'Use relative path for hyperlink' box, then all the links you check in your local directory will be maintained.
Step 4.
Possibly the quickest and simplest is to hit Alt-Print Screen, which copies an image of the current window to the clipboard, then you can paste (Ctrl-v) the image directly into the Word document.
If you want to crop off the edges, you could paste it into the Programs/Microsoft/Photo Editor, use the Select box to set the crop margins, then use Image/Crop to crop it down to this size, copy this cropped image, and paste it into the Word document.
When you save the resulting .html document, the images will be saved as .gif files that you will need to FTP to your web site along with the .html file.
Consider:MS Word gives names to the .gif files it creates. How do you find them? How do you keep different .html pages from producing .gif files with the same name (and writing over each other)?
-
Hand in (part I):
- Make a web site on Dante, with a subdirectory named fe423.
- Make a document that includes images, links, and a discussion of how you did all this.
- FTP it to http://students.washington.edu/your_site/fe423/lab0.html
<http://weber.u.washington.edu/~fe423/lab0.html>