Tutorial 2 - PhotoShop / Photo Montage & Panorama
Photoshop, a digital image-editing program, allows you to modify and optimize a scanned image or an image downloaded from the Internet. You can cut and paste details between pictures, apply special effects, adjust color and brightness, add text, or even create entirely new images, and then you can save the modified images to print out or use them online.
Photoshop Work Environment
Photoshop work environment consists of a Menu Bar (at the top), a Toolbox (on the left side), a Tool Options Bar (below the Menu Bar), and Palettes (usually on the right side).
Menu Bar
Menu bar contains most of Photoshop's commands.
- File Menu
Open, Save, Import files - Edit Menu
Copy, Cut, Paste, Transform selected elements - Image Menu
Allows you to access the various modes and adjustments, change the image or canvas size
Mode: enables you to select a color mode in which to work, RGB, which is what your monitor displays, is most common mode you are going to use.
Adjustments: the source for all kinds of color adjustments, including color balance, brightness, and contrast.
Image Size: check or change the dimension or resolution of an image
Canvas Size: change the dimension of image work area (canvas) not image itself
Rotate Canvas: rotate the entire canvas, not a specific element or layer - Layer Menu
Contains commands to add, delete, merge and work with layers
The most powerful feature of Photoshop is the capability to work on different layers. We will address this issue later. - Select Menu
Works with the Selection tools to let you modify areas you have selected. - Filter Menu
Contains lots of special effects, filters are the tools that make Photoshop fun. - View Menu
Contains commands let you zoom in or out on the picture, also has commands governing rulers, guides, which enable you to measure and place objects precisely within the work area
Guides are lines that you place over your picture to position text or some other elements that you are going to add to the picture. To place a guide, put the mouse pointer on the ruler and click and drag the mouse moving across the canvas.
Snap To: make easier to position an element, in effect, "snap" makes a guide magnetic so that when you place the element near it, the line pulls the element right up against it.
Toolbox
Toolbox holds all tools you'll use to draw, paint, erase, move, stylize, or add text to your images, just like an artist's working table. There are four categories of tools: Selection tools, Painting tools, Text and Shape tools, Viewing tools.
A tiny black triangle in the lower-right corner of some icons means there are more tools of the same general kind available on a pop-out menu.
- Selection tools
Used to select all or part of an image, selected area is indicated on screen by a blinking selection border.
After you have made a selection, you can use the Move Tool to move the selected area.
Magic Wand selects by color, you can set the amount of similarity it demands. - Painting tools
Those tools apply "paint" to the picture in one way or another, just like the real tools they imitate.
Pencil, Paintbrush tools can change width and angle.
Erasers: including Block Eraser or Erase with any of the paintbrush shapes
Special purpose erasers: Background Eraser: erase a background, Magic Eraser: erase a selected color
Paint Bucket tool: allows you to fill all the selected area with the current color.
Gradient tool: like Paint Bucket tool, but fills the area with a gradient color. - Text and Shape tools
Shape tools: draw filled shapes, like rectangles, polygons
Line tools: draw straight lines, hold down Shift key to draw lines constrained to 45 or 90 degrees.
Type tool: type in text on the picture
Notes tool: works like the yellow stickies, invisible when you print the page. - Viewing tools
Hand tool: you can slide the part of the picture you want to see or work on into a convenient spot
Zoom tool: let you zoom in and see a magnified view, zoom out by pressing Option key as you click the image
Eyedropper tool: picks up a sample of any color on which you pick, making the color the active color
Tool Options Bar
Options bar lets you customize the selected tool in the Toolbox.
As you change tools, the Tool Options bar changes according to whatever options are available for the tool.
![]()
Palettes
Palettes give access to common commands and resources, help you monitor and modify your files. They are organized by function into four groups:
- Navigator - Info - Options
- Color - Swatches - Styles
- History - Actions
- Layers - Channels - Paths
Palettes can be accessed from the Window drag-down menu.
Swatches palette lets you select colors.
Working with files
Opening, saving, and creating new files
Command File > Open can be used to open any type of graphics file.
You can also save your file in a number of different formats.
To save the file in its current format, use File > Save. If you want to save it as a different type, you can use either File > Save As or File > Save A Copy.
Creating new files: go to File > New and set the height, width, and resolution of the new file in the dialogue box.
If the image will be gray select grayscale, if there will be color select RGB mode.
File size
Size is usually given in both pixels and inches (you have the option of changing these units). Note: Pixel units are useful when sizing images for the web.
To check the size of an open Photoshop file:
- Choose Image > Image Size.
- A dialogue box will appear with the size and resolution.
You can change the image size by changing either size or resolution. If you want to resize the image proportionally, check the "Constrain Proportions" box.
Image Formats
There are different image formats that exist and they have to do with the way information is stored in the image and the type of compresion used. The most common formats are:
- TIFF (Tagged-Image File Format) is a file very rich in data (color, resolution, etc.). However, they're too large and memory intensive.
- GIF (Graphics Interchange) is used exclusively for Web graphics and are good for high-contrast images.
- JPEG (Joint Photographic Expert) is commonly used on the Web and are good for saving images in which differences in color and brightness between adjacent pixels is slight.
- PICT (a Macintosh file format)
- PSD Photoshop file format
Using the selection tools
Photoshop provides you with several tools to define selections. The most important are the Marquee, Lasso, and Magic wand.
- Marquee: marquee tool enables you to define a variety of geometric selection outlines -- square, elliptical, and single pixel. The Marquee tool is useful for cutting large parts of an image.
- Lasso: Lasso tool allows you to create freeform selection outlines in a freeform path around the object you want to select. You can use the polygonal lasso to define a straight-sided selection.
- Magic wand: just click on the image with the wand and it selects all the neighboring pixels whose brightness values fall within a predetermined range.
Building selections
You can add to a selection you've already defined by holding down the Shift key and then clicking on another part of the image. This lets you build a complex selection and is especially helpful when using the Magic Wand. To subtract from a selection, use the Alt key.
The feather option
The Feather option allows you to create a selection outline with soft, feathered edges.
Copying and pasting
If you want to copy the selection and paste it into another image. Here's what you need to:
- Once you've defined a selection, be careful not to click anywhere on the image (if you do, you'll loose your selection!).
- Copy it by choosing Edit>Copy.
- To paste the copied selection into another file, open that file and choose Edit>Paste.
- The selection will appear in a new layer of its own.
Using Layers
Layers are Photoshop's way of organizing an image. In a Photoshop image, each layer is analogous to a sheet of trace paper in a traditional overlay. Each layer has its own composition, entirely independent of all other layers, and can be edited, repositioned, or deleted without affecting the others. Layers make any picture editing easier to make changes.
Creating new layers
To create a new layer, do the following:
- click the layer options button in the Layers palette and click on New Layer, or go to Layer menu> New
- A dialogue box appears and you can name your layer. This name will show up in the Layers palette. It's a good idea to give your layers descriptive names to distinguish them from the rest.
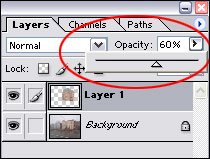
Changing the opacity of a layer
Layers palette contains an option called Opacity. This option allows you to control the opacity of the active layer.
Image Editing
Moving the image
You can reposition an image on the screen with the Move tool. But before you move an element, you have to make sure the layer in which the element stands is active (highlighted in blue). Then, select the Move tool from the Tool Palette, place it on the image, click-and-hold and move the layer around.
Tranforming the geometry of an image
You can transform the geometry of images using several options under Edit>Transform.
Adjusting hue, saturation, and brightness
Adjusting color is one of the most useful and powerful features Photoshop contains. Under Image>Adjustments there are several simple commands you can use to control the color of your image.
Using Filters
Filters are special Photoshop tools let you apply special effects to an image. The filters can be accessed from the Filters menu.
Adding Text
Photoshop allows you to add text directly on your picture, and it places text in a new layer (this layer is created automatically). To add text, simply click on the Type tool in Toolbox and then click on your image and type in text.
- you can move the text around on your image. Choose Move tool, place the cursor on the text, click-and-hold, and reposition the text, be sure you are in the right layer.
- you can also change the formatting of text you've already entered, you first go to the right layer and choose Type tool and then highlight the text with the cursor and modify it.
In-class demo-1
Photo Montage
In this demo, you are going to learn how to merge a building into a different streetscape.
Please copy the two files from U:/ to your PC (or directly download the following two files: corner1.jpg and corner2.jpg). You may put them on the desktop.
Open the file corner1.jpg using Photoshop CS.
You are going to cut out the red masonry building on the corner and place it onto a street corner in the other photo.
Go to View > Fit on Screen to enlarge the image, so you can have a better view allowing a precious selection.
Use Polygon Lasso Tool, set the Feather to 2 px in the options bar, so you can have a softened edge.
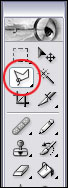
![]()
Select the building by carefully tracing its outline, you actually have to click several points on the edge to define your selection. When you complete the loop and go back to the starting point, you will see a small circle appears right below the Lasso Tool, which just tells you that you have completed a loop, now double-click to finalize the selection.
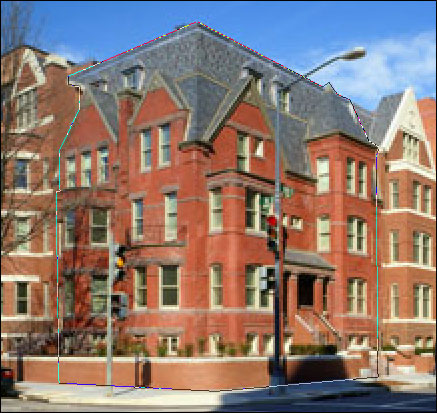
Go to Edit > Copy to copy the selection
Now open the other file corner2.jpg. then with corner2.jpg opened, go to Edit > Paste, then you will see the building you just selected from corcer1.jpg has been pasted onto corner2.jpg, and a new layer (layer 1) has also been created to contain only the selected building.
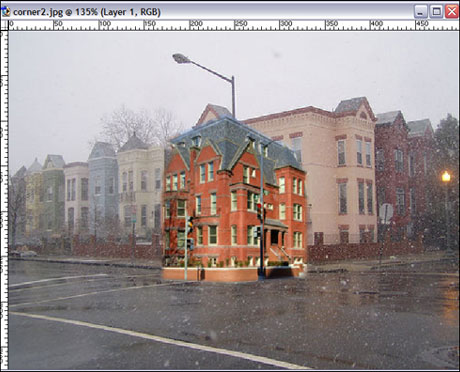
With layer 1 selected, change the opacity to 60%, you can slide the bar or just enter the number. So you can see through the building and align the building with the background more preciously.
Now use Move tool to move the building, try to align the corner on the bottom of the building to its corresponding position on corner2.jpg.
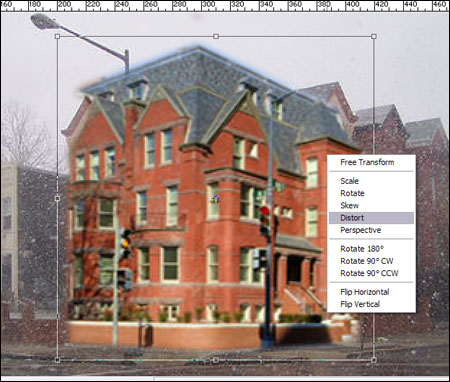
Then go to Edit > Free Transform to fit the building to the existing building on corner.jpg.
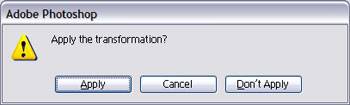
Then right-click the mouse and in the menu select Distort (you can also try other options, like Perspective), you can use the eight bounding boxes to fine-tune the perspective angle. When finished, click on any tool (like Move tool), then click Apply in the dialog window to finalize the transformation.
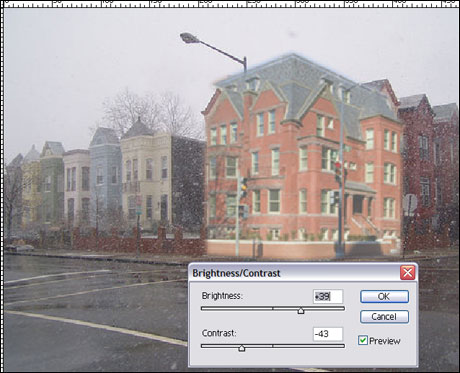
Change the opacity of layer 1 back to 100%. Now you can see the building already sits on this streetscape, but it looks a bit brighter than the surroundings. Go to Image > Adjustments > Brightness/Contrast, change values for both to your liking.
Done!
In-class demo-2
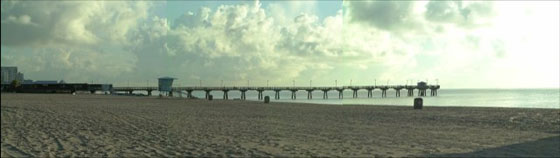
Creating a Panorama
In this demo, you are going to learn how to merge a number of pictures, which are taken in sequence and for a scene, into a Panorama image.
Please copy the three files from U:/ to your PC (or directly download the following three files: pa1.jpg, pa2.jpg and pa3.jpg). You may put them on the desktop.
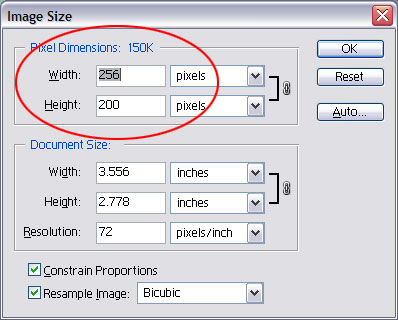
Open the file pa1.jpg. first you have to know the size of this image, go to Image > Image Size, in the dialog, you can see that the image size is 256 x 200. That means in order to allow some space for the other two images (in the same size), you have to increase canvas size for the file pa1.jpg. Close the Image Size dialog by clicking OK.
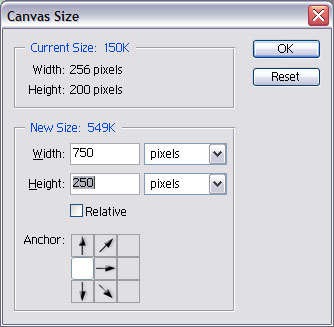
To add canvas, go to Image > Canvas Size, you need to add canvas to the right of pa1.jpg, and also add a bit canvas to both the top and the bottom of the image. Set anchor and width/height as shown below.
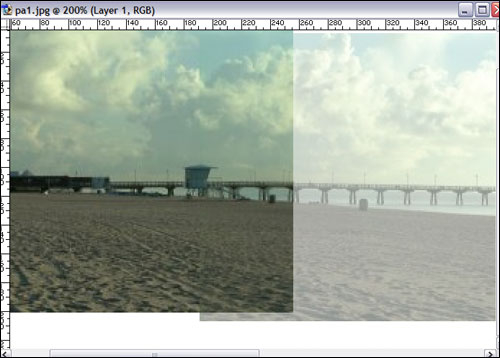
Now open pa2.jpg, select Move tool, and click on the image (anywhere) and hold the mouse, then drag the image over pa1.jpg and release the mouse, you can see pa2.jpg has been added to pa1.jpg, and a new layer (layer 1) has also been created.
With layer 1 selected, change its opacity to 50%. Then using Zoom and Move tool and try to align the two images using the safe-guard house as reference point.
Then go to Edit > Transform > Skew to tilt (using the middle bounding box to your right) the right hand side of pa2.jpg to better align the two images. Apply the transformation when you are done. Then change the opacity back to 100%.
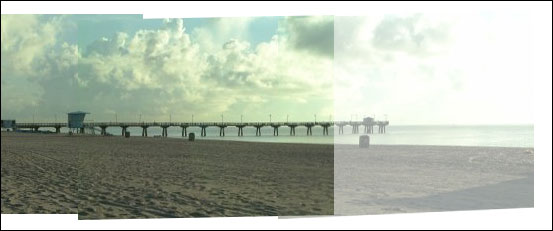
Now Open pa3.jpg and click and drag it to pa1.jpg. Again, change the opacity, and use Zoom and Move tool, and Transform (skew) to align pa3.jpg with the other two. When you are satisfied, change the opacity back to 100%.
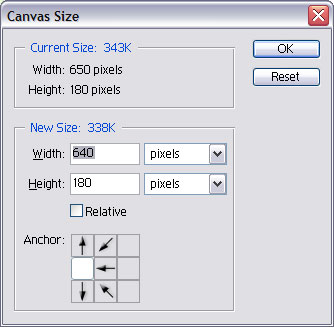
Finally, adjust the canvas size to 640 x 180 (in a sense, you crop the image) and you are done..
Tips for printout (in case you do need to print something out)
- Be sure to keep you images smaller than the dimension of the paper. Besides, usually a printer's maximum printable area is smaller than the size of paper and differs between different printer. So, you'd better to limit your image size to a certain range, say if you want to make a letter-size-printout, the maximum size for your content may be limited within either (8" x 10 1/2") or even a little smaller (7 1/2" x 10").
- To print you file out, first go File > Save to save your file, then go File > Page Setup to choose the Paper Size to letter size, and decide the orientation depending on your page layout. Then go File > Print to print you file out.
- To get information about how to print in the College, go to the web pages: http://www.caup.washington.edu/computing/public/printing.php
- Or you can go to Odegaard Undergraduate Library Copy Center: http://www.lib.washington.edu/about/hours/ouglcopy.html
- Or Mary Gates Hall Computing Resource Center: http://depts.washington.edu/sacg/facilities/labs/hours.shtml#crcto ,print your files out.
Last modified: 4/29/2009 12:15 PM