Tutorial 3.x Geodatabase and GIS Data Management
In
this tutorial, you will learn how to use geodatabase to manage your GIS data.
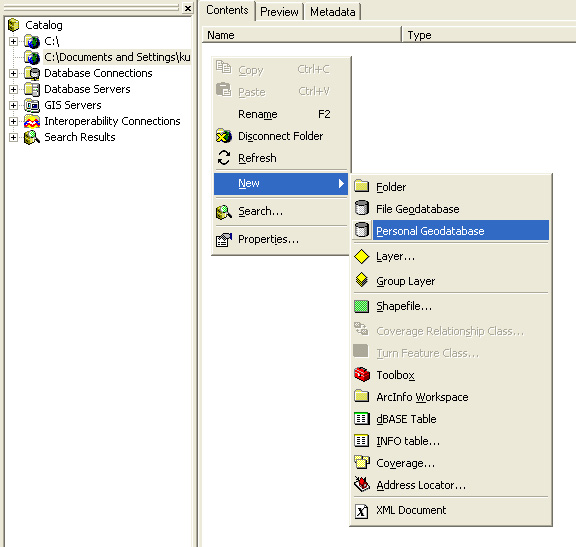
1. In ArcCatalog, use Connect to Folder creating a new link to your desktop (or somewhere else you want to locate your new geodatabase). Then, right-click - New - Personal Geodatabase and name the geodatabase as you like.

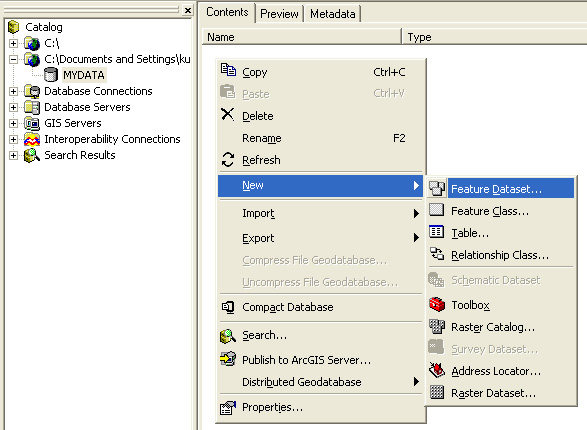
2. Double-click the geodatabase. Right-click - New - Feature Dataset and name the new dataset. The Feature Dataset is usually project-based, while the geodatabase is the collection of all your GIS projects.
 Â
Â
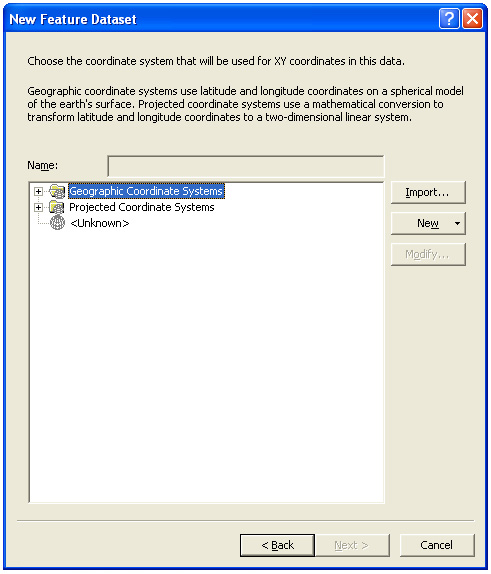
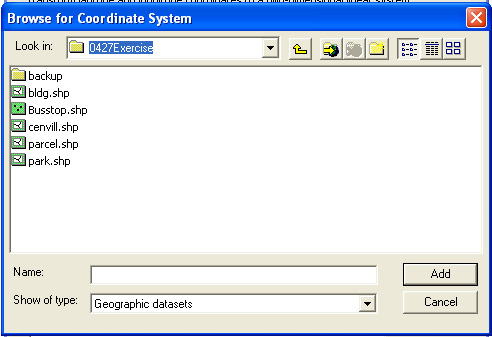
3. Click Next to define the dataset's Geographic Coordinate System. Here you may Import the coordinate system from any Seattle GIS data you have (e.g. parcel, bldg). So, navigate to where you store your GIS data, Add one file in, and keep clicking Next in the subsequent dialog boxes.
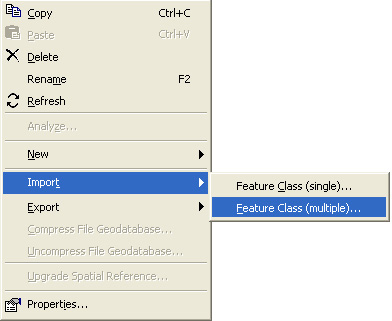
4. Now you can import GIS data into the feature dataset you just set up by Right-clicking the dataset in the catalog tree and Import - Feature Class (multiple).
5. Move the dialog box away from ArcCatalog and then drag
all the data you want to use into the Input Features box of the dialog
box (one by one).
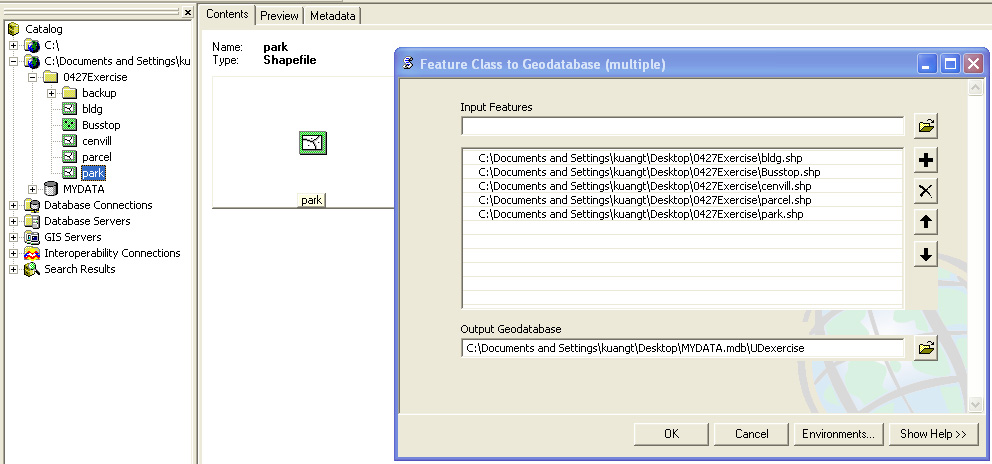
6. Click OK to begin the operation. The process may take
a while. Be patient.
7. Go to ArcMap and begin your GIS work.
Notice: Import all the data from WAGDA to your
geodatabase BEFORE you start working in ArcMap. Then, when you are adding new
data in ArcMap, remember to use the data that is located in your geodatabase
(instead of those you downloaded from WAGDA).
Exporting & Saving Data: Since the geodatabase and
feature dataset are created, whenever you are exporting something to a new
layer or generating new GIS data, you should save them in this project-based
dataset.
New Project: If you need to develop a new project, just
repeat step2-3 to create a new Feature Dataset.
Backup: Files you need to backup include:
1) the ArcMap file you created in ArcMap (the file
extension is mxd); and
2) the geodatabase.
Last modified: 4/29/2009 1:03 PM