Tutorial 5.3 - Case Study
Go to U: drive to get the folder: College_Inn
(or directly download the following zipped file:College_Inn.zip)
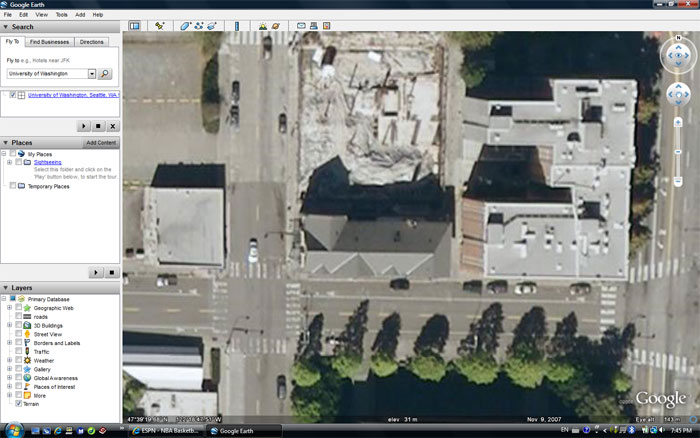
Open Google Earth, In the Search box, type in University of Washington. Click on Begin Search button. Google Earth should then fly to the UW campus. Use the Wheel button and click (left) to zoom in and pan to University Inn. Keep the view straight down, do not change the view angle. No perspective.
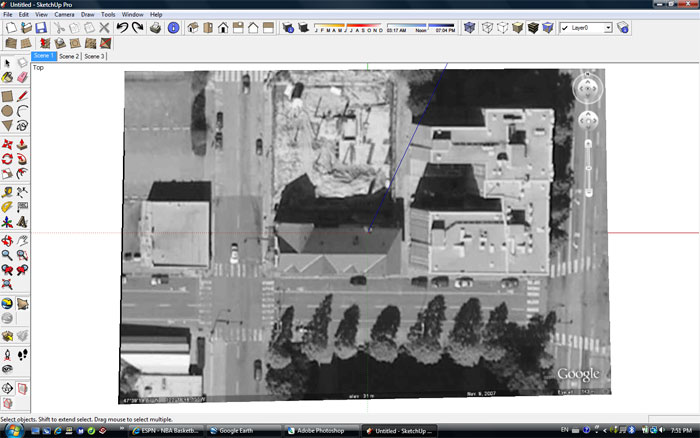
Now, open SketchUp. First thing to do is make sure you have Google Toolbar turned on. Then click on Get Current View button in the toolbar. Give SketchUp a little time to process, then you should see that a 2D flat snapshot is placed in your model.
We are going to building College Inn and we will use ONLY layer 0 to complete the model.
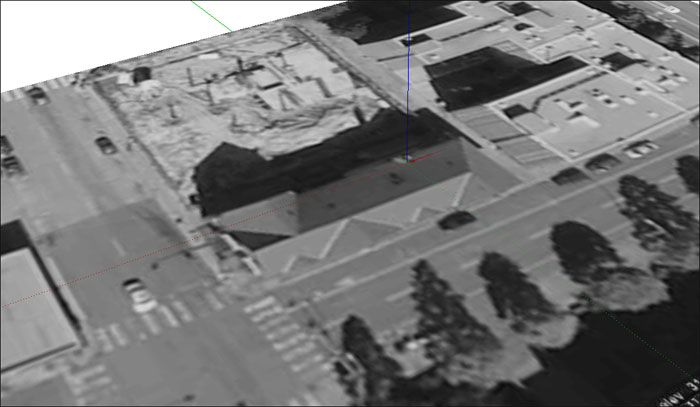
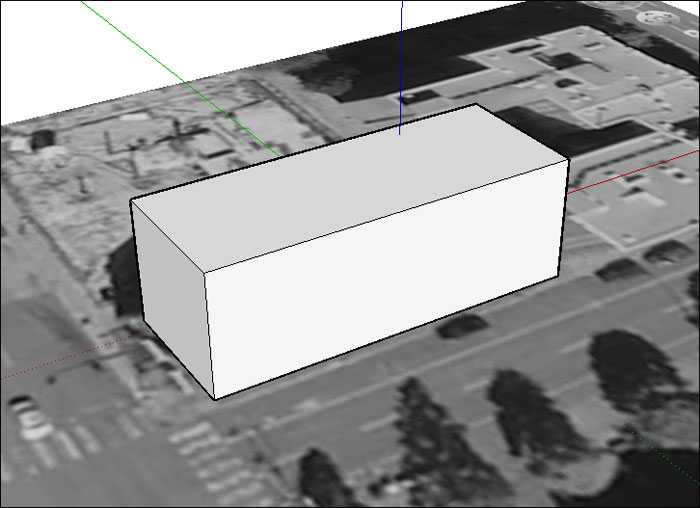
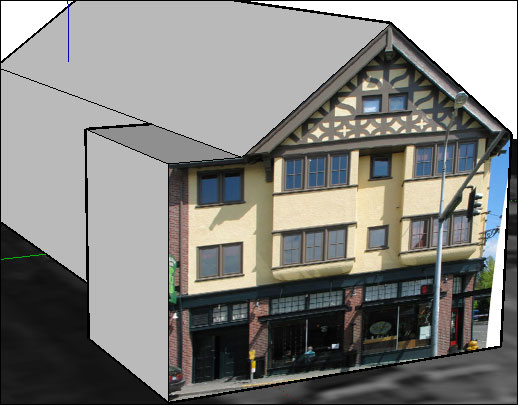
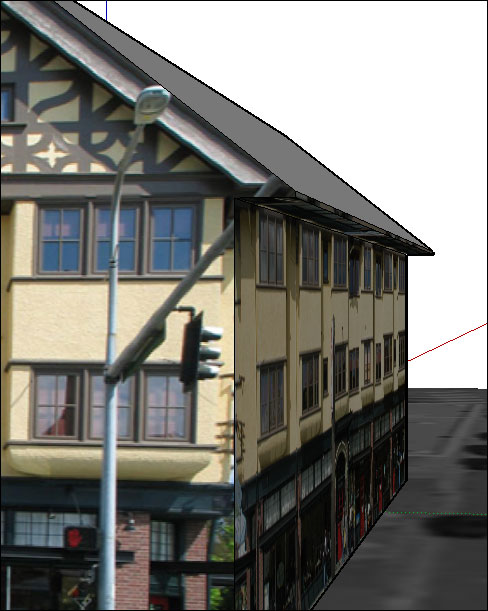
Adjust the view angle as shown in the image below:
Use Rectangle tool to make a rectangle to cover most of the building. (depend on the view angle, the rectangle might not fully be seen, but it is there, no worry)
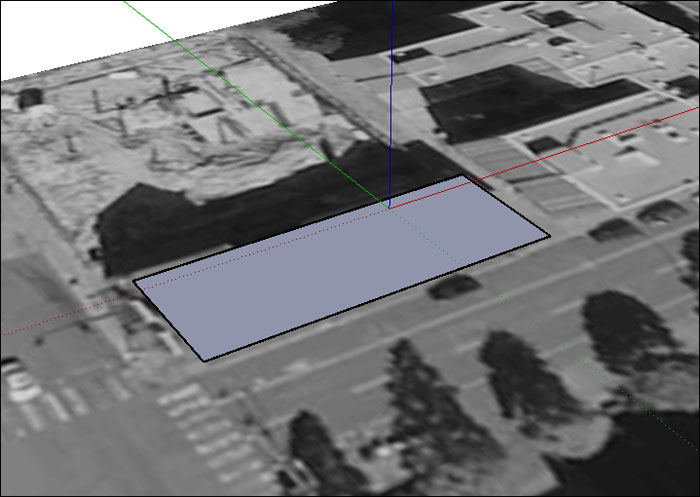
then use Push/Pull to make a 3D box, do not worry about the building height, we will adjust that later.
We will then paste the south-side-facade image onto the south surface of the box, then we can base on the image to adjust the height.
Go to File > Import¡K
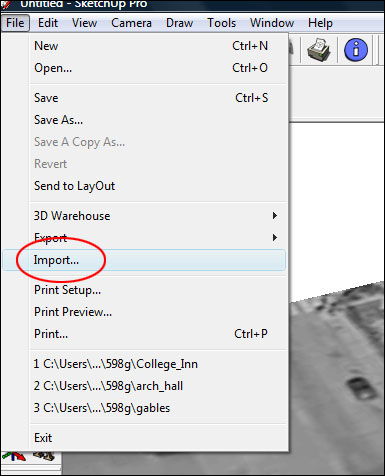
In the dialog window, make sure the Type of File is set to JPEG,
in the Folder, find the image file college_inn_s.jpg, be sure to check Use as texture check-box. Hit Open
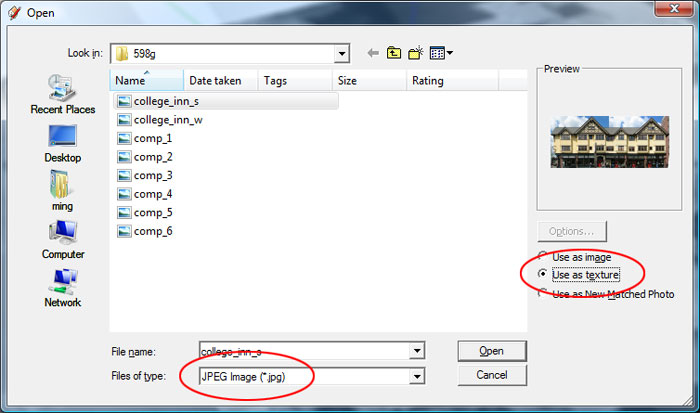
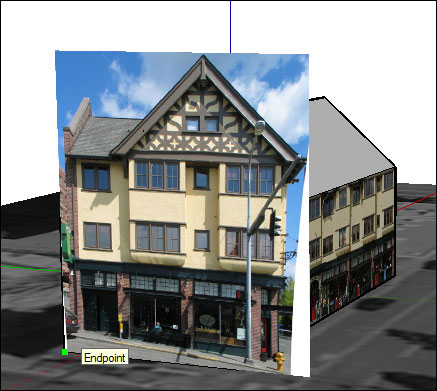
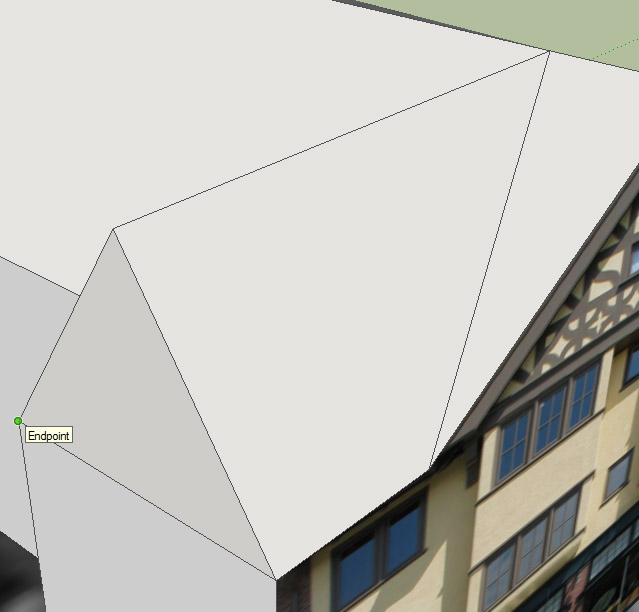
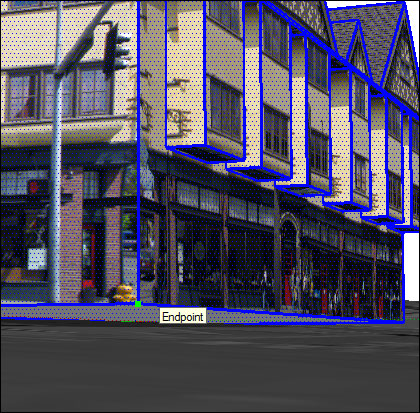
Now you should see a small image is moving along with the cursor. Place the lower-left corner of the image (the cursor) on the lower-left corner of the surface, wait until you see a message says Endpoint, click to locate this corner.
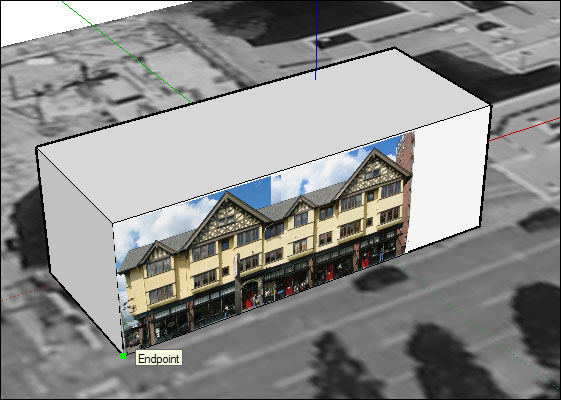
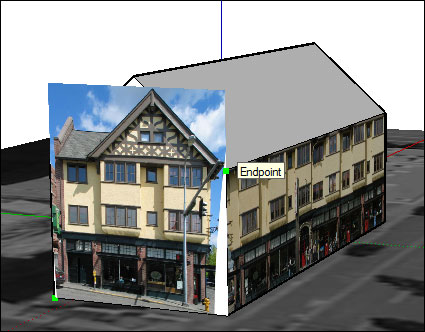
then move the cursor to the up-right corner of the box surface, click to locate this corner.
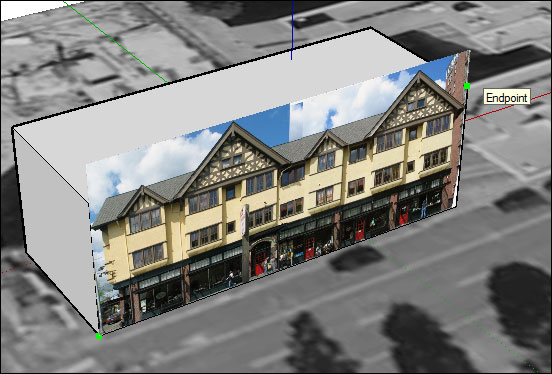
You should now see the image placed on the surface but part of the building is not shown. (depend on how much you pulled in the previous step, your model might look differently).
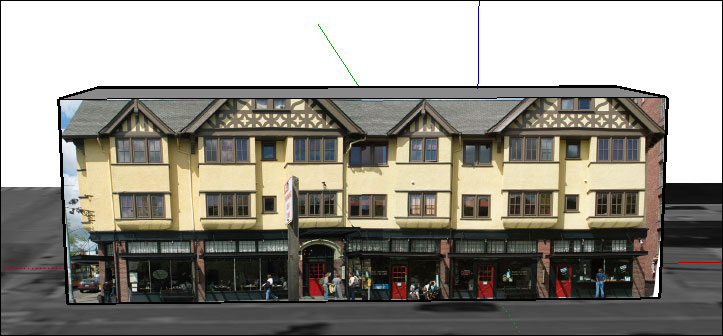
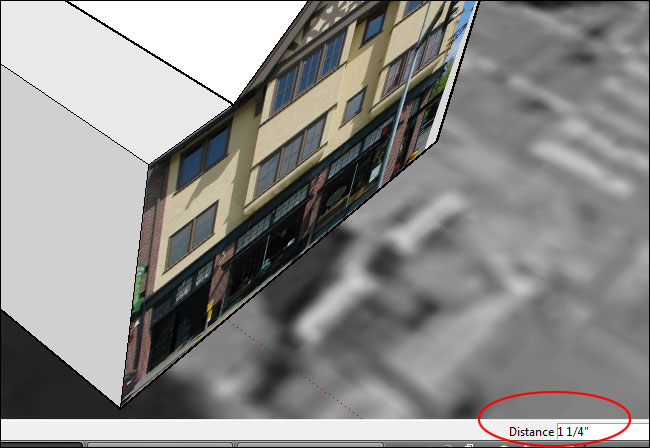
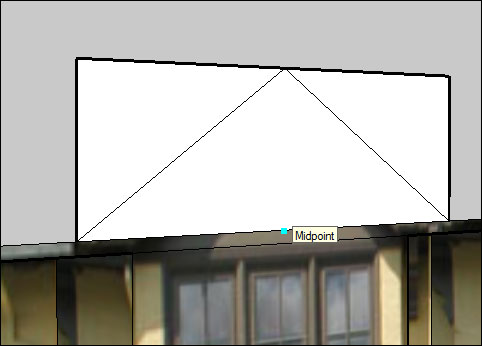
Use Push/Pull to push the top surface down to the edge of the gable bottom as shown in the image below, we will build the gable roof later.
Adjust the view as shown in the image below, use Line tool to draw a center line, from Midpoint to Midpoint.
Use Move/Copy tool to pick the center line,
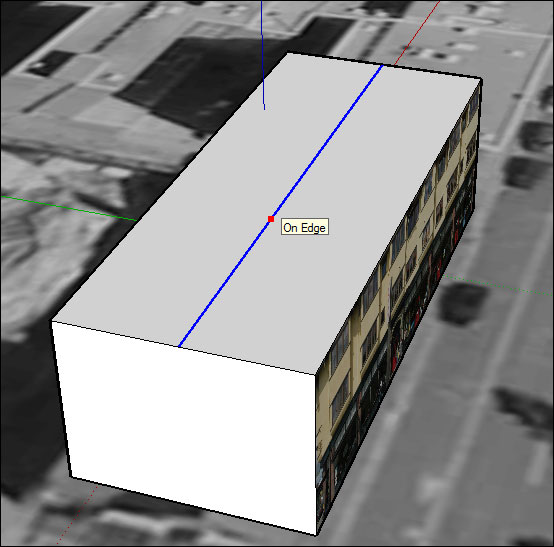
Move the center line straight up, make sure moving is done along the Blue Axis. Do not have to worry about the height of the gable at this point.
Now paste the west-side-facade, again go to File > Import¡K in the dialog choose college_inn_w.jpg, use as texture.
First locate the lower-left corner, then up-right corner
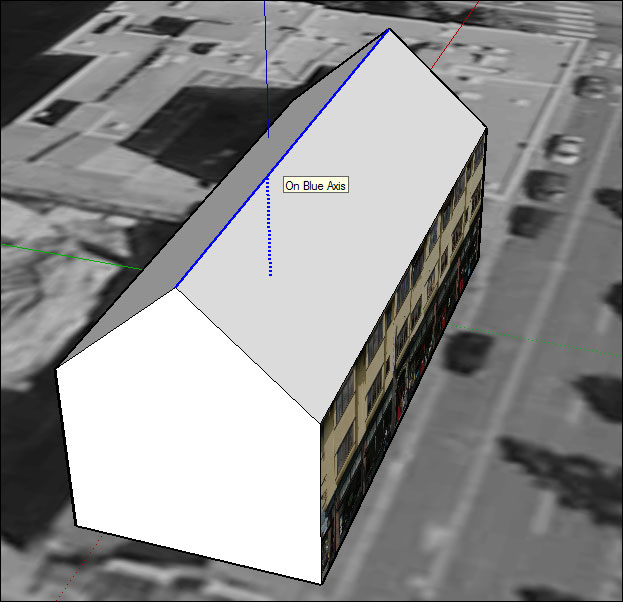
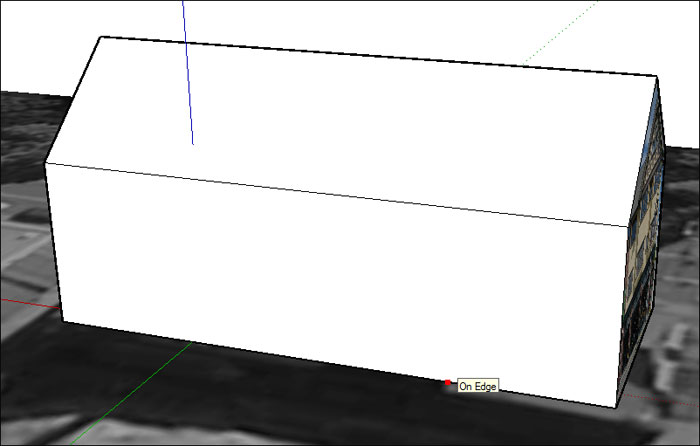
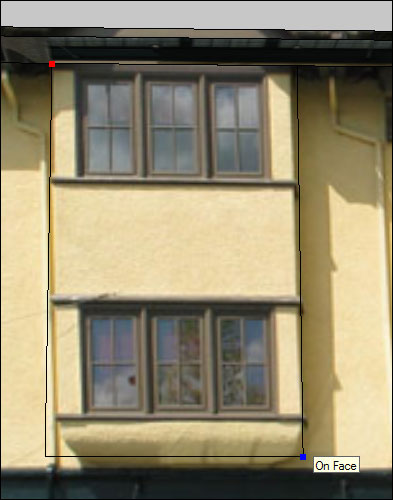
Turn the model around so you can see the north side of the model, as shown in the image below, we are going to make the small addition on the north side of the building. Use Line tool, start from the bottom, make sure you see the message On Edge.
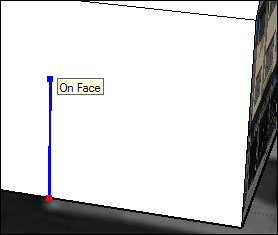
Move the tool up, keep straight up, wait until you see On Face and see the Blue line that indicates you are on Blue Axis.
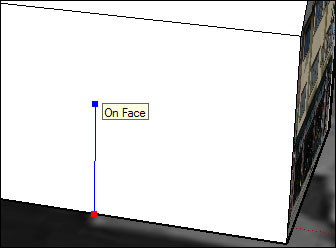
You can lock the direction by pressing the Shift key. And then you should notice that the blue line became thicker.
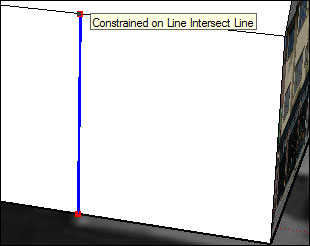
Keep moving up until you reach the top of the surface (you should see a message says you are on intersect line) click to make a line.
Use Push/Pull to pull the addition out.

Now we will re-position the west-side-facade. Adjust the view so you can see the west side of the building
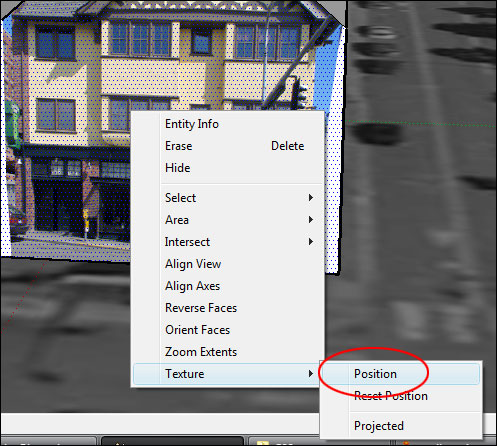
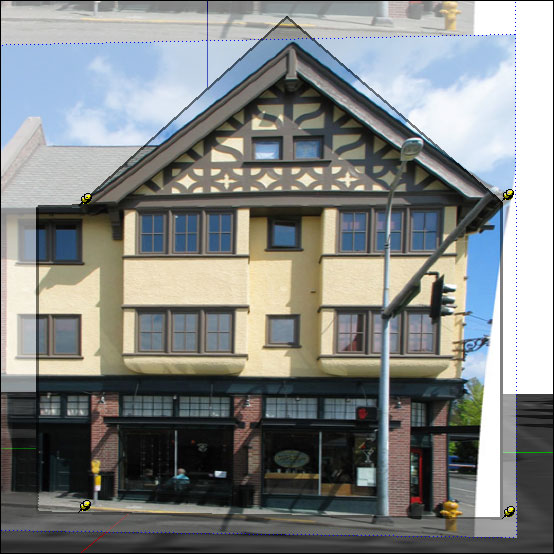
Move the cursor on the west side surface. Right-click and then click Texture, then Position,
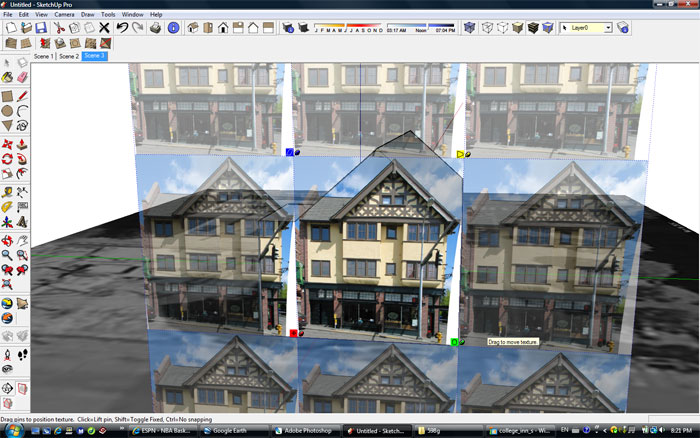
You now should see a number of images (9) piled up together on the screen, and you should see four pins, each with a different color, surrounding one image.
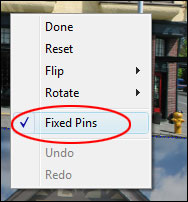
Keep the cursor over the image, Right-click to bring up a menu, in the menu, UNCHECK Fixed Pins, so now we are using Free Pins, you should see that all four pins are with the same color (yellow).

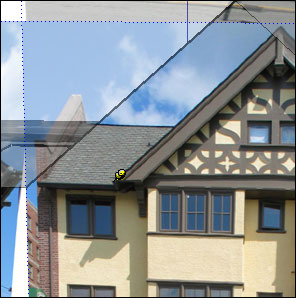
Move the cursor over the pin on the up-left corner, you should see a message says that Drag pin to distort texture, click to lift pin.
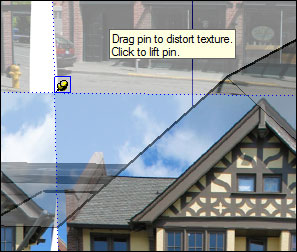
We will first click (click and release) to lift this pin, and move the pin to the location where the bottom-left corner of the gable intersects the vertical building surface. As shown in the image below. Click to locate the pin.
Then click on (click and release) and move the pin on the up-right corner, and place it to the location as shown in the image below, we can move the pin around the location until you see a blue dashed line shows up which helps you align horizontally this pin with the previous one.
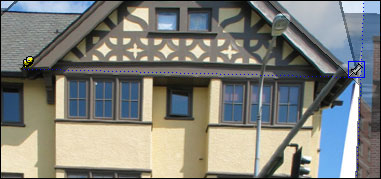
Then move the pin on the bottom-right corner, again pay attention to the blue dashed line
Then move the pin on the bottom-left corner
So now you have repositioned all four pins, and you can now drag them (click and hold the mouse) to stretch the image to make it fit into the building facade. To finalize this texture repositioning, right-click again and select Done from the menu to finish the positioning.
OK, now you have re-positioned the texture for this side of the building. But the gable still not look right. Turn the model around so you can see the ridge of the gable. Use the Select tool to pick the ridge line. Then use Move/Copy tool to move the ridge line to match what is shown on the texture image.
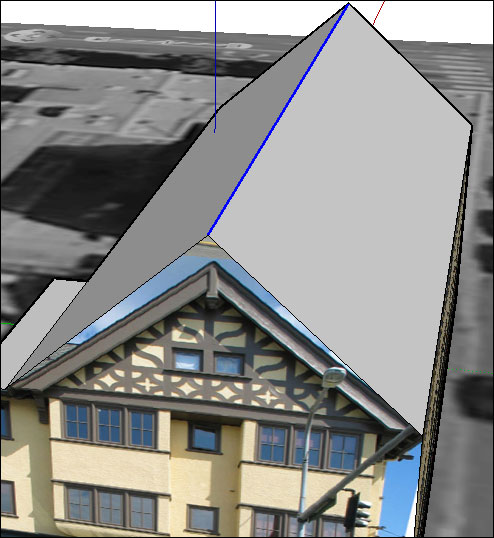
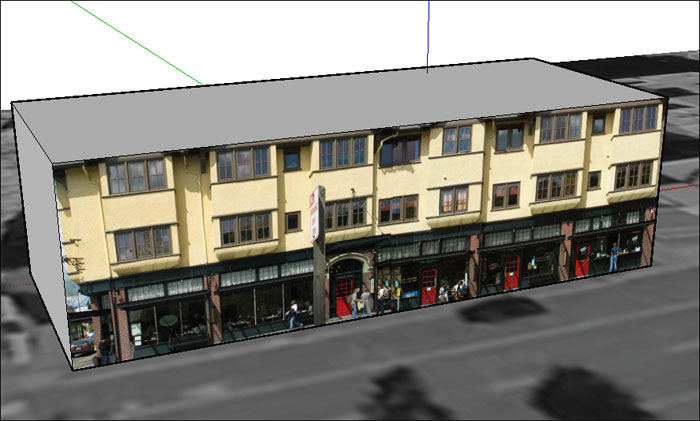
Below is what you are supposed to get.
Part of the addition is still not shown, turn your model around so you can see the north side of the building, then use Push/Pull to pull the north side of the addition out to match the image.
Now we will deal with the gable roof top on top of the addition. Use Push/Pull and pull up the top face of the addition, you only need to pull this face up a little, you can pay attention to the Value Control Box. Just a few inches up.
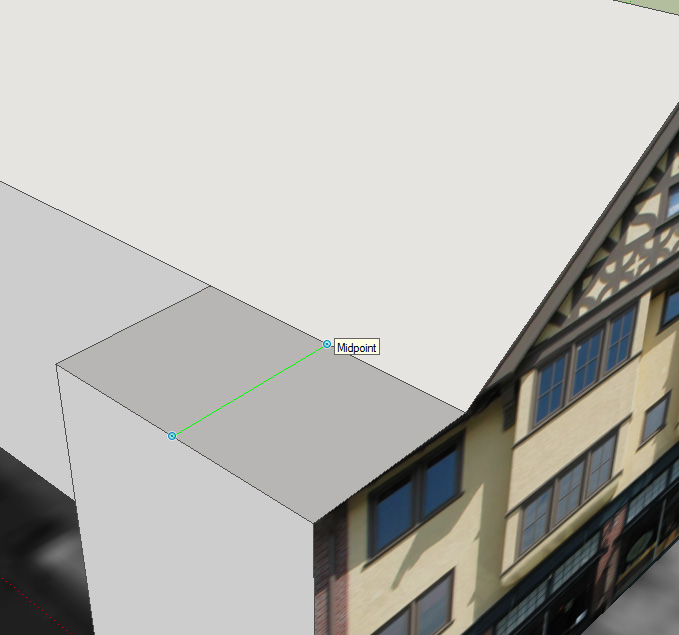
Then use Line tool to draw a center line on the top face of the addition, make sure to draw from Midpoint to Midpoint.
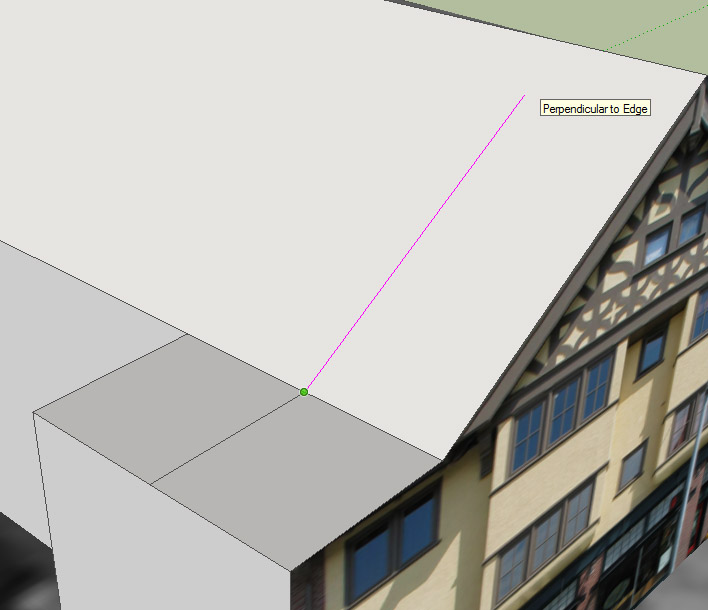
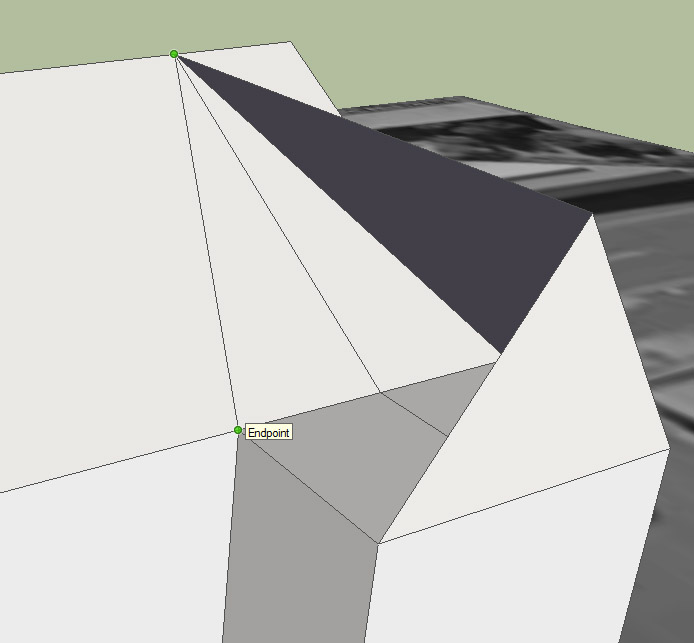
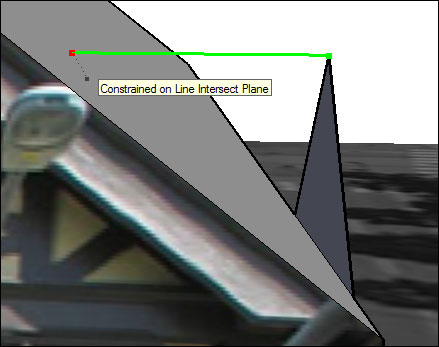
Now, continue to draw Line from the Endpoint to the point On Edge of the main gable roof top. Make sure the line should follow Perpenticular to Ege, which the Pink line appears.
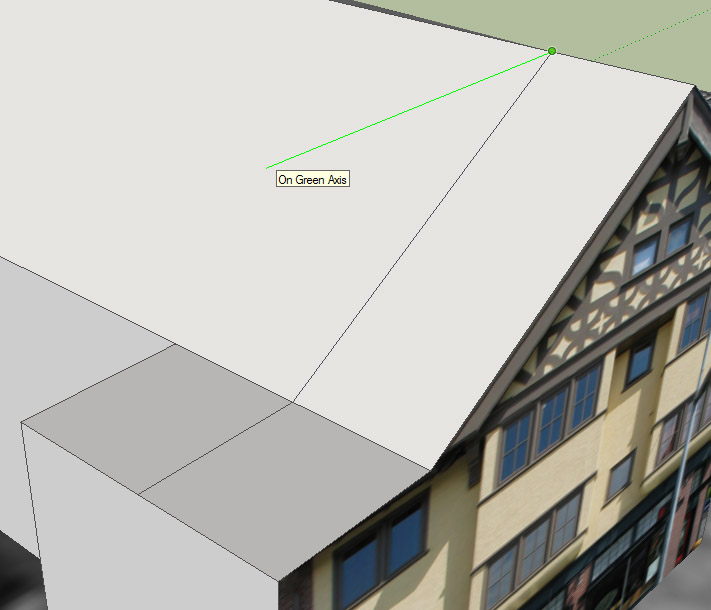
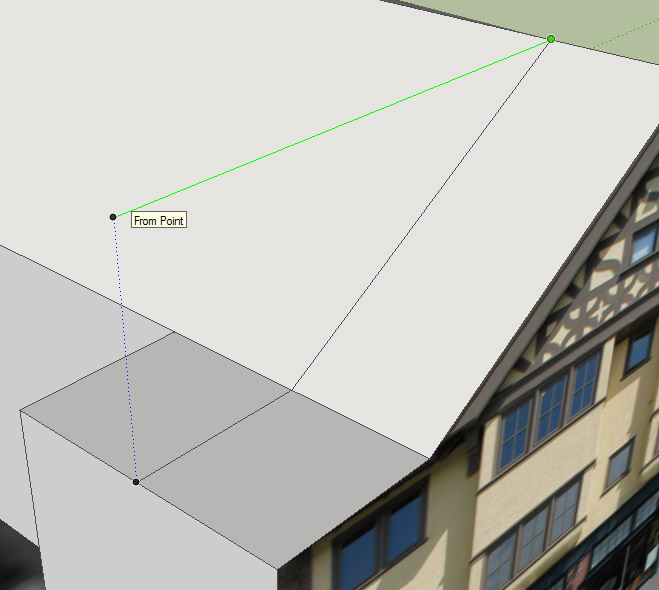
Next, we should continue drawing the Line that connect the main gable roof top to the gable we are going to create. When drawing the line, make sure it is On Green Axis. Click for the point when you see From Point and the blue line (blue axis).
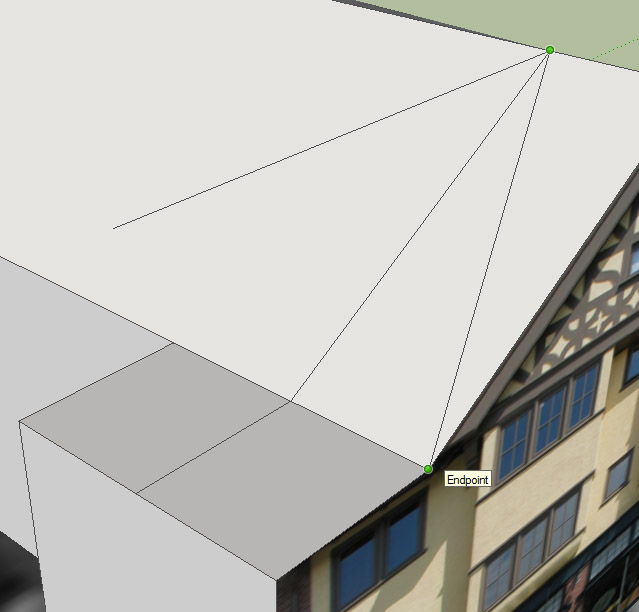
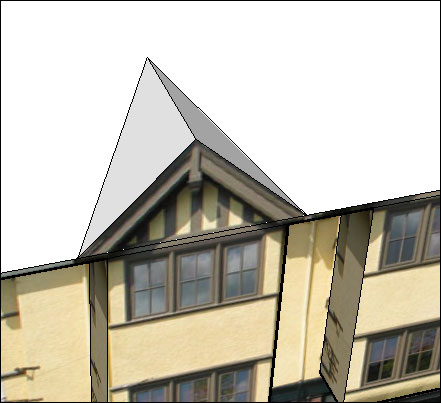
Now, we are ready to draw the edge of the small gable. Draw the Line from Endpoint to Endpoint.
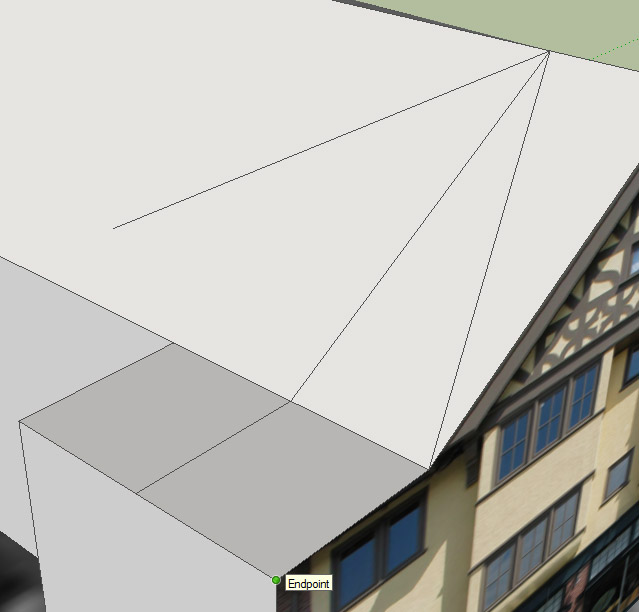
Continue the line to the Endpoint of addition part, and back to the Endpoint of the roof top edge

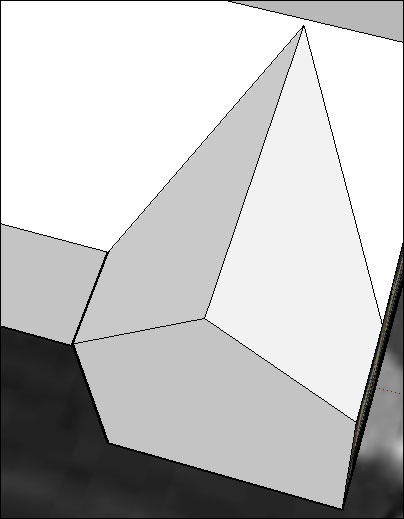
You should now finished half surface of the gable.
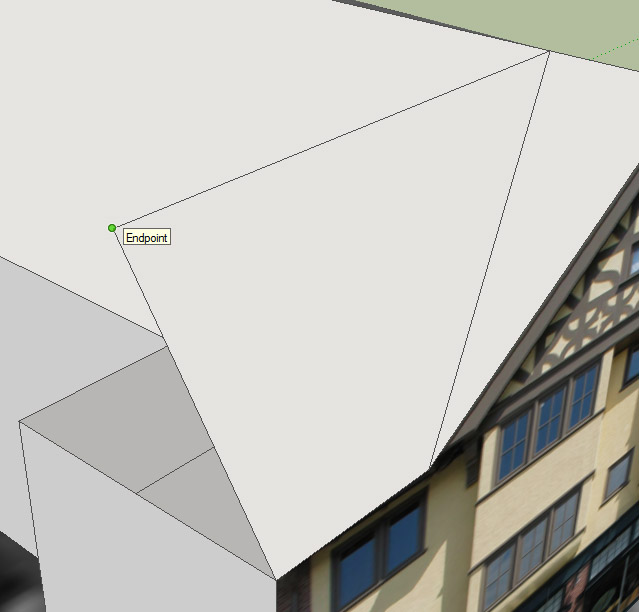
Finish the other side of the gable by drawing Line from Endpoint to the Endpoint.
You can use Eraser to clean the two unnecessary lines. And now we have completed this gable.
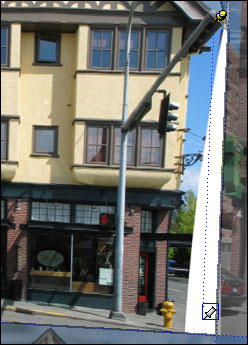
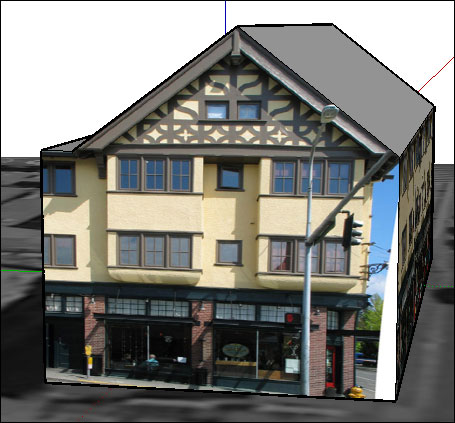
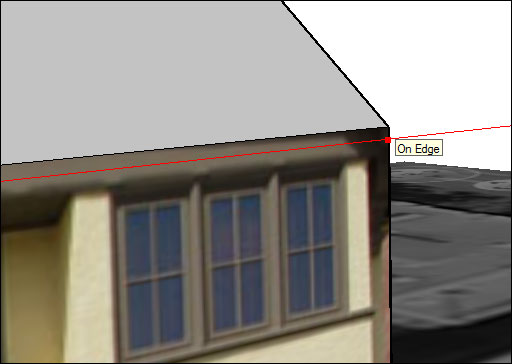
Now let¡¦s fix the south facade. Turn the model around and zoom in to the corner as shown below. Use Line tool, we are going to draw a line just below the bottom of the main gable, Make sure you are on Eage as shown below.
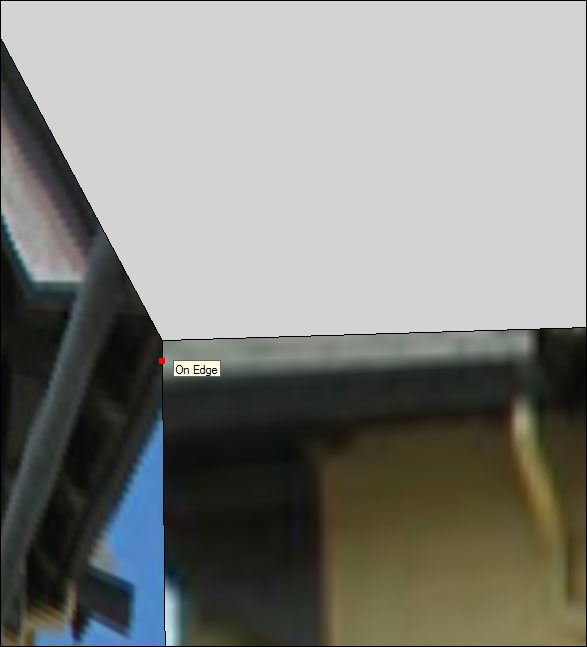
Then move to the other side of the south facade, and lock your direction to red axis. Locate the other end of the line and click to finish drawing this line.
This line actually divide the south facade (the vertical part) into two parts, so now we can use Push/Pull to push the bottom part of the facade in.
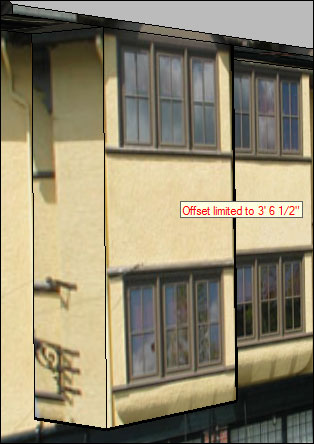
Let¡¦s work on the bay windows on this side of the building. Turn and zoom in to one of the bay window, so you can see the upper end of the window. Use Rectangle tool to draw a rectangle, make sure it cover the window well.
Use Push/Pull to pull the bay window out, pull it out and make it match the edge of the gable,
Repeat the same process for other windows.

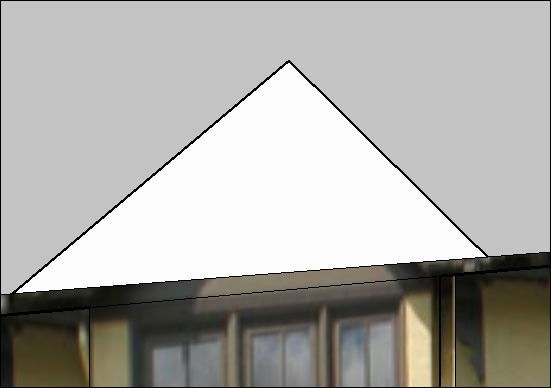
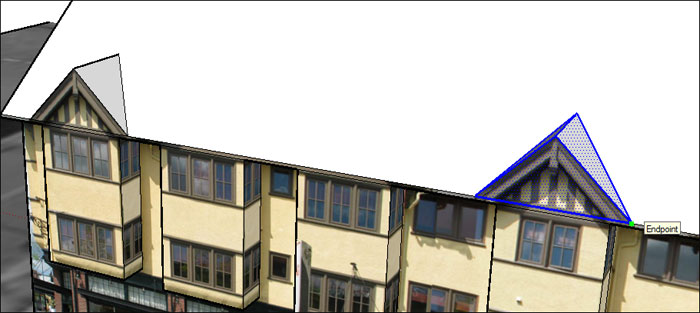
Let¡¦s now work on the dormers on top of the main gable to the south side of the building. Zoom in to the top of the bay window on the left hand side of the south facade. Use Rectangle tool to draw a vertical rectangle just above the window (along the edge), then use Line tool to draw two lines to form a triangle. (two lines join at the Midpoint of the top line).
Use Eraser to remove the unnecessary parts, we only need the triangle.
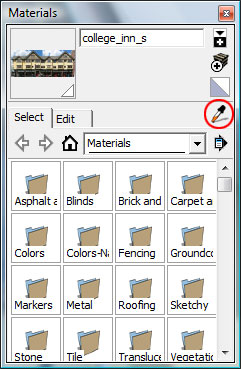
We will now apply the texture to this triangle, open Paint Bucket tool, in the window, select Sample Paint tool (the eyedrop). Then move the cursor over the bay window and click to sample the texture. You should see a small image of the texture shown in the dialog window.
Now you can apply the texture to the triangle.
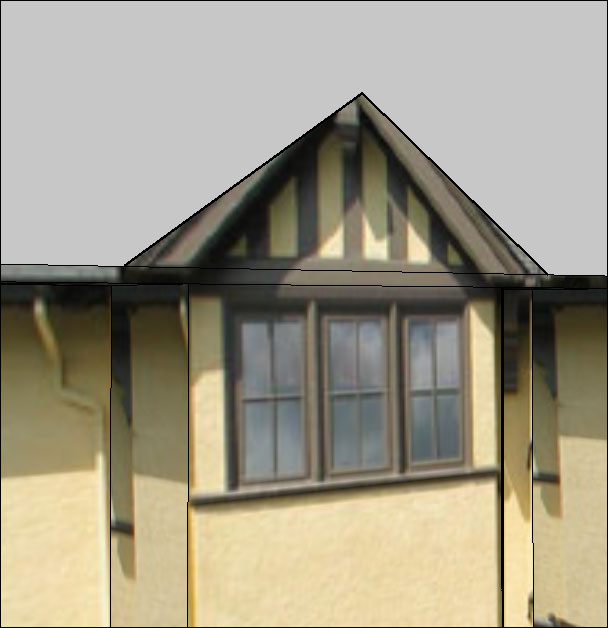
Use Move/Copy tool to pick the top point of the triangle (you may need to move also the two bottom corners) to make the triangle match the texture.

Now let¡¦s complete the dormer by adding a few lines to give it the form. Use Line tool to draw the ridge line and two lines along the main gable
We have another dormer exactly like this to build, instead of repeating the process, we can just make a copy and then paste to the next location.
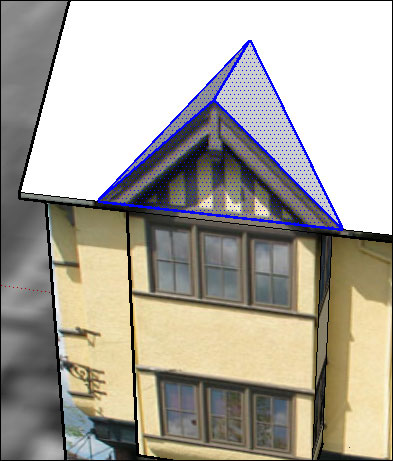
Use Select tool, double-click to select one triangle face in the dormer, then press Ctrl key to add selection, again, double-click on the rest of two triangle faces to select the entire dormer.
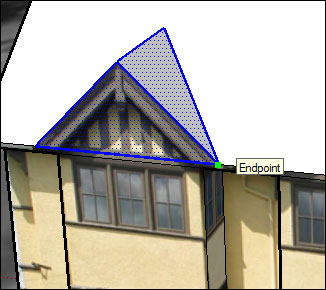
Use Move/Copy tool, first place your cursor to the bottom right corner of the dormer. And click to locate the reference point.
Then Press the Ctrl key to toggle copy. Now you can move the copy to the next location and click to place the dormer. (be sure to press Ctrl before you move the mouse)
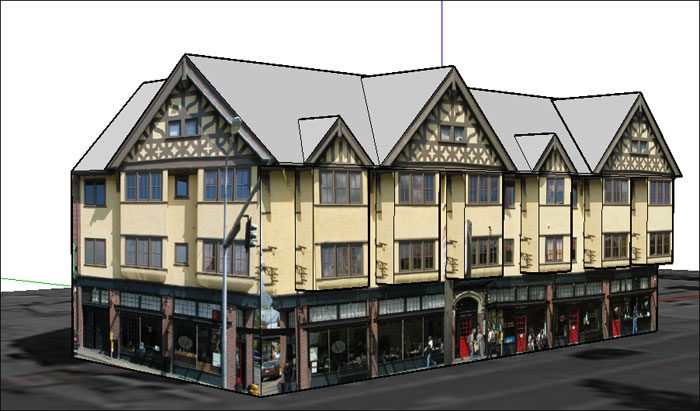
Repeat the process to make the two bigger dormers.
Now let¡¦s apply texture for the roofs. Open Paint Bucket tool again, in the drop-down menu, select Roofing,
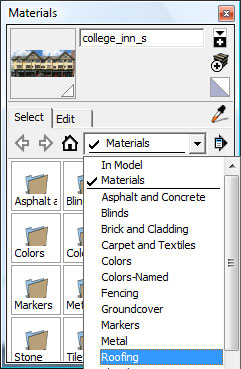
then select the one shown in the image below (roofing_shingles_asphalt)

and then apply this texture to all the roofs.
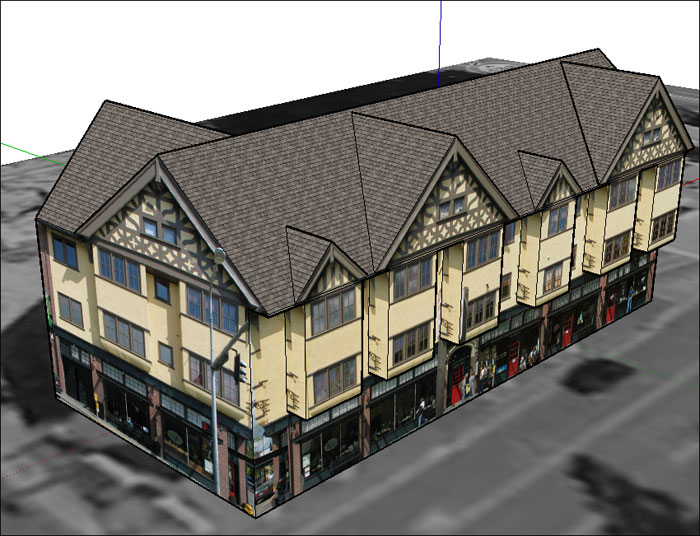
Now, you have your College Inn built up. SO we can move on to bring this building back to Google Earth. But before that, let¡¦s check to see if the building is situated correctly on the terrain. Click Toggle Terrain in the Google Toolbar to bring the terrain up. And then you should discover that the whole building is kind of floating on top of the terrain.
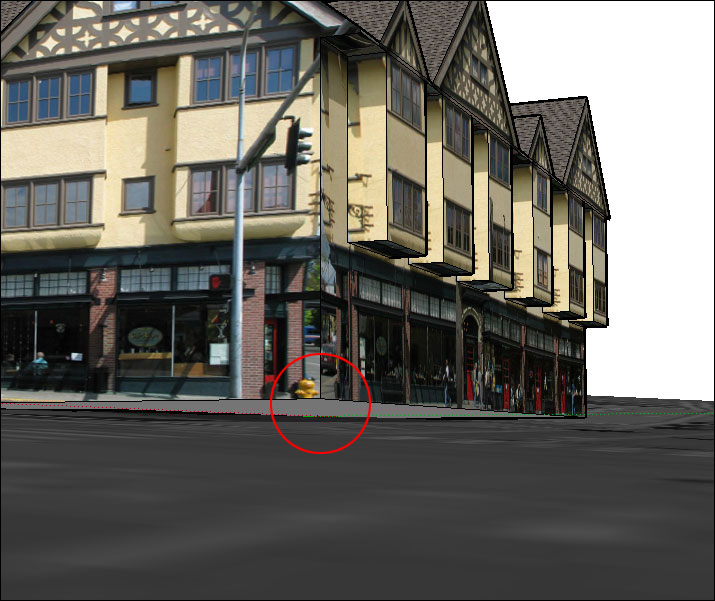
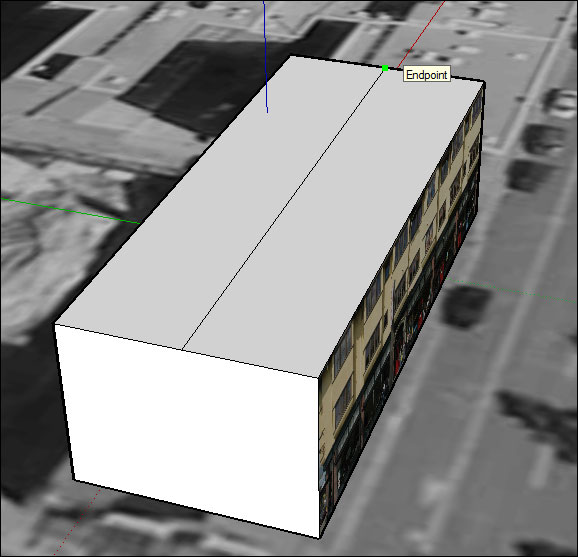
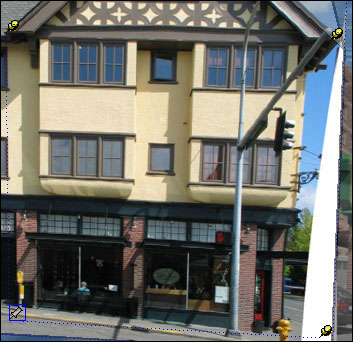
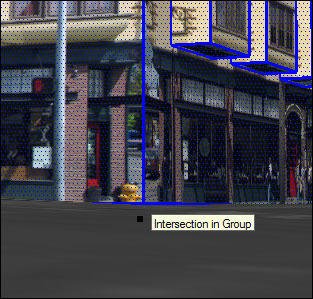
Let bring the whole building down, use Select tool and triple-click to select the entire building. And use Move/Copy tool, place the cursor over the bottom corner as shown in the image below, click to locate the reference point,
then move straight down until you hot the Intersect Point on the terrain, click to finish moving.
Now you can go ahead to place you building back into Google Earth, just hit the Place Model button in the Google Toolbar.
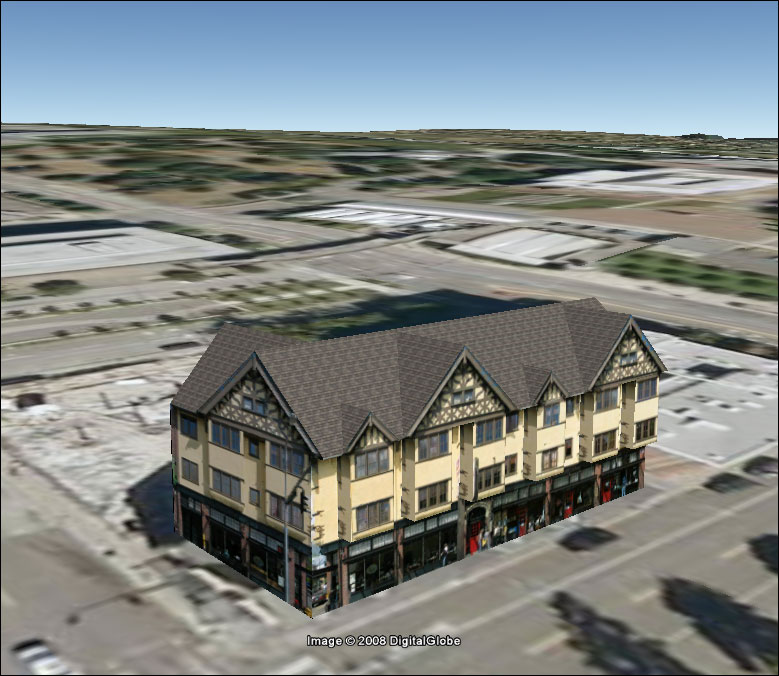
Congratulations, you have completed this tutorial.
Last modified: 4/29/2009 12:31 PM