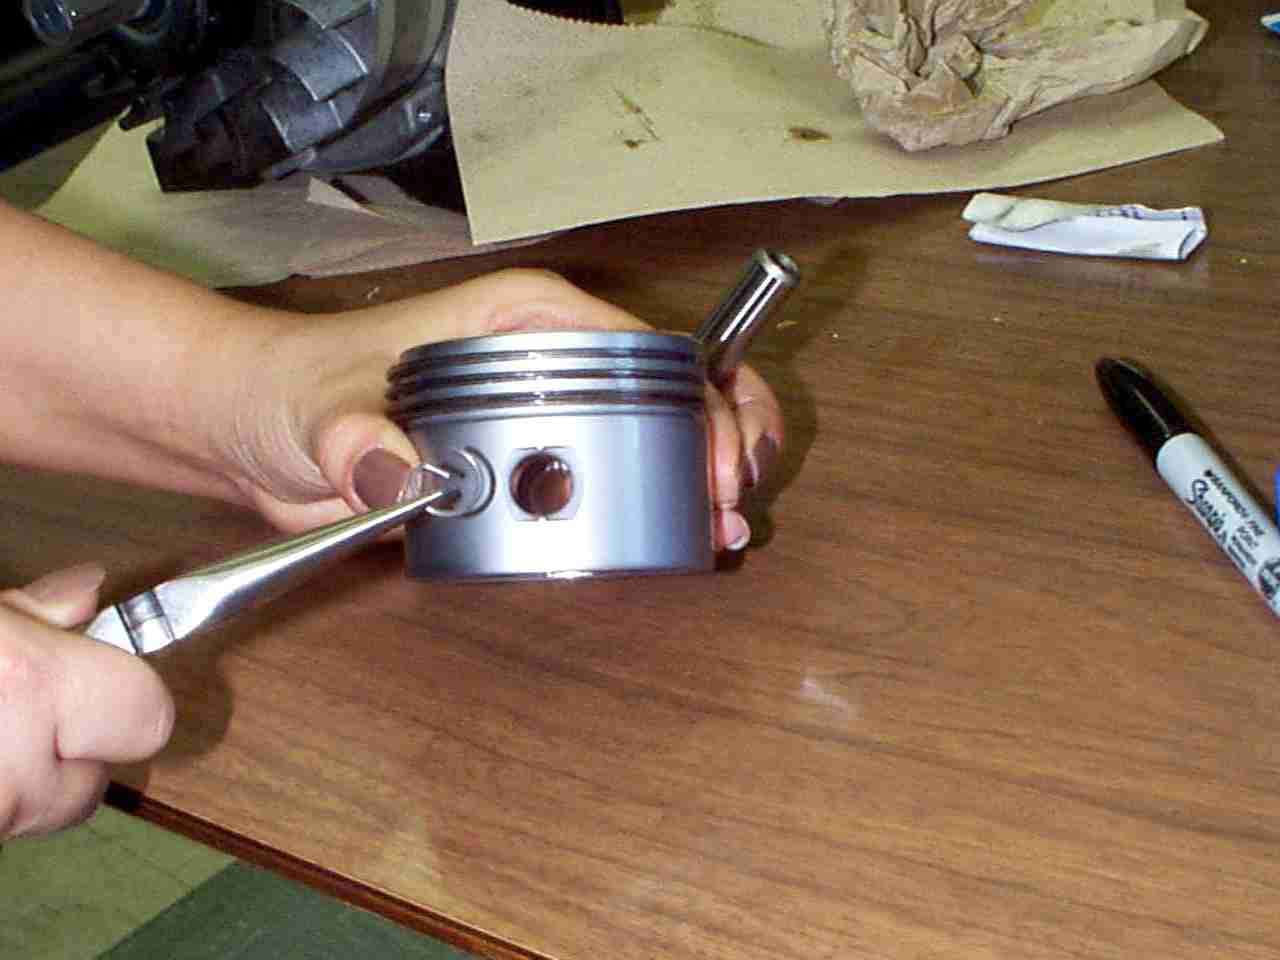
Reassemble the Piston and Connecting Rod by
sliding the Piston Pin back into place in the Piston.
If necessary use the wooden dowel and mallet to tap the Piston
Pin back into place. Ensure the letters that were
previously marked on the Connecting Rod are
matched and aligned with the letters on the bottom side
of the Piston as shown.
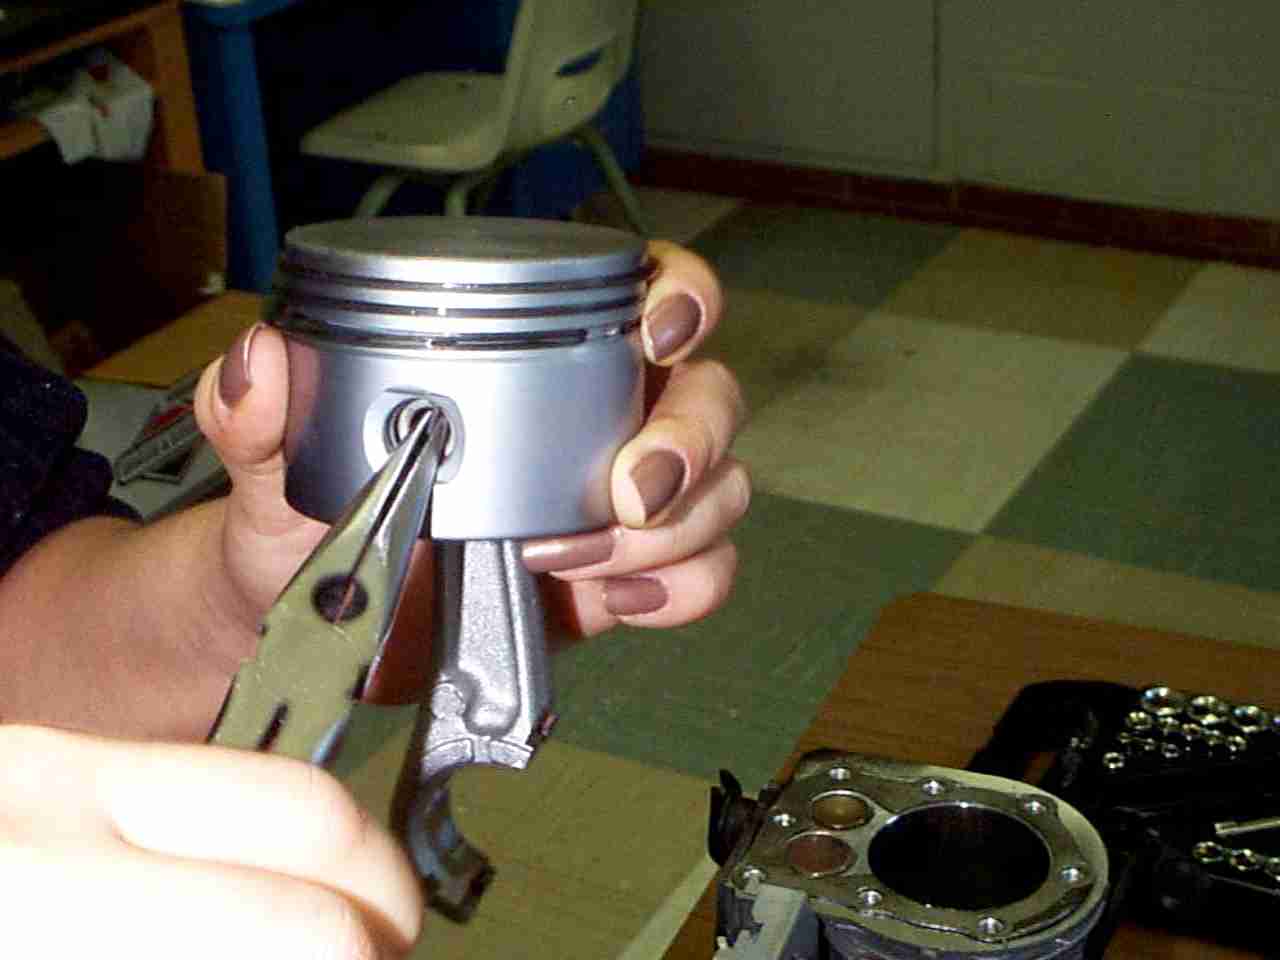
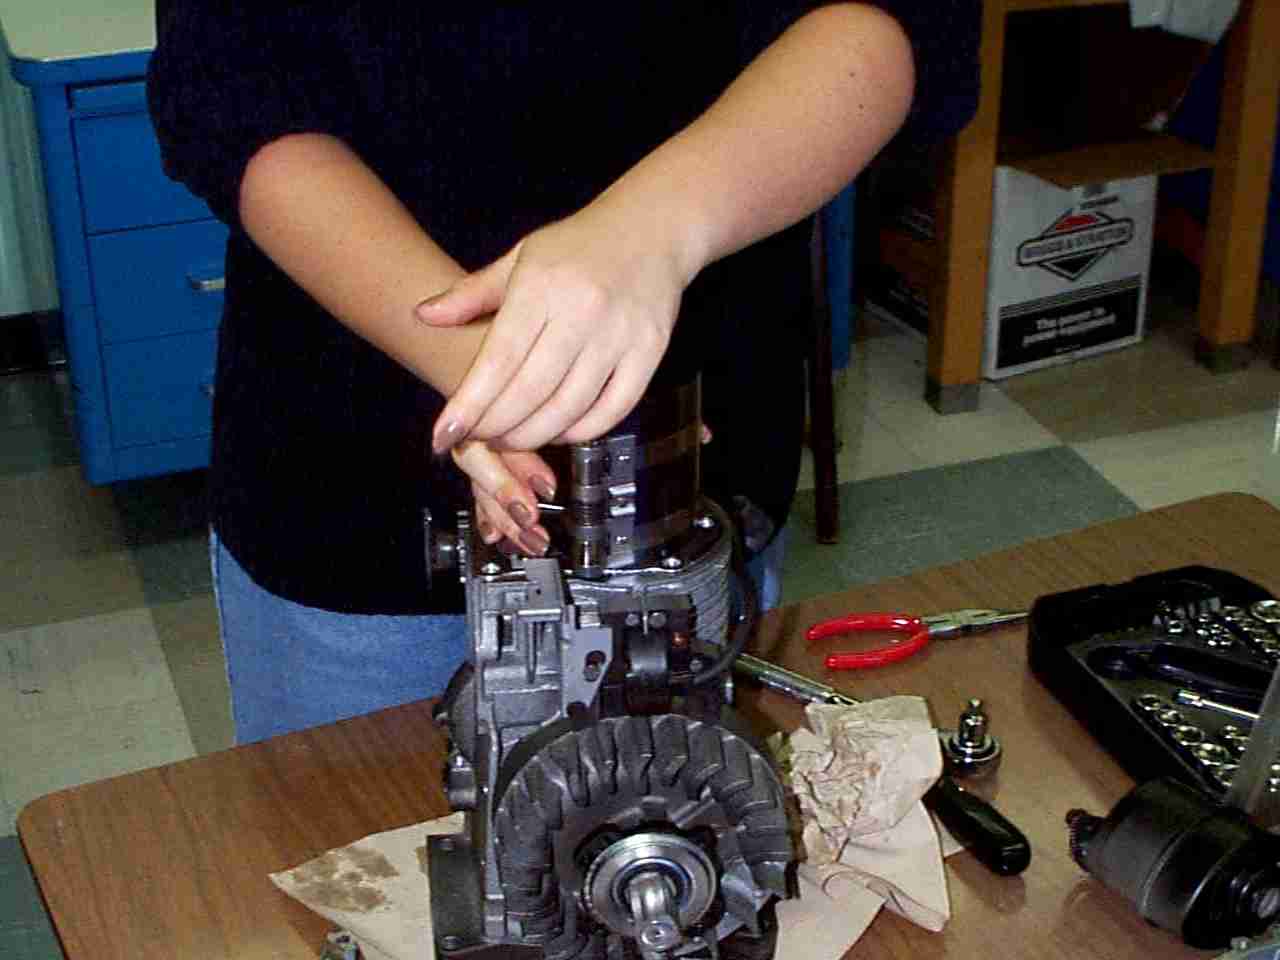
Replace the Piston Spring Clip into the piston as
shown, use the needle nose pliers for this operation.
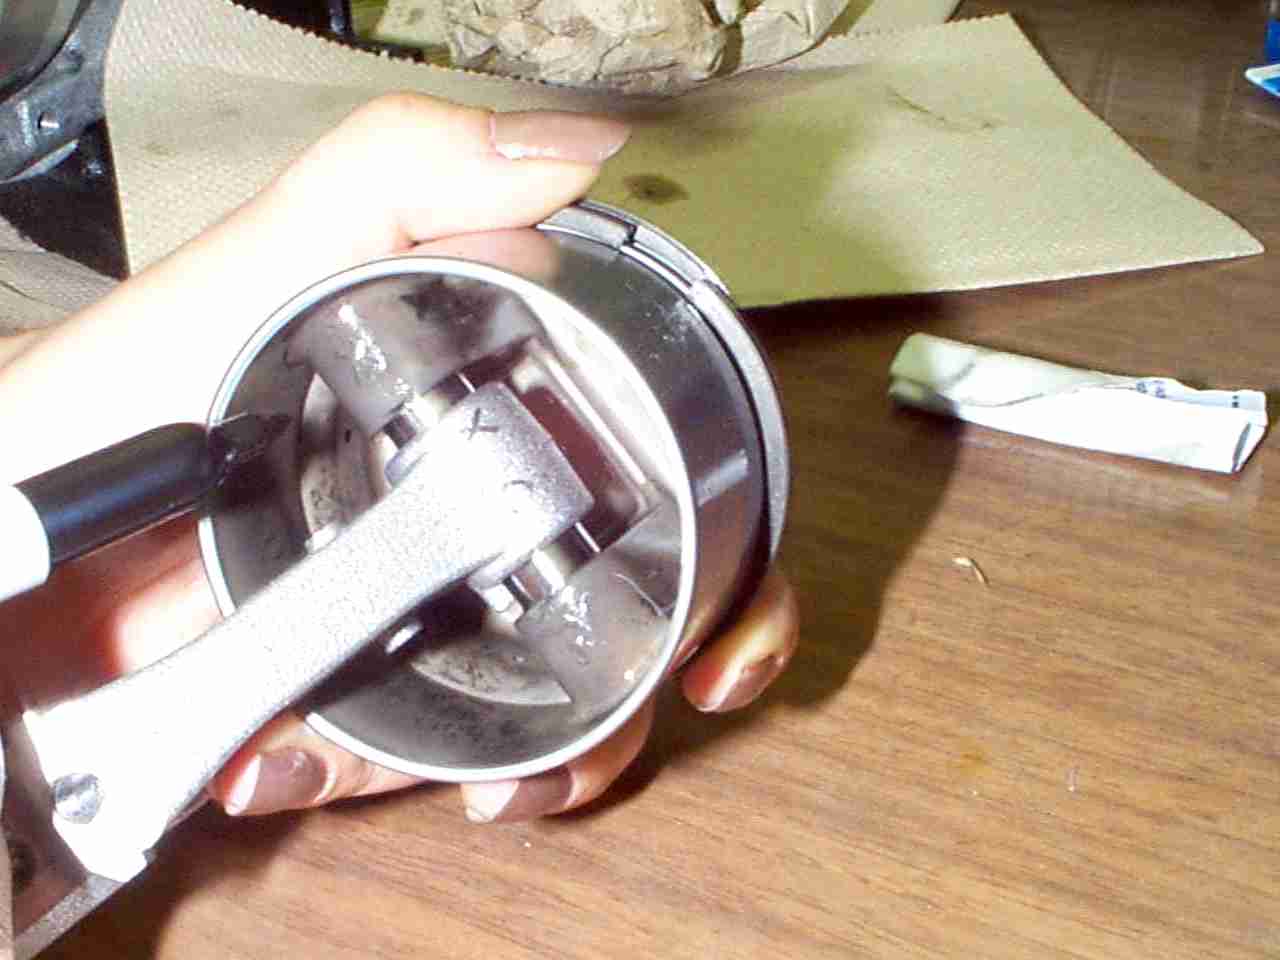
Please ask the instructor for help at this point, as the ENGR 100 Ring
Compressor is different. To insert the Piston and Connecting Rod Assembly back
into the Cylinder Block it will be necessary to
use the piston ring compressor. Adjust the piston ring
compressor to a slightly larger diameter than the Piston
and Compression Rings. To do this, hold the spring
lever down, while turning the adjustment lever
counter-clockwise, when the desired size is reached
release the spring lever. Be sure to lubricate the
compression and the cylinder bore with a small amount of
engine oil before attempting to push the piston into the
cylinder.
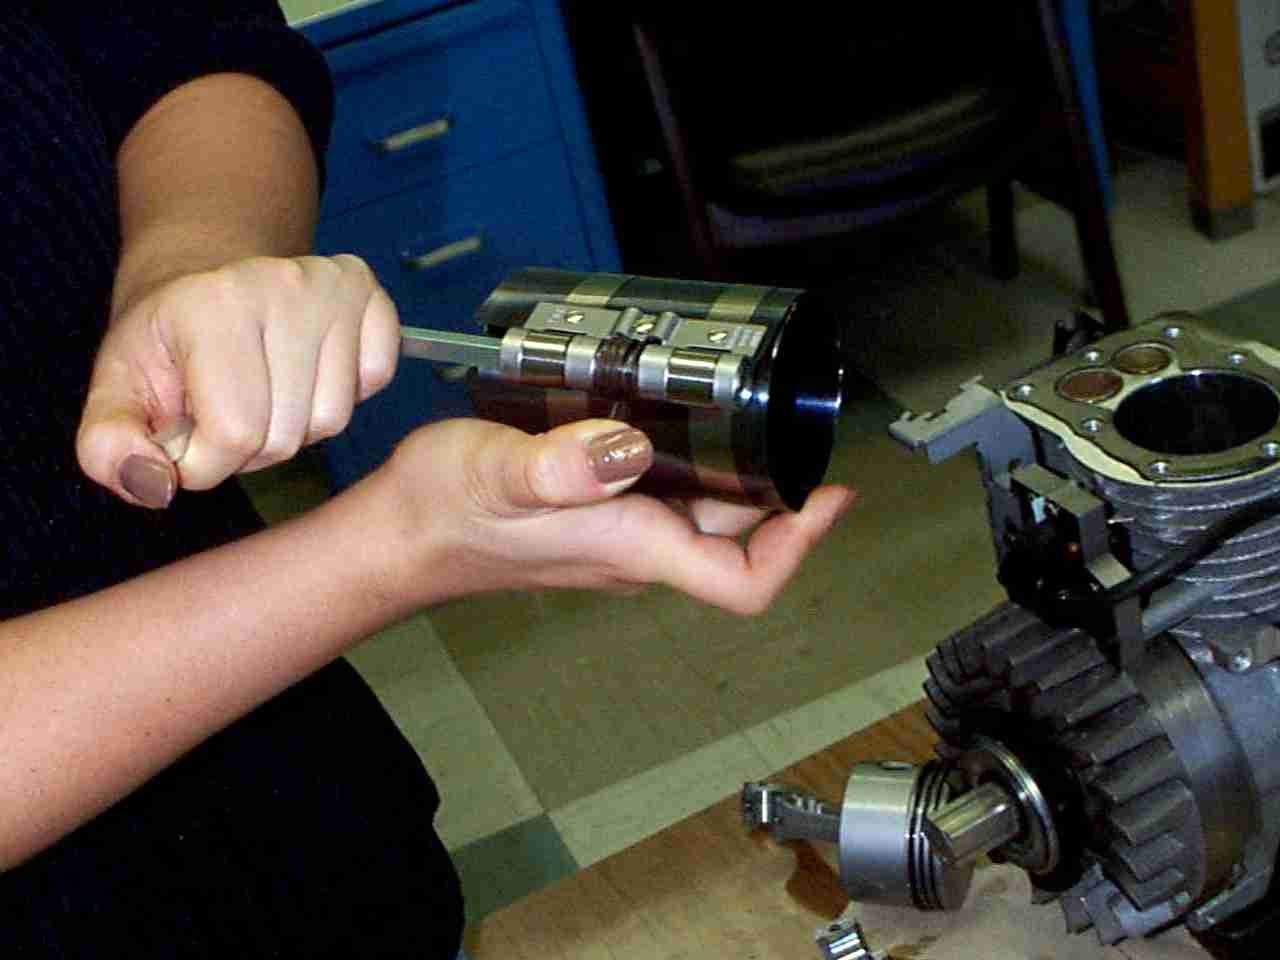
Remove the Cylinder Head Gasket if it has not
already been removed.
Place the piston ring compressor flat onto the Cylinder
Block, then slide the Piston and Connecting
Rod assembly through the tool. Allow the Piston
to rest on the Cylinder Block, then tighten the
piston ring compressor by turning the lever in a
clockwise direction until it is snug around all sides of
the piston. The PistonCompression Rings
should now be fully compressed. DO NOT drive
the piston down into the cylinder bore with the mallet.
The goal is to gently push it down while not allowing the
big end of the connecting rod to strike the crank
journal.
Turn the piston ring compressor and Piston until
the big end of the Connecting Rod is properly
aligned with the Crankshaft. This will prevent
damaging or jamming the Connecting Rod when the
piston is pushed inside the Cylinder Block.
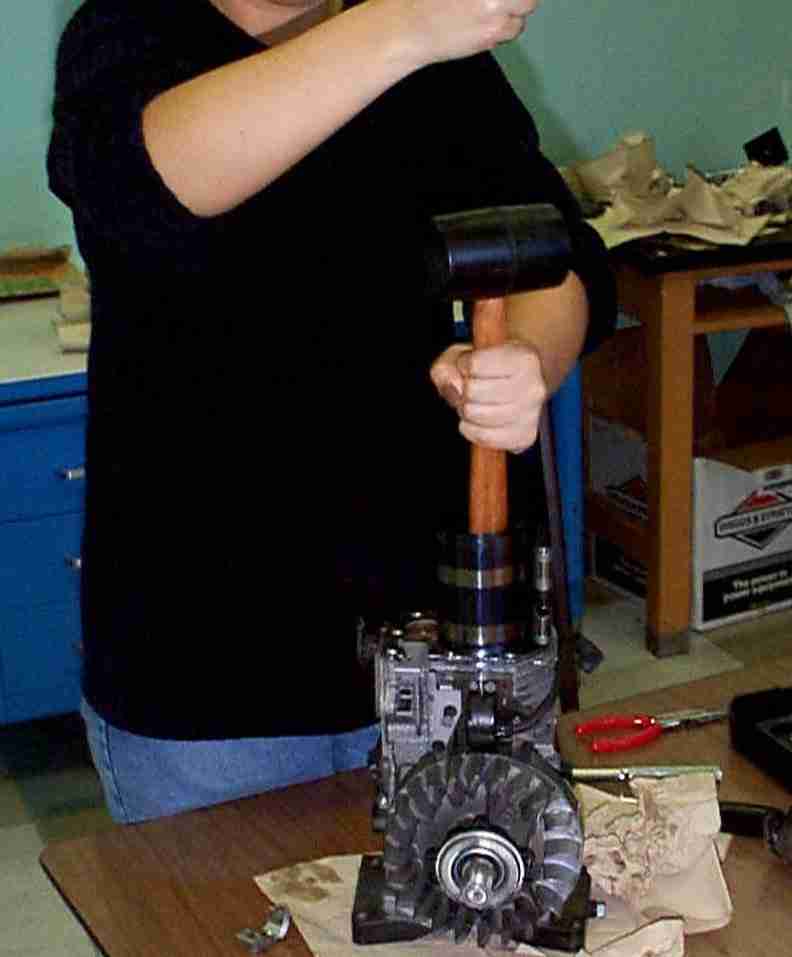
Using the end of the mallet push the Piston
through the piston ring compressor and into the Cylinder
Block as shown.
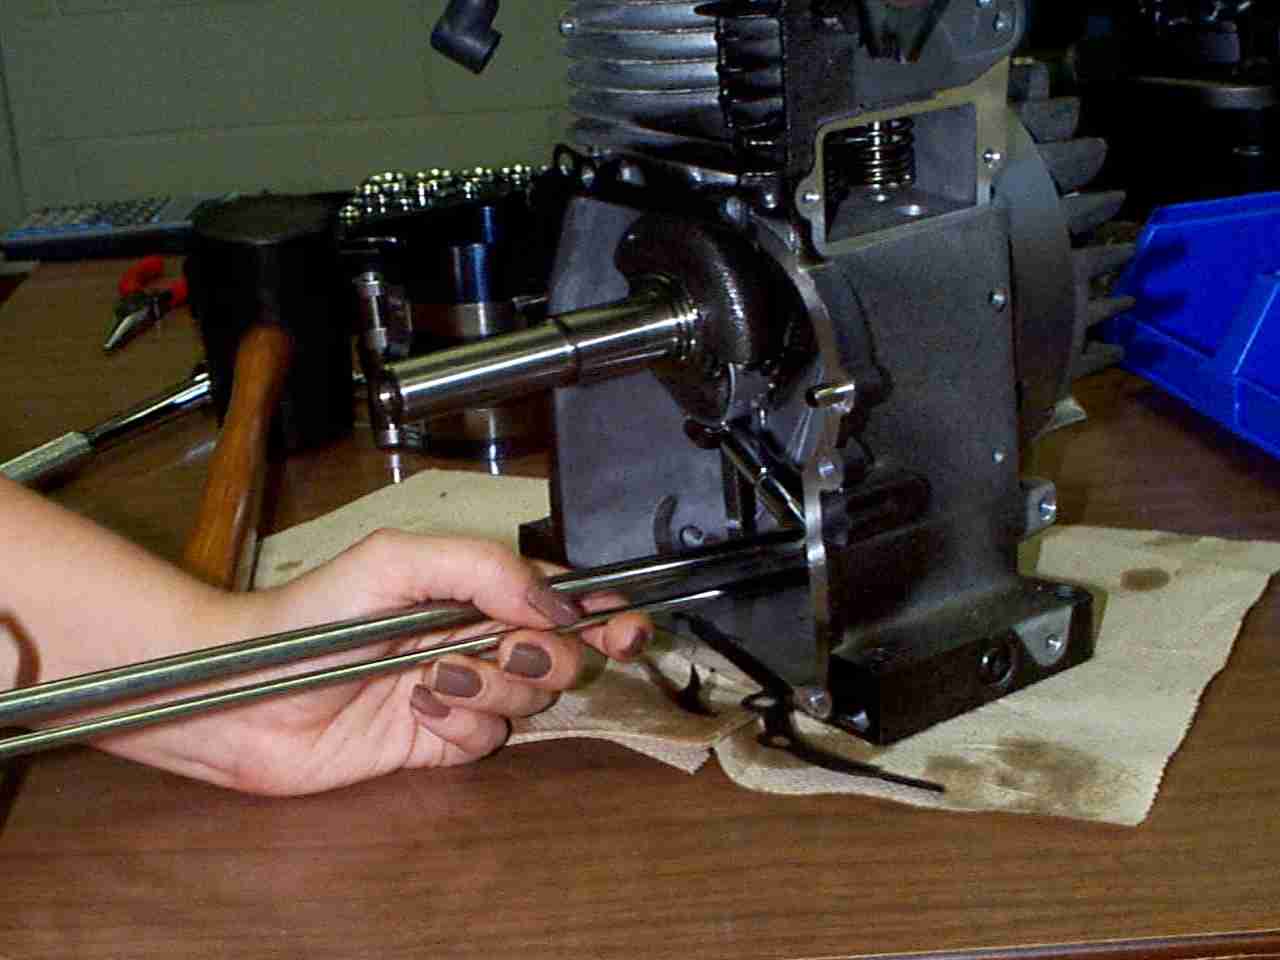
Once the Piston has been put into the Cylinder
Block, the big end of the Connecting Rod must
be brought into position around the throw of the
Crankshaft. Reattach the other half of the big end of
the Connecting Rod using the correct bolts and the
5/16" socket and the ratchet. Be sure that the
ratchet has been switched into tighten mode and that the
bolts are tightened in a clockwise direction. Using the
torque wrench and the 5/16" socket tighten the bolts
to 100 in-lbs, or 8.3 ft-lbs. If you do not know how to
use a torque wrench ask for assistance. Do not forget to
attach the Oil-Mixing arm to the big end of the Connecting
Rod, ensuring that it does not interfere with the
motion of the Crankshaft.