![gif [13k]](http://courses.washington.edu/engr100/b/pics/engr100Logo2.gif)
Engine Dissection Project
1. Purpose
The purpose of the Engine Dissection Project
is to learn about the theory, design, and
operation of a four-cycle internal combustion engine, and to
apply simple thermodynamic principles
to estimate its output horsepower
based on measurements obtained during a
product dissection.
2. Deliverables
- Detailed journal record of all activities (described
in the remaining sections):
- record of all procedures followed
- answers to all questions posed (below)
- sketches of parts and assemblies
- measurements after complete disassembly
- other pertinent information
- Assembled, operating engine;
- A group report (described in separate handout).
3. Engine Dissection Project Schedule
| Day 1: |
Introduction and overview; tool inventory. |
| Day 2: |
Run engine; external observations; start disassembly. |
| Day 3~5: |
Complete disassembly; measurements; performance calculations;
reassembly. |
| Day 6~7: |
Reassembly & start; begin draft of report. |
4. Procedure
Note:
This project is not a race!
There is a lot of time to do the work.
Take your time to address the issues listed below as you progress in your
dissection.
Your ultimate goal is the group report, not the assembled engine,
so use as much time as you need to address the pertinent issues.
Recommendations:
During
disassembly, choose two of your team members who will be the only
ones allowed to touch the engine. This pair should take turns
with the various steps to ensure an even distribution of work.
The manual resource person (see below) and the remaining team member(s)
should be noting observations and answering the written questions.
Then, during reassembly, the remaining team members
would take turns with each task.
4.1 Tool Inventory and Repair Manual
Read the following sections of the
Briggs and Stratton Repair and Service Manual [1]
(you might select one team member to do the readings during the
first day and to act as the manual resource person):
- Section 1: General Information
- Section 13: Tools
The required tools include the basic tool box, parts bin, torque
wrench, specialty tools (valve spring compressor, piston ring
expander, flywheel holder, piston ring compressor, and flywheel
remover).
Begin with a tool inventory:
- Count and record all tools in your tool box
(this means knowing the names of each tool).
Compare this with the tool list you are given.
- Give a copy of your tool inventory to your instructor.
This
can be a copy of the inventory list you are given with check
marks.
- On a separate sheet, list shortages and/or overages, and
give a copy to your instructor.
4.2 Preparation
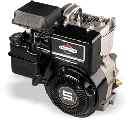
- Mount the engine on the aluminum plate provided.
Pay attention to orientation: Mount it so the
starting cord is over the excess plate surface
(i.e.,
the shaft should be over open space).
- Note the manufacturer, model, and serial number of your
engine.
- What is the maximum RPM and horsepower for this engine?
- Check that there is no fuel in the engine.
- Determine if the engine has compression. This is done
by pulling the starting rope and observing if there is a
significant resistance during part of the cycle. If the
engine spins freely with no resistance, you have no
compression. (This condition can be repaired during your
rebuild.)
- Explain each of the four steps in the engine cycle in
your journal (use sketches in your description).
- Take the engine to the parking lot outside the main
door of the building. Put a small amount of fuel in the gas
tank. Engage the choke and open the throttle all the way (to
the "rabbit" position). With two team members
standing on either side of the support plate, have a third
member pull the cord and start the engine
(keep pants
cuffs clear of the rotating shaft!).
Allow the engine to
run only a few seconds to avoid too much heat buildup. Stop
the engine and drain the fuel (be careful of the muffler,
which will be burning hot). Return the engine to the lab.
4.3 Engine Dissection
Warnings, tips, and recommendations:
- Read the repair manual [1] before you remove any part
(e.g., the flywheel).
Refs. [2] and [3] may also be of use.
- Remove and store watches. The strong magnetic fields
around the armature can damage watch mechanisms.
- Make notes and sketches to ensure that you can
reassemble all of the parts easily. Record the exact method
you used to disassemble your engine
(i.e., the order
in which the parts were removed, etc.).
- Use nut drivers or sockets to remove all bolts. Only
use combination wrenches if absolutely necessary! (These
tend to round the hex-shaped bolt heads. Note that the only
place where these are really needed is for removing the
carburetor.)
- When you remove a bolt, instead of just throwing it in
your parts bin, thread it back into the place where it came
from (after the mating part has been removed!). For example,
after you remove the carburetor, screw the two mounting bolts
back into the engine block.
- Be extremely careful with the gaskets: We may be able
to reuse them (although this is not generally a very good
idea).
- Drain oil first to avoid a flood!
- Make sure you note where the timing mark meshes with
the gear on the cam shaft.
Check the manual [1] to figure this
out. If you are not sure, ASK!
The following disassembly order has been successful in
the past:
- flywheel shroud;
- air vane bracket (plastic piece
and support mounted on the side of the armature...you will
need to carefully disconnect the wire linkage to the
carburetor...note which hole in the vane is used for the
linkage);
- armature wires to ground and spark plug; armature;
- carburetor assembly (do not disassemble carburetor!);
- muffler
(use channel lock available from the lab instructor);
- side shroud;
- cylinder shroud;
- flywheel nut (you will need to use
the special brace to hold the flywheel stationary during this
step;
- flywheel (you may need to use the gear puller to remove
the flywheel...your instructor will show you how...watch for
the little flywheel key that fits in the slot between the
flywheel and the crank shaft...it may either drop out or
stick to one of the parts: It is very easy to lose!);
- crank
case cover - drain oil first if you have not already
and beware of the sharp edges;
- spark plug - use special spark
plug socket head;
- valve spring cover (on side of engine with
vertical tube attached);
- cylinder head;
After removing the head:
- Reassemble the flywheel (just hand-tighten the
flywheel nut) and rotate the flywheel.
- Record your observations (carefully note the
sequence of events...piston location, valve location,
armature/flywheel magnet, etc.
By repeating the
process you should be able to understand exactly how the
engine performs each of its major functions).
- Measure the bore and the stroke of the cylinder.
Estimate as accurately as you can the volume in the
cylinder when the piston is at top dead center (this
includes the volume contained in the cylinder head, which
you will get by filling the volume with water and getting
a weight difference on a scale). Ask if you do not
understand since you will need these volumes for your
calculations. You want to get it right before you put the
engine back together.
continue disassembly;
- remove the flywheel;
- valve
springs (use the spring compressor...this is the single trickiest
procedure in the entire dissection...each of the two
disassembly team members should work together on this. Do
not at any time try prying the valves from their seats with a
screwdriver or anything. This is not necessary (the valves
will simply lift out when they are correctly disengaged) and
will ruin the valves.);
- valves;
- cam shaft;
- connecting rod;
- piston (do not remove the rings from the
piston).
As you disassemble your engine, complete the following steps
and questions
(the answers will be put in your report appendix):
- Ignition
- Identify how the ignition system on your engine works.
- What types of materials are used on the flywheel? Why
does the flywheel have one section made from a different
material?
- What is the purpose of the flywheel? How much does it
weigh? What would be the advantages and disadvantages of
making it heavier? Why does it have fan-like vanes on it?
- What is the purpose of the starter clutch? Explain from
your examination how it does its job.
- What determines at what point in the cycle the spark
occurs?
- Carburetor
- What type of air cleaner is used on your engine? (You
can remove this from the carburetor assembly, but
do not
take anything else off.) Why is the air cleaner needed?
- From reading the appropriate sections of the repair
manual [1], have one of your team members identify in general how
the carburetor works.
- What is the function of the choke?
- Engine Block, Valves, Crankshaft, Camshaft, Pistons
- Locate the intake and exhaust valves. Which one is
larger? Why?
- Which valve has a special valve guide? Why?
- Explain what happens in the valve spring compartment.
- Why do you think the cam shaft made of nylon?
- What is the significance of cam timing, and how is it
set?
- What is the relationship between the cam timing and
the flywheel magnet? When in the cycle does the spark occur?
Does every spark result in combustion, or is one spark each
cycle wasted?
- Sketch the camshaft assembly.
- What are tappets, and what is their function?
- On the camshaft there is a small metal piece,
including a spring, that is connected where the gear meets
the shaft. Looking at the relation between the tappets and
cams, can you guess what purpose it might serve? Try putting
the tappets and the camshaft back into the engine, rotate the
cam through its motions, and see if you can figure it out.
- Sketch the piston assembly. What is the purpose of the
rings?
- What type of bearings does the crankshaft use? How do
these bearings avoid becoming worn out?
4.4 Engine Reassembly & Start
Warnings, tips, and recommendations:
- Use small amounts of engine oil to lubricate mating
parts (bearings, valves, etc.);
- Follow the service manual [1]
during reassembly;
- Before you reassemble your engine,
tell the lab instructor if you have any broken parts or torn
gaskets.
- Do not over tighten the bolts. Many of the smaller bolts
(e.g., crankcase, breather, or shroud bolts) are small and
are easily broken off. Most bolts need only be tightened a
little more than "finger tight". Note that the
following require the use of the torque wrench:
- connecting rod bolts;
- head bolts, which must be tightened in
a specific order;
- crankcase cover bolts;
- spark plug; and
- flywheel bolt.
Refer to the manual [1] for the pertinent specifications.
Reassemble your engine:
- Install parts in the reverse
order which you disassembled them (this is a test of your
memory, journal completeness, and common sense).
Note that
when you put the head back on, the top shroud and the spark
plug grounder should be in place, or you will need to redo
the head installation later. Also, the wind vane bracket must
be installed on the armature when the armature is gapped, or
you will need to redo the armature installation.
- Be sure to use a torque wrench when it is recommended,
i.e., rod cover, crank case cover, connecting rod bolts,
flywheel and head. Torque all bolts to the factory
specification. Is a 100 lb-in a large moment? Try each
torque wrench on an exterior bolt before you use it for real
to see how it works. Finger tighten bolts before using the
torque wrench. Do not over-tighten any of the bolts -
remember, the engine block is aluminum, and the threads can
get stripped very easily.
- Use the ring compressor to place the piston back in the
cylinder.
- Install the head and remaining parts.
- Why is it important to torque the bolts to a certain
value?
- Why are the bolts torqued in a certain pattern?
- What is the purpose of the head gasket?
- The air gap between the flywheel and the armature must
be set according to the specification in the manual [1]. Use two
feeler gages to set the gap (borrow one from another group).
This is most easily done with the magnet below the armature
as this holds the armature tightly on the flywheel during
tightening.
Run your engine:
- Fill the engine with oil to the bottom of the fill hole,
and then take it outside.
- Fill the engine with gas. Start the engine using the
same procedure you used on day two.
- Did your engine operate smoothly?
- Let your engine cool.
- Drain the fuel.
Final checkout:
- Clean your tools;
- Inventory your tools;
- If you know of any missing tools, find them.
- If you have extra tools, find out where they
belong.
- Organize the sockets in your box.
Acknowledgements
This project is based on a
module from ME/IE 497 Product Dissection, a one semester
course at Pennsylvania State University developed by John
Lamancusa under the Manufacturing Engineering Education
Partnership.
Reference Materials
| [1] |
Briggs & Stratton Corporation,
Repair Manual For Single Cylinder 4-Cycle Engines,
Briggs & Stratton Corporation,
Milwaukee, WI, 1992, 1996, 1997.
|
| [2] |
Engine Parts Pictures,
|