Microsoft Excel is a tool used for storing, organizing, and analyzing information. The basic building blocks of this tool are the rows, columns, and cells that make up a spreadsheet.
| Row: |
|
|
Column:
|
 |
Cells are the intersection of rows and columns; each cell represents one data point. In the image below, the cell that is highlighted is at the intersection of Column B and Row 2.
|
Cell:
|
|
Cells can be used for entering both data and labels for rows and columns.
With Excel, you can:
1) Perform statistical analyses using the function wizard and
2) Present graphical information using the chart wizard
As a spreadsheet program, Excel is composed of workbooks and worksheets. A workbook is like a document; it contains all of the information in a given file. The workbook is made up of worksheets, which are like the individual pages of the document. Individual worksheets are represented by tabs at the bottom of the screen in Excel, which can be used to switch from one worksheet to another.
| The active worksheet is the highlighted tab (here, Worksheet 1). |  |
Well, in order to use Excel, you probably want to work with some data. The following steps will teach you how to work with data in Excel.
There are two places to enter data in Excel:
| 1) Enter data in a cell by clicking on a cell, typing in the data (numbers or words), and pressing Enter. |  |
||
|
2) Enter data in a formula bar--click on a cell, type in the data in the formula bar, and press Enter. The formula bar appears above the data, after the = sign. |
 |
You may also want to edit data that you have entered. You may do this by clicking on a cell to "select" the cell. Any data already present in the cell will be deleted when you type.
To go back and edit the original data, double click on the cell. A cursor will appear, and then you can edit the cell.
Selecting a group of cells:
To select a group of cells, click on the topmost or leftmost cell that you want to select and drag over the other cells that you want to include.
|
Hover over the play button to view the cells being selected in this example.
|
To select a row or column, click on the label of either the top of the column or the left of the row.
Sorting selected cells:
Once you
have selected a group of cells you can sort those cells by clicking on the toolbar
button that has the label ![]() to
to sort numbers in the order 1»9 (or the label
to
to sort numbers in the order 1»9 (or the label ![]() to
sort numbers in the order 9»1).
to
sort numbers in the order 9»1).
Example:
|
The
cells that are highlighted in Column B will be sorted when the
|
 |
To
the right are the sorted data.
|
 |
Basic
Formatting:
The toolbar can be used to change the look of the data in a cell:
Click on the cell, and then you can use all the commands you are familiar with from Word (i.e., Bold, Underline)
You can also change the size of rows and columns:
1) Click on the right border of the Column label or the bottom border of the Row label and drag to resize
2) Double click on the border of the row or column that you want to resize (the right border of a column or the bottom border of a row) to have Excel automatically size the row or column to the width/height of the data


Formatting Numbers:
By using buttons on the toolbar, you can change the format of numbers.
For example, to change your numbers to currency:
3) $ represents currency, comma represents numbers and % represents percentsThe data in column A are represented as currency in the image to the right.
Identifying Cells :
Remember that each cell is an intersection of a row and a column. Thus, each
cell has a unique label that is the combination of the row and column names
in that order .
The top left cell in column A and Row 1 is called A1.
These labels can be used in formulas (which you will learn about later) to access the data in that cell.
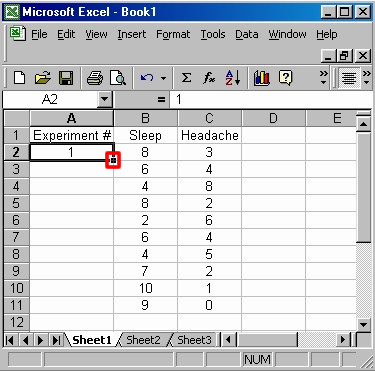
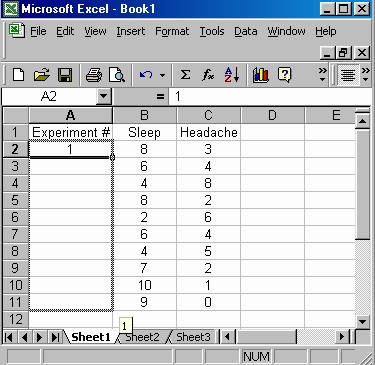
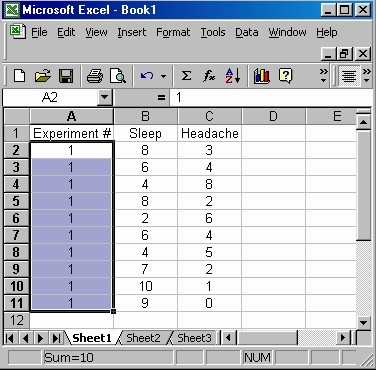
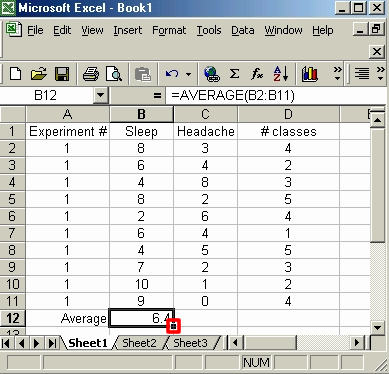
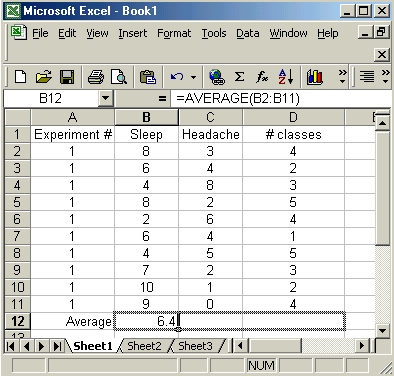
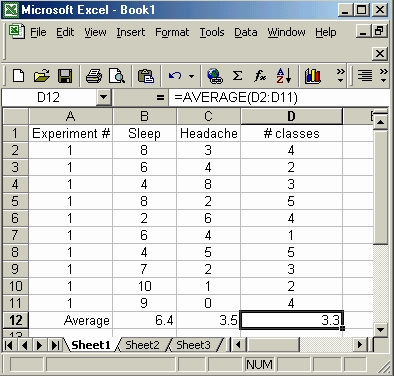
Copying Data into Multiple Cells:
To take data from one cell and copy into the other cells, 1) select the cell,
2) click on the little square in the bottom right corner of the cell,
3) Drag over the cells that you want to have the data copied into.
 |
 |
Summary Statistics:
Excel will calculate means, medians, modes, standard deviations, variances,
and correlation coefficients for you.
You may directly write the formulas for these statistics into the formula bar, or you may use the formula wizard (fx in the toolbar) to calculate these statistics.
Now that you know how to work with the basic functions of Excel, you can begin to use this program for storing your data. Once you become familiar with other features of Excel, you can calculate statistics and produce graphs using the program.
Working with Formulas
Beginning
Formulas in Excel all begin with an equal sign (=) and can be entered in either of two places:
|
1.
The formula can be entered in the cell it will correspond to
|
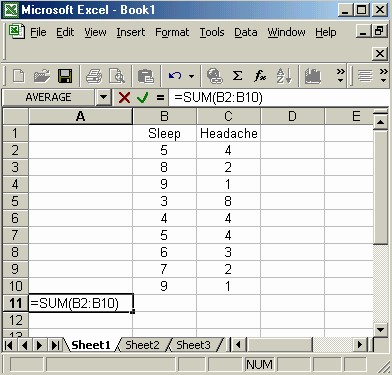 |
OR 2. A formula can be entered in the formula bar
Note: Figures taken from Microsoft Excel 2000 |
Formulas can use mathematical operators such as +, -, * , / (÷), or ^ to perform various calculations.
Pressing return/enter after typing the formula will display the result.
Similar to entering data, if you single click the formula cell, any formula will be deleted when you begin typing. Double clicking on the cell will allow you to edit the formula.
References with Formulas
Remember that each cell is an intersection of a row and a column. Thus, each cell has a unique label that is the combination of the row and the column names in that order.
|
|
 |
These cell labels can be used in formulas to access the datum in that cell.
You can refer to multiple cells by specifying the first and last cells of the group with a colon in between the cell labels (e.g =sum (A1:A5) See example below)
|
 |
Using Labels
A short cut to get to a cell's label (name):
Using Functions within Formulas
Excel provides a lot of mathematical and statistical equations for your convenience
There are two possible formats for the functions that you can use
Clicking
on ![]() on the Excel toolbar
will show you a list of all of the functions available (and give you more
information about how to use them).
on the Excel toolbar
will show you a list of all of the functions available (and give you more
information about how to use them).
Copying Data into Multiple Cells
To take information from one cell and copy it into other cells:
|
 |
 |
|
|
 |
Copying Formulas into Other Cells
Similar to copying data into other cells, formulas can also be copied from one cell into other cells.
Conveniently, this is done in the same manner.
(Insert picture here with two frames (possibly a flash movie) and the following text)
 |
|
|
 |
 |
|
Results from formulas
Once you have caluculated a formula and have a result in one or more cells be aware that if you change your data then the calculated result will also be changed.
For example,
|
 |
 |
|
Watch what happens if the score in cell B7 is changed from 32 to 95:
|
The average automatically changes! |
 |