Tutorial 5.2 - SketchUp / Texturing
Ok, it's time to wrap up your site model with some rendering.
Adding Colors and Textures
Tips about painting with colors and textures
Using Shift and Ctrl keys
While using Paint tool, pressing and holding the Shift key will paint all faces that have the same material as the pointed face (selected, or the one Paint tool is placing onto).
Pressing and holding the Ctrl key will paint the selected face plus all faces that are connected to it.
First picture shows that three boxes, two with the same color

Now apply a texture while pressing and holding the Shift key on one of the two boxes originally with the same color, then both the two boxes are painted with the texture

Undo the previous step, then Repeat the same process, but this time press and hold the Ctrl key, then only the box that the Paint tool is placing on is painted with the texture

Texture Manipulation
First off, you have to understand that all the textures used in SketchUp are actually preinstalled .jpg images, which tile seamlessly when repeated. You can manipulate the way a certain texture (image) is applied to fit your model.
Below we will use a simple model to play with those options in SketchUp for manipulating textures.
Go to the course server and find texture_1.skb in the folder (U:/). Copy it to the desktop and then use this copy, don't directly use the file in my folder.
(or directly download the file:texture_1.skp)
There is actually only a simple model in the file.
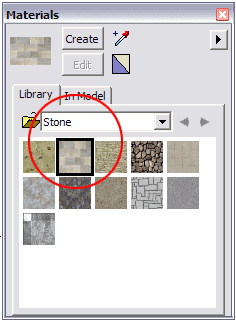
Click on Paint Bucket tool to open the Materials dialog window.
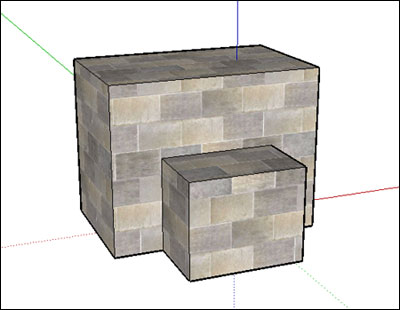
Apply the Stone Masonry texture found in the Stone category to the entire model, you can hold down the Ctrl key while pointing the Paint tool on the model.
Change the Size
The first thing we can change is the size of the texture image,
First click In Model tab in the Materials window, you can see now a small thumbnail of stone masonry is in the window, indicates that it is in use.
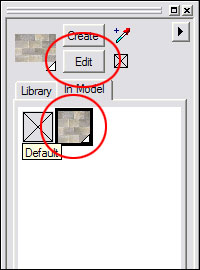
Click Edit button to start edit this texture, or you can double-click the thumbnail to edit it. Now you should see the Edit Material dialog. In the dialog, you can see the original size of the image, which is 5'-4" long and 4'-4" high. This is the size that is repeated for the tiled image.
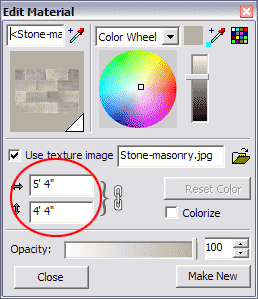
You can change the dimension by directly typing in a new number. A small lock symbol allows you to maintain (or not to) the aspect ratio of the image. Click on the lock symbol to lock or unlock the aspect ratio.
Now set the length to 8¡¦ so that the stone blocks will be long enough.
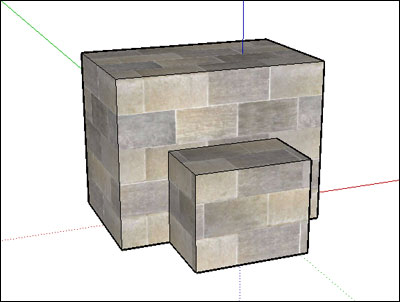
Texture Positioning
There are two modes you can use to position textures: Fixed pins and Free pins
Fixed pins:
Fixed pins is the more exact mode for texture positioning. You have 4 pins of different colors, each with its own function:
- The Red pin is the Anchor pin, you can use the red pin to move the entire texture without any distortion, rotation, shearing, or scaling. All other three pins work relative to the red pin.
- The Green pin is used for overall scaling and/or rotation.
- The Blue pin is for shearing (making diagonal) as well as vertical scaling.
- The Yellow pin is used for distortion. This is useful for actual photographic images that you are trying to fit it to a face.
To set the texture positioning for a certain face, you right-click on this face and select Texture > Position. Let¡¦s do it for the smaller front face.
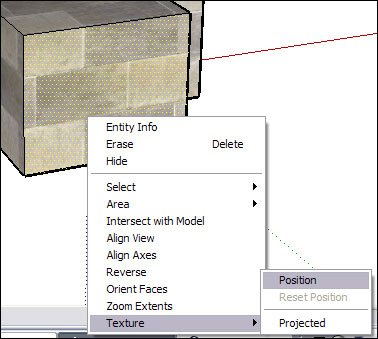
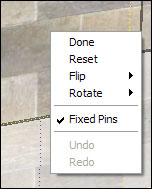
Now you should see 4 pins in 4 different colors, the indicates that you are in the Fixed Pins mode. If this is not the case for you, right-click on the face again, then in the menu you check Fixed Pins. The four pins surround one instance of the texture, the rest are tiled instances.
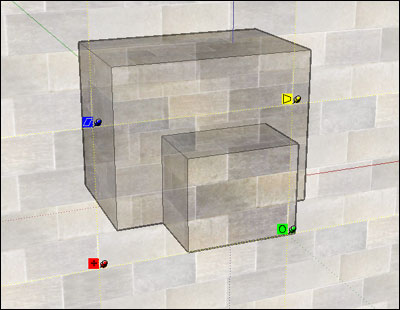
Now you can play with all four pins to see what they can do for you, refer to the information about all the four pins listed just above.
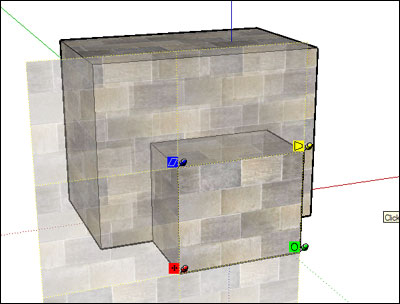
The picture below shows the result of the following steps:
Move the red pin to the bottom-left corner,
Move the green pin to the bottom-right corner,
Move the blue pin to the up-left corner.
Free Pins
Free pins model is useful when you want to make a photo image fit within a certain shape.
Find texture_2.skb and door.jpg in U: drive. Copy both to the desktop and then use these copies, don¡¦t directly use the file in my folder.
(or directly download the files:texture_2.skp and door.jpg)
You see a simple house with a rectangle outline for the door in the file. Now you will place a door photo (door.jpg) onto this rectangular frame.
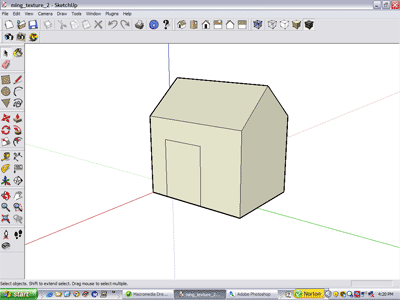
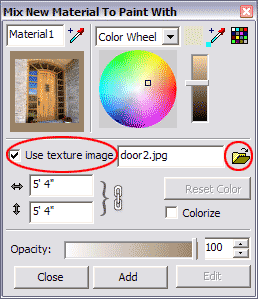
There are two ways to insert a picture to be used as a texture. One is to select File > Import. The other is to use Material dialog. Click In Model tab, then click Create, in the Mix New Material to Paint With dialog, check Use Image Texture, then click the folder icon to browse the image file that you want to use.
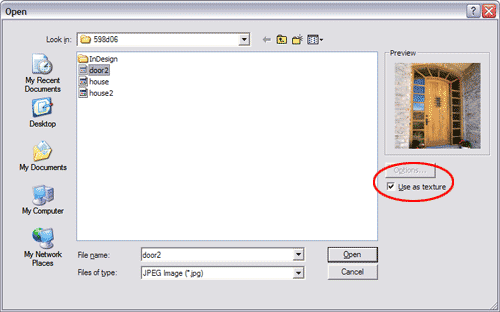
We now choose the first way to do it. Go to File > Import, and browse to your folder then choose the right type of file (.jpg for this deno) and find the image file door.jpg. Be sure to check "Use as Texture". Place the image on the door frame by first clicking the lower left and then upper right corners of the frame.
You see the image fills the doorway but does not have the correct size and orientation. Let¡¦s fix it.
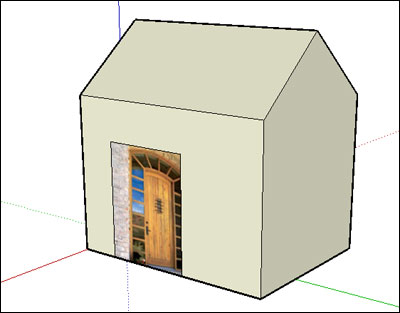
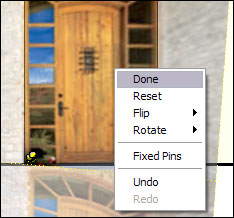
Right-click on the image then Texture > Position. Then right-click again then deselect Fixed pins.
This time you see 4 yellow pins surrounding one of the tiled images, each pin has the same function, which is to pull its corner to stretch and distort the image.
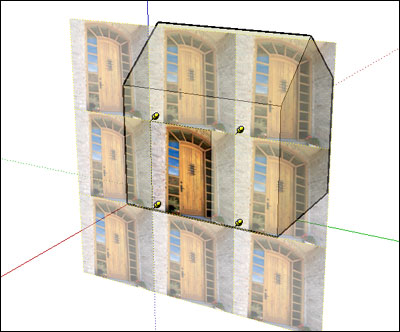
Now click one of the four pins, (not drag), and move the pin to the closest corner of the door (to this pin) on the photo, repeat for the rest of three pins. Now the locations of these four pins represent the four corners that should be placed to the four corners of the original door frame.
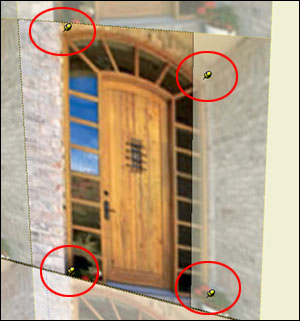
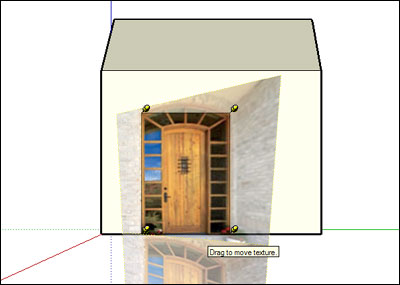
Now drag the four pins (click and hold) to the closest corner of the model door frame. Now you can see the door photo is aligned perfectly to the door frame. To keep this image manipulation, right-click the image and select Done to finish the positioning.
Last modified: 4/29/2009 12:31 PM