
Introduction to Geographic Information
Systems in Forest Resources |
Exercise: Project
and Data Management
Objectives:
- Use ArcGIS data management tools
- Convert ArcInfo data to ArcGIS data
- Use Package tool to pack your data set
Important note:
At the Arc GIS 10, ESRI uses the Geodatabase as the default format to store data. Hence, you can either create a Geodatabase in your removable drive in order to bring all of your exercise or assignment data with you. Most vector and few raster layers (see spatial data model for vector and raster layer distinction) can be stored into Geodatabase. We suggest to store the raster data into the general folder instead of Geodatabase (you will see them in Raster Analysis 2 exercise later).
- Perform drive
substitution to create drives L (CD) and M (removable drive).
- GIS work environment setting
- Vector data management
- Raster data management
- Move and Export ArcGIS project
Perform drive substitution
Perform drive
substitution to create the virtual drives L and M.
GIS work environment setting
- Create an ArcGIS map document
- Set up current workspace
Create an ArcGIS map document
ArcMap document is an platform to display, manipulate, and analyze the spatial data. The ArcMap Document (.mxd) file did not store the spatial data at all. Instead of sotring the data, the ArcMap Document store the path of data files which need to be imported into ArcMap (See Getting Data into ArcGIS for more detail information)
- Delete unnecessary files from your removable drive and create a directory
called proj_mgmt.
- Open ArcMap to create a new map document. Save the map document in the new
directory with the name proj_mgmt.mxd.
Environment Setting
Setting the workspace from the environment settings will allow you to save time navigating through
the file system, because the workspace specifies the default output
location for new files created by geoprocessing tasks.
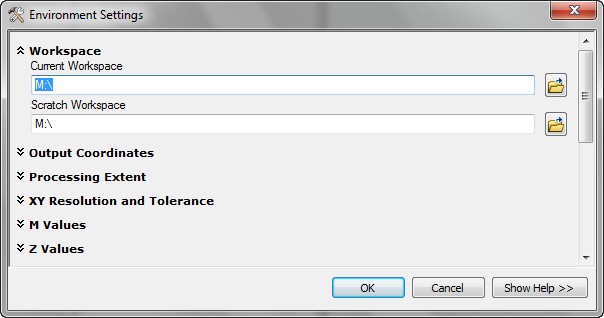
- From the Geoprocessing menu, select Environments option.
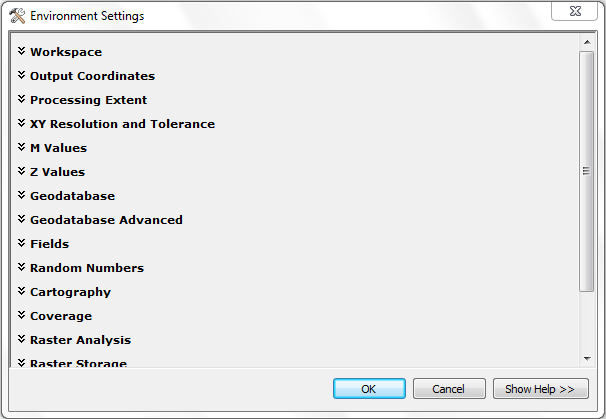
- Click Workspace option and Set the Current Workspace and Scratch Workspace to the
LAST EXERCISEon the removable drive (M:\). Be aware to assign right drive and existed geodatabase to the workspace. Be sure to finish the drive substition and created your Geodatabase already from LAST EXERCISE.
You will also need to become comfortable the relationship between a path
name and the graphical representation within the geodatabase. This updated version, Arc 10, is getting rid out of file system and saved all data within the geodatabase at most situtions. Read the geodatabase concept from ESRI will help you get used to it.
Vector data management
In ArcGIS, there are 3 major types of vector data source files:
"Coverage", "Shapefile", and "Geodatabases" (see spatial data model for more information)
Coverage is a basic implementation of the vector arc-node topological model as shown in the cartoon-like images above. The coverage is a package that composed of polygons, arcs, nodes, label points, and tics. This is due to the original way features were modeled in some of the first GIS software applications. It is a complex and sometimes unwieldy way to store data, but because many systems still use ArcInfo as the main GIS software, the coverage will be around for quite some time.
Shapefile is used mainly in ArcView 3.x and ArcGIS, although supported in other software as well. Because of the simple data and file structure, shapefiles draw very quickly in ArcGIS 9. Shapefiles can be fully managed (created, edited, and deleted) within ArcGIS 9 's environment. Shapefile data files can also be managed using operating system tools, such as the Windows Explorer. The shapefile standard is public, so any software can be made to read or write shapefiles.
A single shapefile represents features that are either point, line, or polygon in spatial data type.
Geodatabase stores all features and related tables, as well as other files, within a single or distributed database format. There are several advantages to using geodatabases rather than other storage formats: portability, integrity, validation of allowed data values, storage of data relationships as part of the data structure, topological rules, etc. In terms of the basic representation of spatial features (points, lines, and polygons), and their spatial referencing, the geodatabase functions the same as the other formats.
- Understand the data structure of vector data formats
- Create a Geodatabase
- Move between a shapefile and a feature classes in the geodatabase
- Convert a coverage data source to a shapefile
Understand the data structure of vector data formats
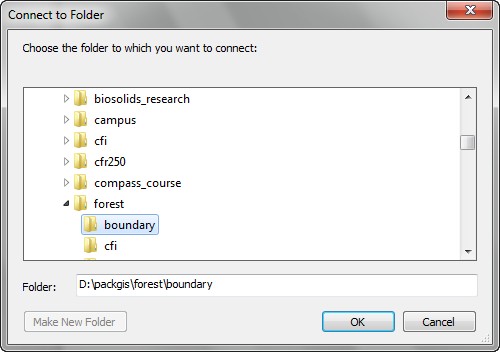
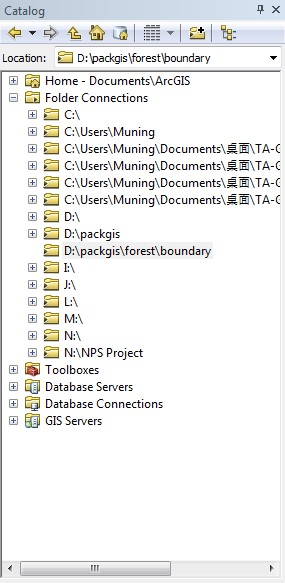
- Click side menu to open ArcCatalog and navigate to the CD drive (L drive) in the L:\packgis\forest by using "Connect to Folder" bottom.

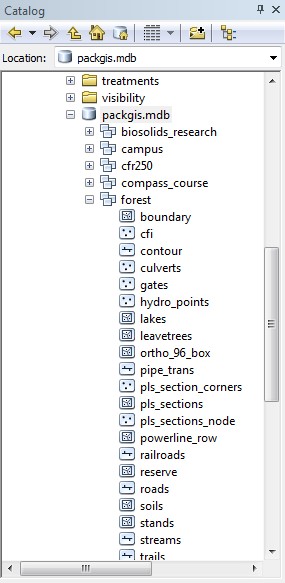
- From the ArcCatalog window, it is able to see several coverage files such as "boundary", "cfi", "contour", etc.

- If click the any single coverage, you will see a set of features. A coverage layer needs to have all of the features here to be displayed in the ArcMap.
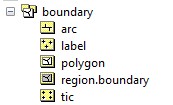
- However, the coverage file will looks like the general folder in the connection or Windows Explorer. It is important not to connect the the coverage folder directly, it will not be able to open in ArcMap. The following two images show the result while you connecting to boundary coverage folder directly, you will not be able to find boundary layer or anything in the ArcCatalog window:
The coverage file is the old format of GIS file that needs different feature layers to display one GIS layer. Next, we will see shapefile format and understand its structure.
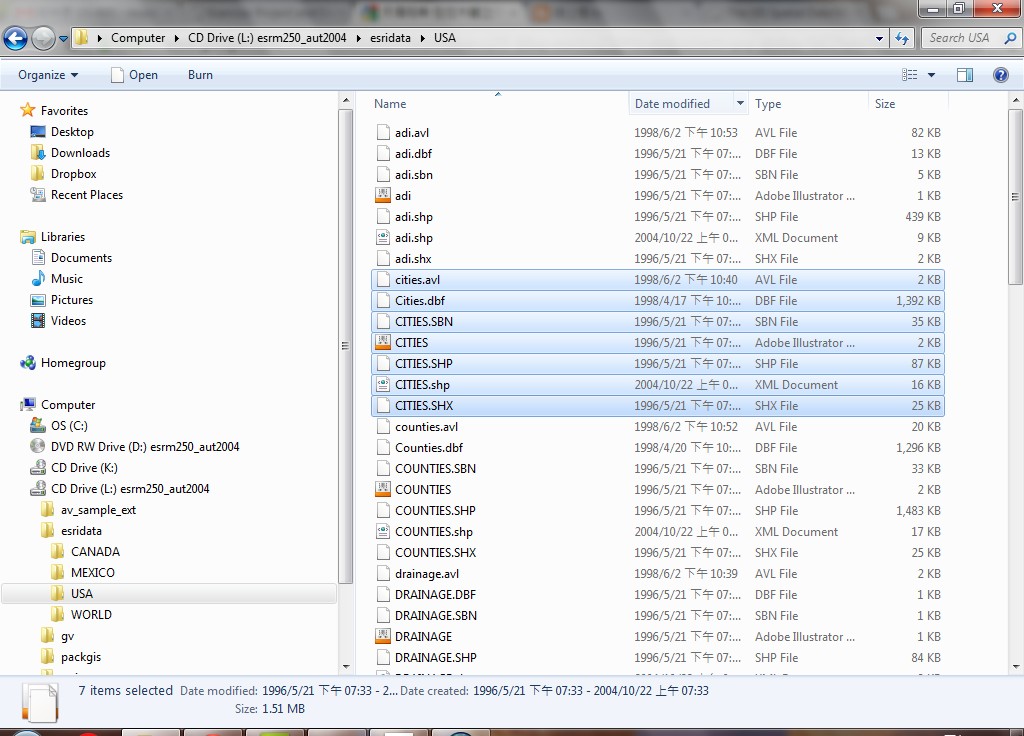
- Connect your folder again to L:\esridata\USA, you should find several layers within this folder by viewing them from ArcCatalog window.
- At the same time, open the file manager (Explorer), you can see there is more then one file called cities or CITIES (7 files) from the file manager window. With this observation, you need to remember do not move the file without using ArcCatalog since each file you saw in the ArcCatalog represent a set of files (7 files) in the window file manager. Note the shapefiles in ArcCatalog only have a single entry, whereas the shapefiles
in the Windows Explorer show the multiple files comprising the data source.
If you would like to copy this file into the other folder, it is better to execute this funtion on ArcCatalog. At the ArcCatalog, right click on the file you would like to copy, clip copy and paste it into the destination folder.

Create a Geodatabase
One of the several advantages to using a geodatabase is that feature geometry
fields (area, perimeter, and length) are stored as an integral part of the data
set. When updates are made to the geometry of features (reshaping, resizing,
splitting, etc.), the fields representing geometric measures are automatically
updated. In this section you will create a geodatabase that will store the output
of subsequent analyses.
- Click on the Side Menu to open ArcCatalog and navigate to the M:\ directory.
- Right Click on M:\, select New > File Geodatabase.
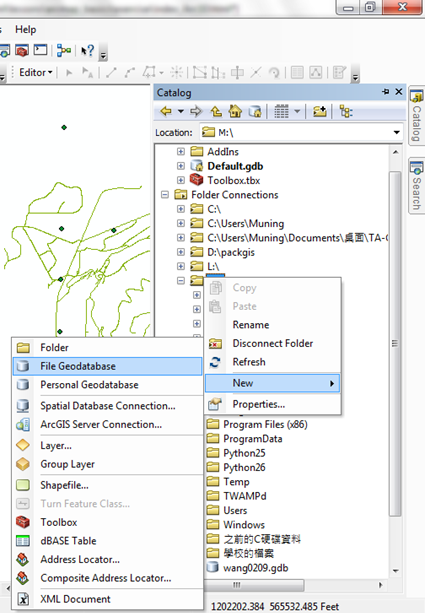
- Rename the geodatabase to your UW NETID (ex. wang0209.gdb).
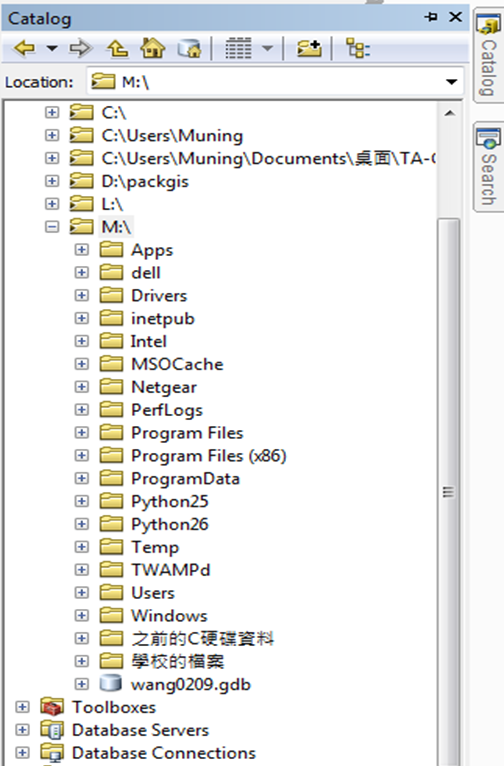
The new personal geodatabase is stored as a single file on the OS, currently
empty of geographic data, but soon to contain a number of different feature classes.
Move between a shapefile and a feature classes in the geodatabase
- Navigate inside the L:\packgis\packgis.mdb\forest container on the
CD. This is a personal geodatabase; not it has many of the same data sources
as the \packgis.mdb directory also on the CD.
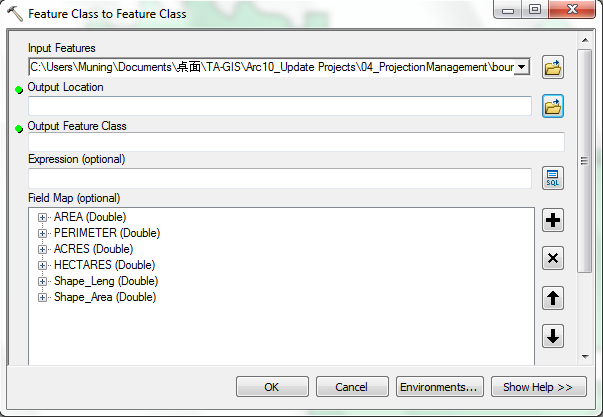
- Right-click boundary and select Export > To Shapefile (single).
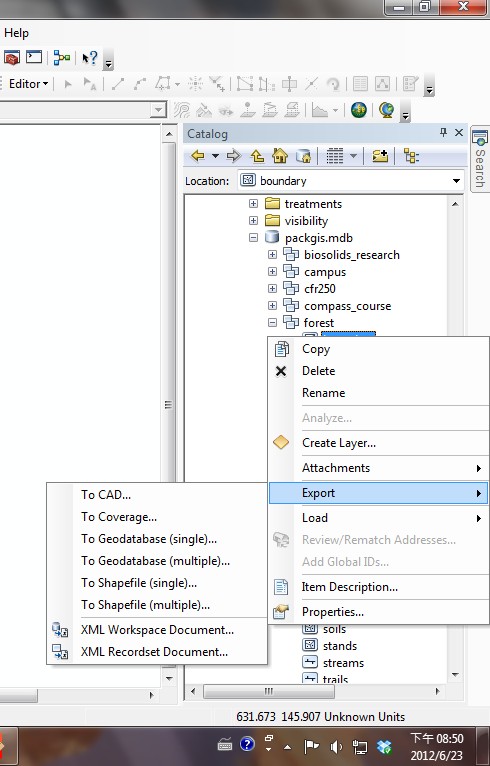
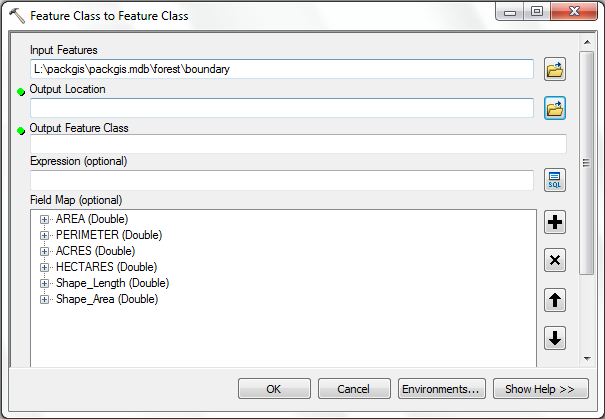
- The Feature Class To Feature Class dialog will open, automatically
containing the boundary feature class as the Input Features.
Drag the ANY directory within your removable drive from ArcCatalog into the Output Location
control, and then enter boundary as the Output Feature Class Name.
Performing the export in this way opens the same interface as if you exported
the geodatabase feature class from an ArcMap document or using the data management
tools within ArcToolbox.
- Click OK. The progress dialog will appear; you can close the dialog
after the process completes.
- On the other hand, if you would like to move the shapefile to your geodatabase, you can right click on the boundary.shp and select output to Geodatabase (single). After that, assign the output location as your geodatabase (M:\NETID.gdb) and put the output layer name, then click on OK. You can see the boundary.shp is becoming the feature class in the geodatabase.

Convert a coverage layer to a shapefile
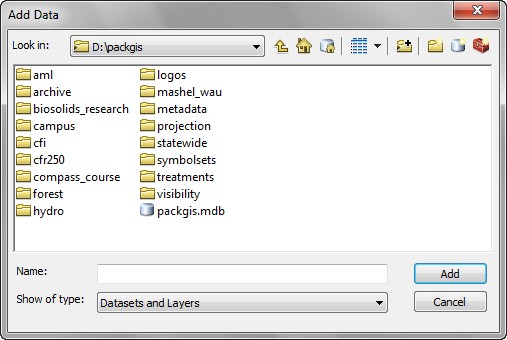
- Use the Add Data button in ArcMap to find the roads data source
from the L:\packgis\forest directory on the CD.
- Double-click on the name of the data source, so you can see the components
of the coverage data source. The roads data source contains feature data sources
for arcs, nodes, and tics. We are interested in the arcs as well as the nodes.
- Press the <SHIFT> key and select the two layers from the roads source.
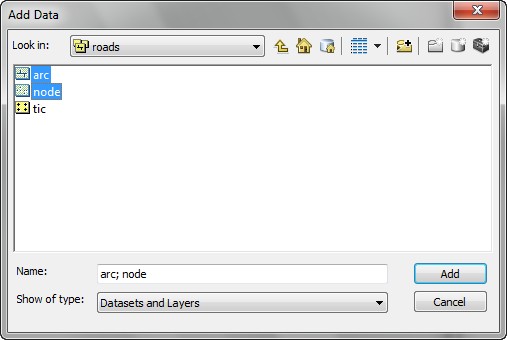
- Add the two layers to the view.
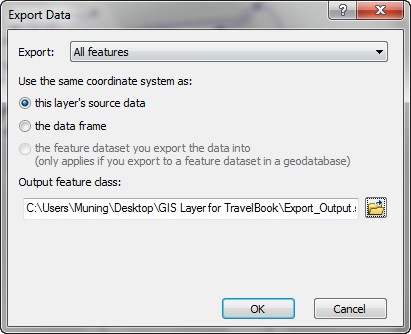
- Right-click the roads arc layer and select Data > Export Data from the menu.
- Save the new layer data source as \proj_mgmt\roads on the removable
drive in the same coordinate system as the source data set. Be sure to click
the Browse button and select "Save As Type" as shapefile then type in the complete pathname for the new shapefile
(you should get used to thinking about pathnames rather than just using the
GUI all the time).
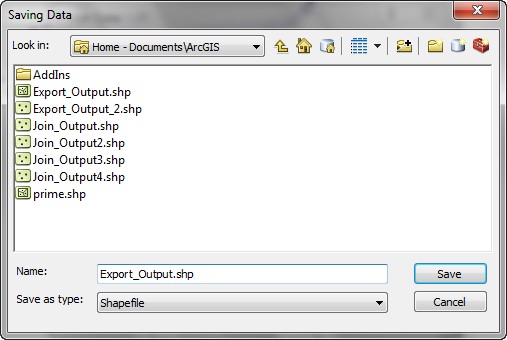
- Do not add the new layer to the view when ArcGIS asks (we
will rename this in a moment, and if the shapefile is present in the project,
it will be "locked").
You have just exported a coverage data source to a shapefile data source. That
shapefile is much easier to manage than the original ArcInfo coverage data source.
You can export any vector data to a shapefile, regardless of the data source
type. You can use the Manage Data Sources tool to copy, move, rename,
or delete this new shapefile. We will move and rename the shapefile in the next
step.
Raster data management
- Copy a raster (image/grid) data source
- Exporting grid layers to generic raster format
Copy a raster (img/grid) data source
Copying image data sources is done the same way as copying a shapefile.
- Open the ArcCatalog.
- Connect the folder to L:\packgis\forest\
- Add the raster dataset L:\packgis\forest\landsat_1991.img into ArcMap
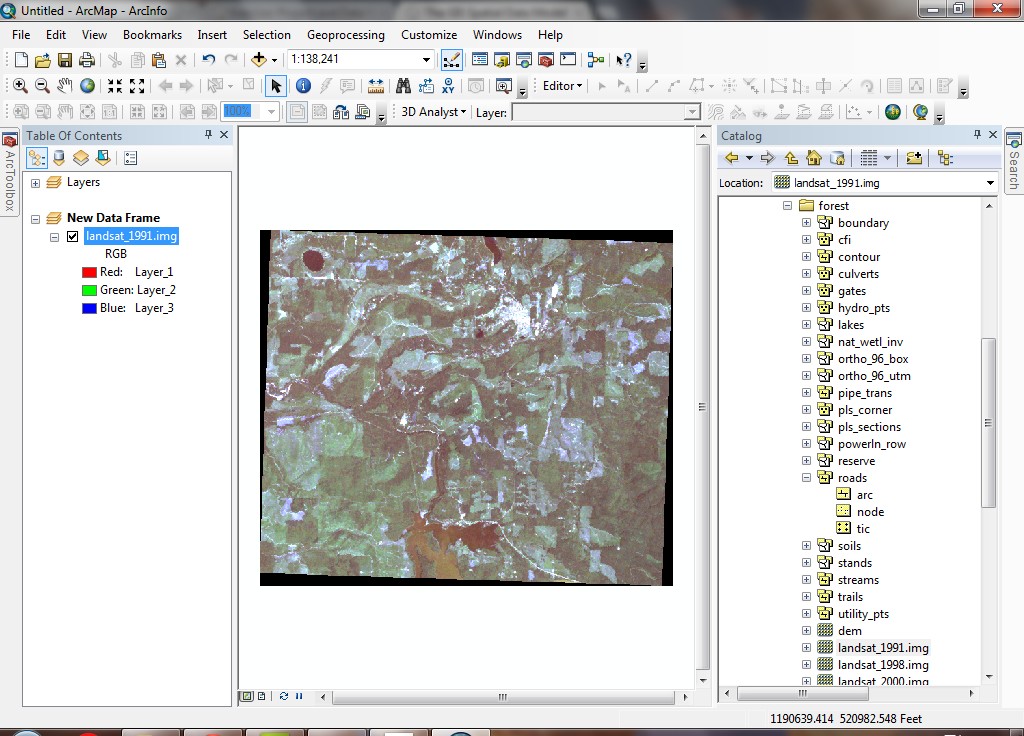
- Right-click the dataset's name and select Copy.
- Navigate to your proj_mgmt directory and select Edit > Paste
from the menu.
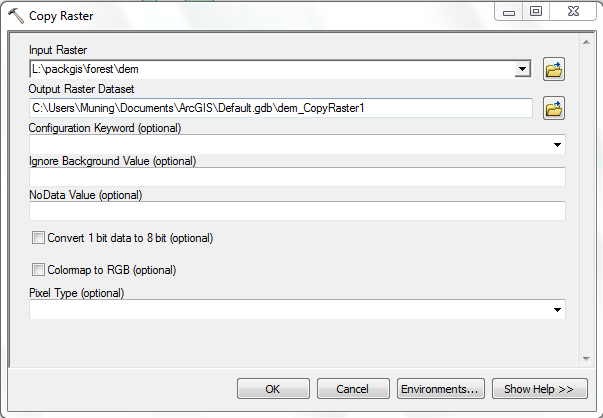
- If you would like to save the raster or img file into Geodatabase, right click that layer and select "Raster to Different Format" within "Export" option. You can see the following pop-up window. You need to assign the name of the raster dataset in your preset geodatabase (M:\NETID.gdb) then you can open this img in your geodatabase.
Exporting grid layers to generic raster format
Some data processing packages require generic raster data file imports. The
generic raster file can act as a data interchange format if you are sharing
data with someone who does not have software that supports the ESRI grid raster
format. Most GIS or GIS-like applications that use raster data can handle the
generic ASCII raster format.
- Create a new directory on your removable drive called data_export.
- Open ArcGIS and create a new map document.
- Set the Current Workspace to the new directory on your removable drive.
- Add the L:\packgis\forest\dem raster grid data source to your map document.
- Open ArcToolbox from within ArcMap and dock it in the application window.

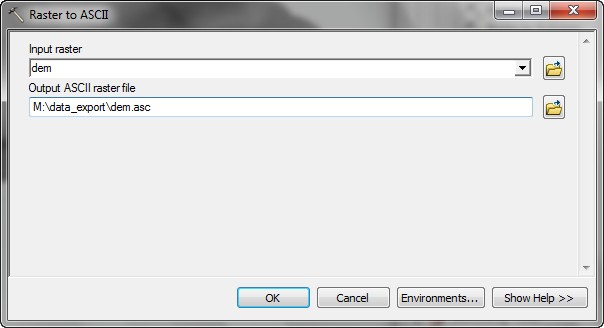
- In ArcToolbox, double-click Conversion Tools > From Raster > Raster
to ASCII. .
- Select dem as the Input raster. Set the Output ASCII raster
file to \data_export\dem.asc. Click OK to start the process.
- After a few minutes, the process will complete. As you wait, this would
be a good time to check your e-mail or buy a book on Amazon.
- Notice that there are now one new file in the output directory. It is the
generic ASCII raster file (dem.asc).
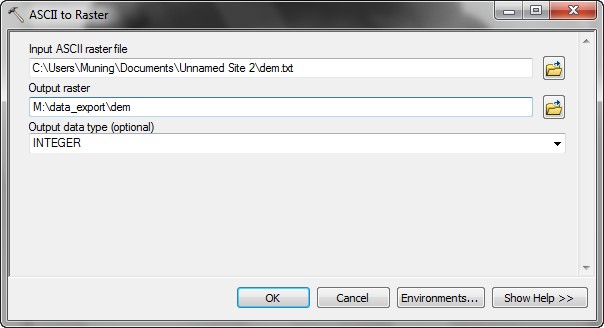
- Next, In ArcToolbox, double-click Conversion Tools > To Raster >
ASCII to Raster.
- Click the Browse button to find the Input ASCII raster file (\data_export\dem.asc). You will need to change the Files of type from .TXT to .ASC.
- Alter the Output raster to \data_export\dem. Keep the INTEGER data type.
- Again, it will take a few minutes to import the raster. You can entertain
yourself by looking at the news.
- The process will complete and add the new raster to the map document.
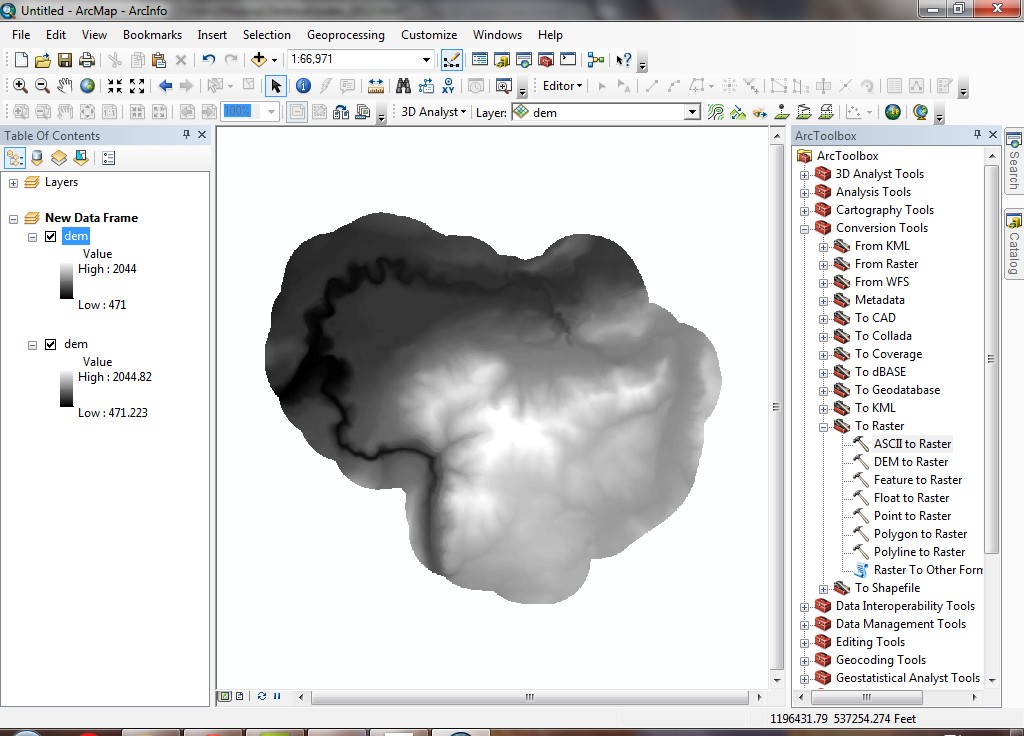
Note that the new grid's legend does not have decimal places. This is because
the new grid is stored with integer values. Compare this to the original grid's
legend , which shows that it is stored with floating-point precision.
You have just exported an ArcInfo format grid to generic ASCII raster file
format. The new file can be imported into ArcGIS or other GIS applications.
The file can be shared across file systems without danger of corruption. This
is frequently necessary if you are using another GIS that does not read the
ArcInfo grid format. Most image processing or GIS applications can import the
generic ASCII raster file. You could also use the generic binary raster format
in the same way.
Move and Export ArcGIS project: Package Toolset
Package toolset is the new way to pack all of your editing into one package (one file). As the zip file, you can esily pack/unpack in the ArcMAP.
The ESRI resource have a detail information abuot Package Toolset, click the LINK to read before you packing your data.
- Pack the Map and Files
- Extract the Package
Consolidate the Map Package
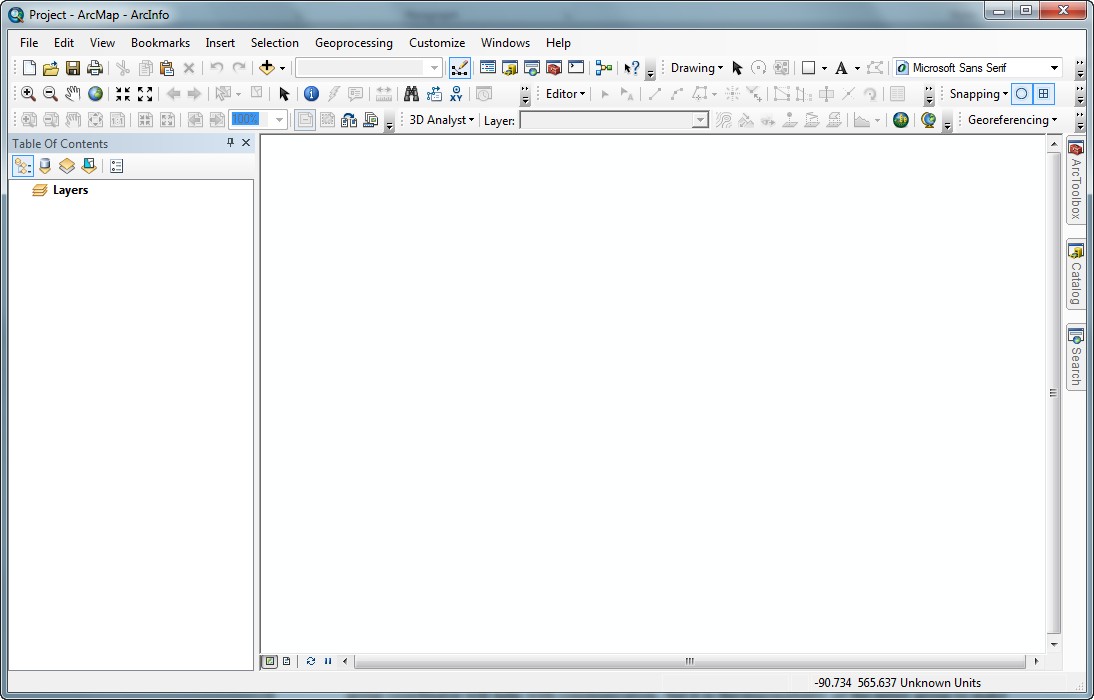
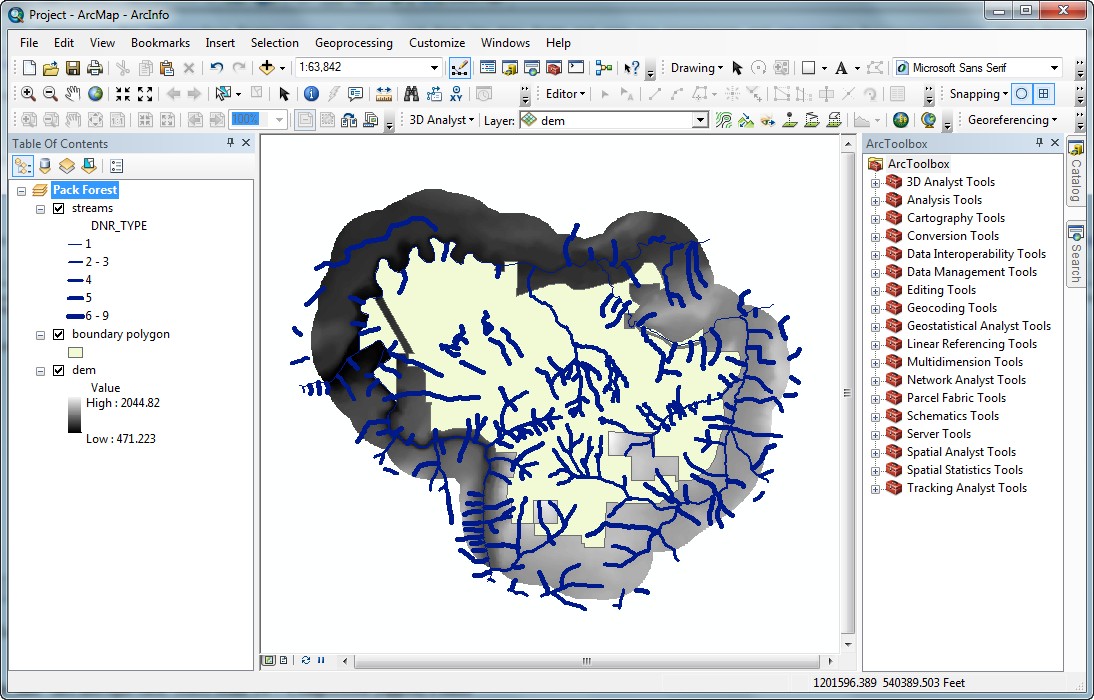
- Create a new map document, named Project.
- Add the DEM raster layer, Boundary coverage Layer (polygon), and Stream feature class from L drive (Learnt to read the file path from the following snapshot).
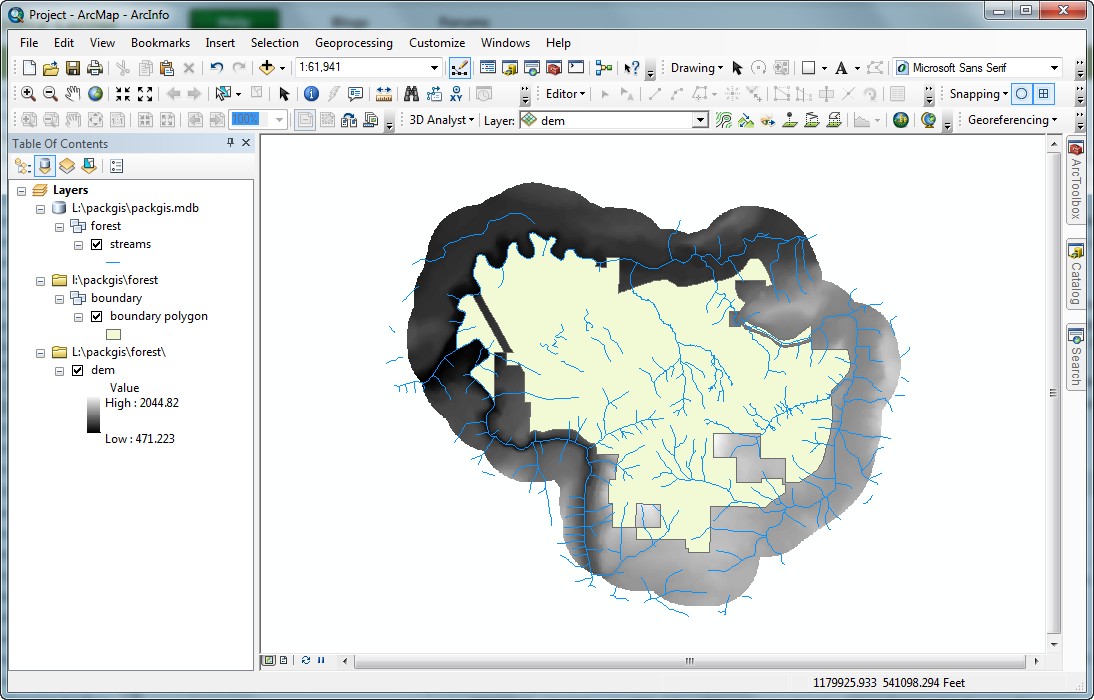
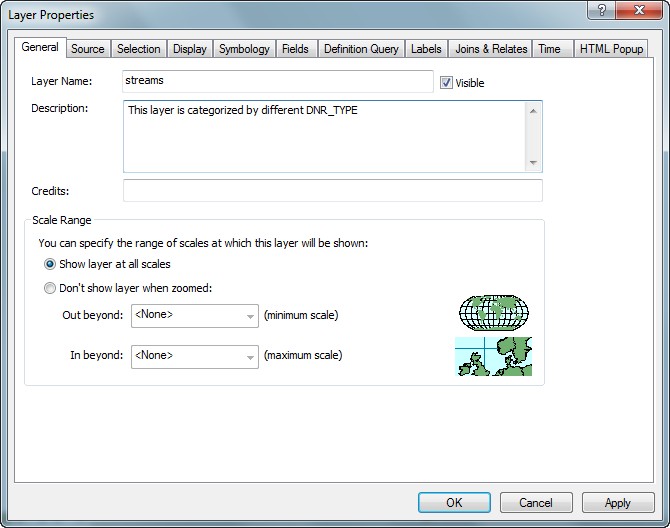
- Change the symbology of Stream Layer, using Graduate Symbol to display the field of DNR_TYPE
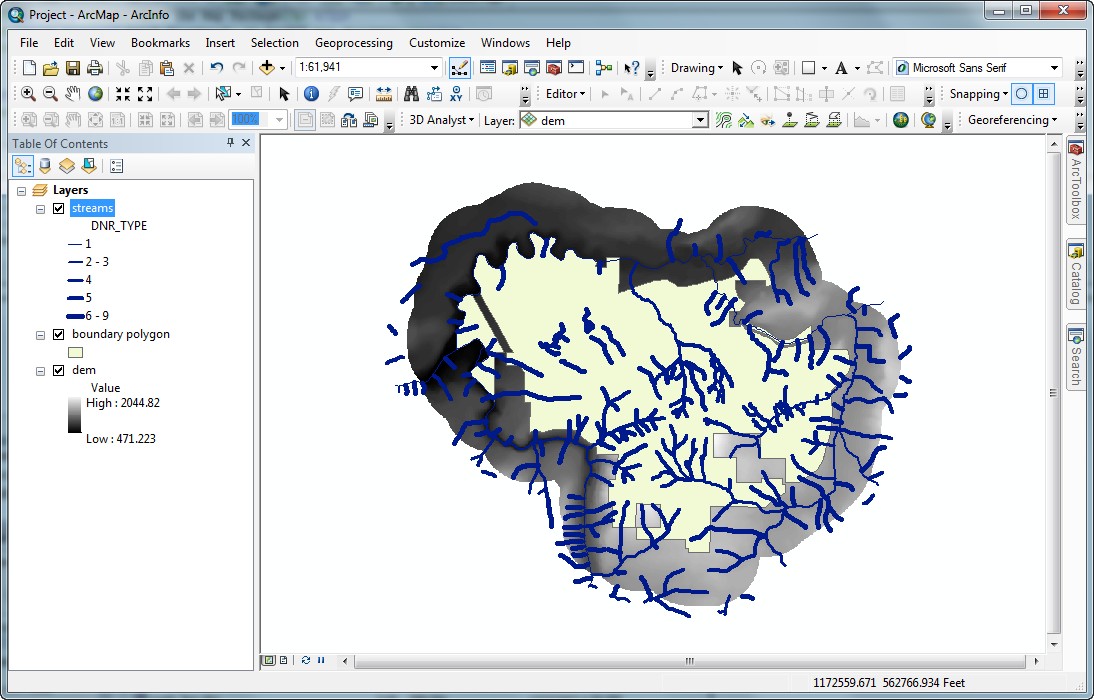
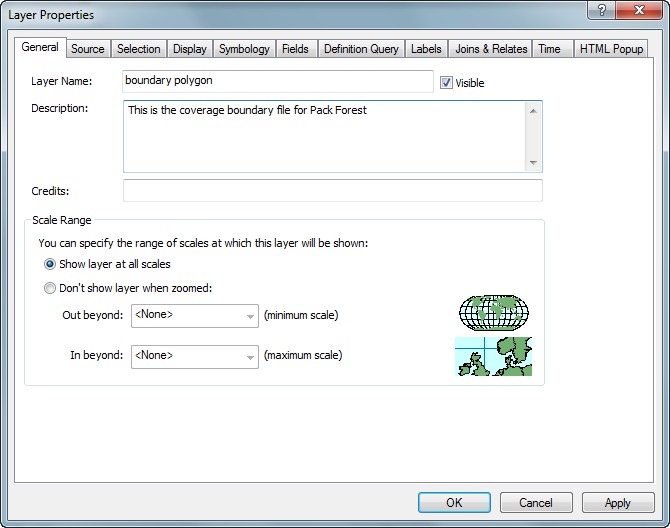
- Create the desciption for each layer (Streams, Boundary Polygon, and DEM, Boundary).

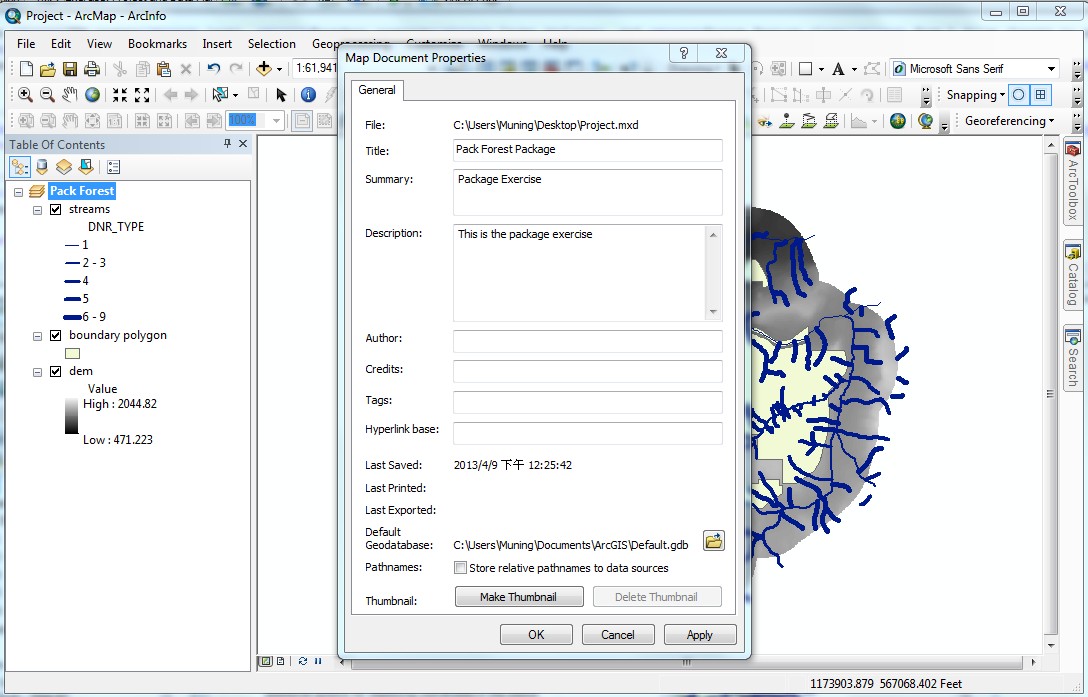
- Create the description for Data Frame (right click from the data frame and open its properties) and Map Documents (Click File, select Map Document Properties), and SAVE all edits.

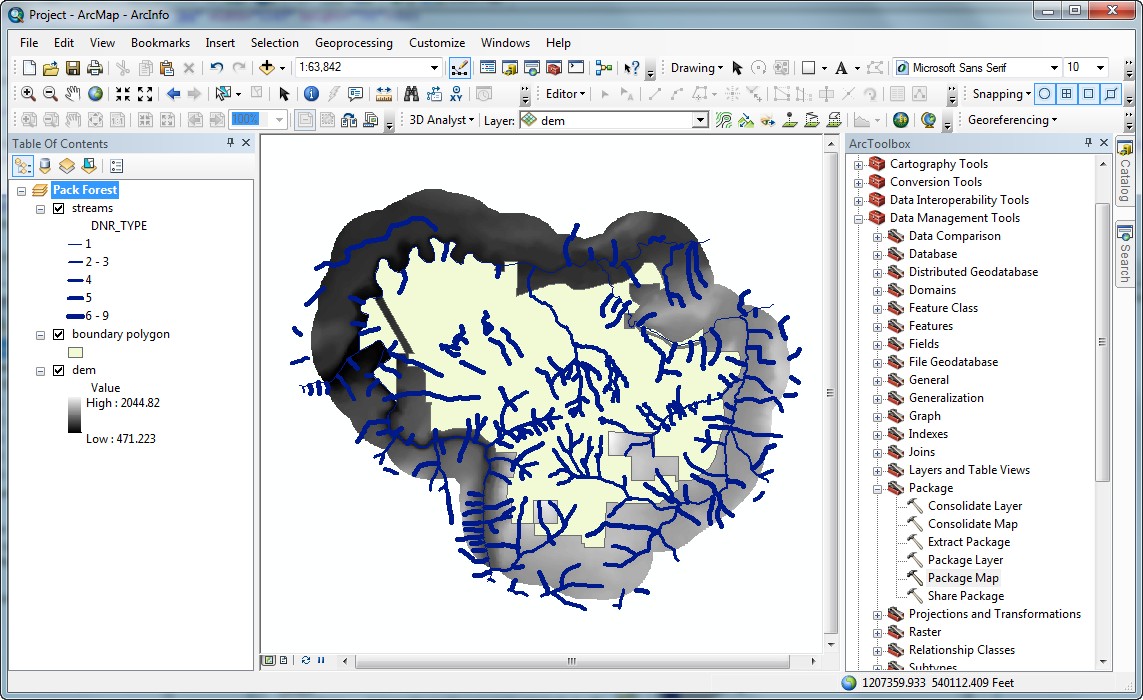
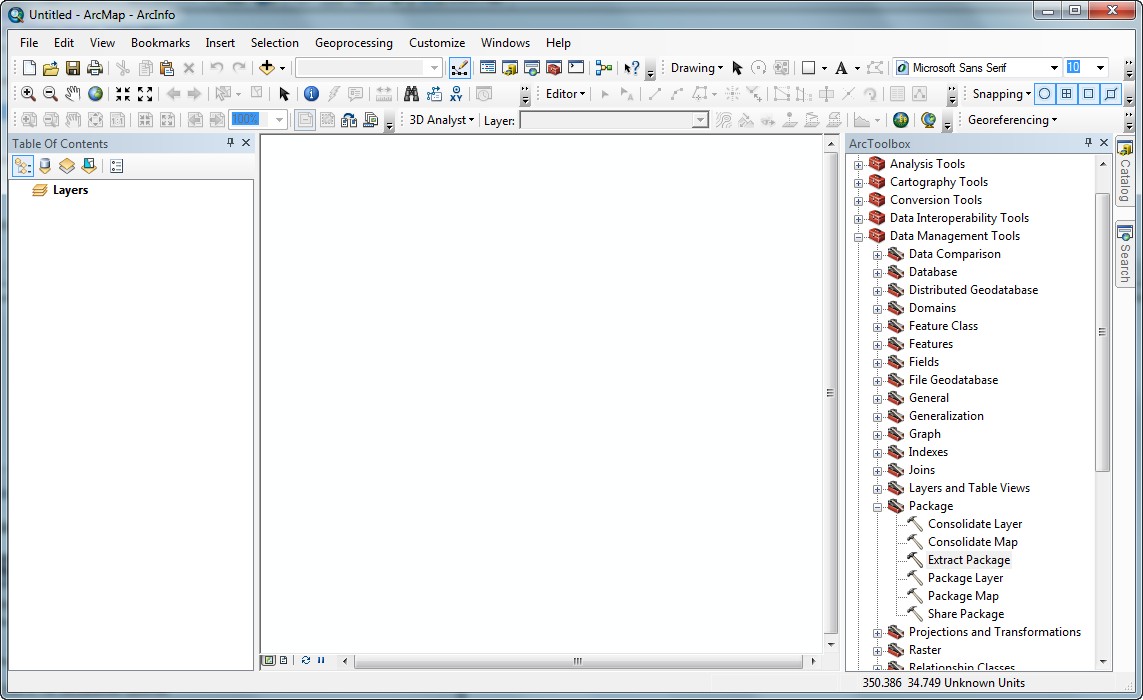
- Click the ArcToolbox icon and Open the ArcToolbox.
- In the Data Management Tools, Select the Package, and Choose Consolidate Map-- Data Management Tools -> Pakcage -> Package Map
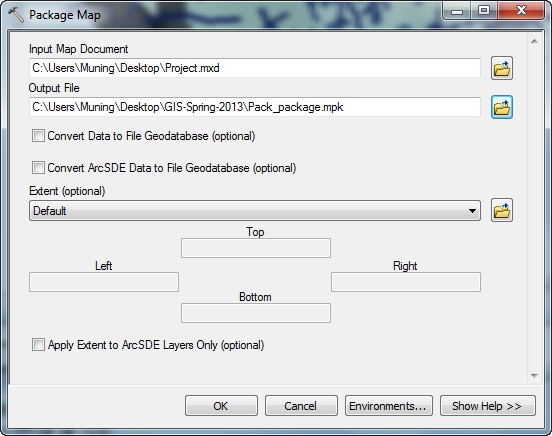
- In the Consolidate Map window, select the Project.mxd, and type in a new name for the package (In the example, I save into my C:\Users\Muning\Desktop\GIS-Spring-2013\Pack_package.mpk)
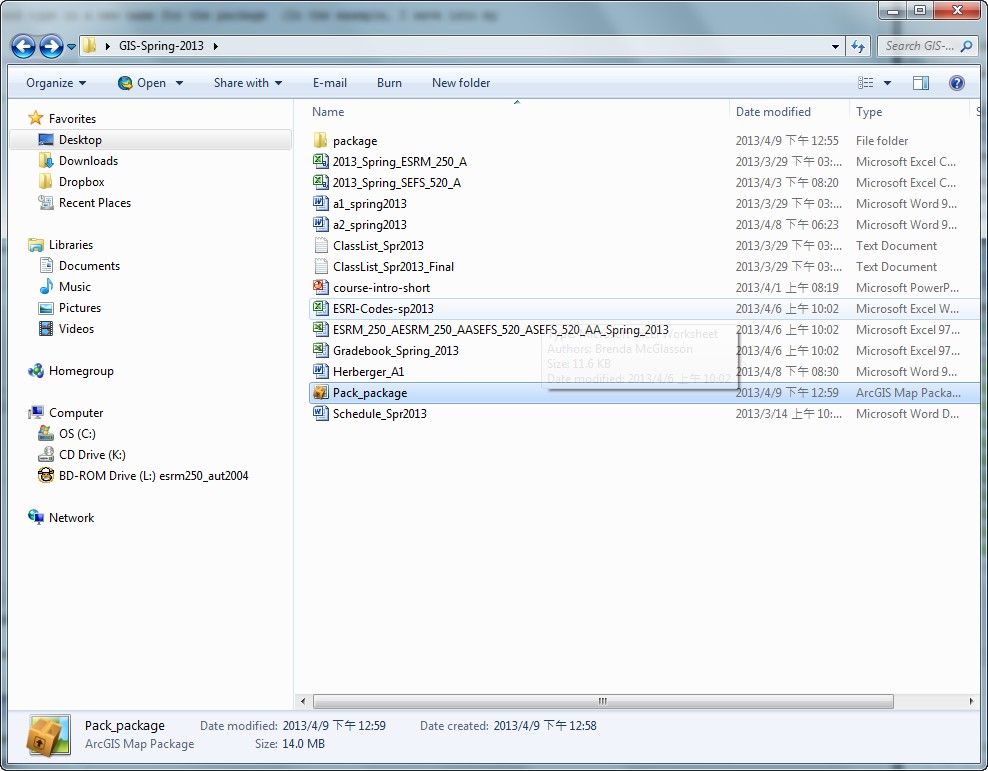
- After the process is finished, check back to the folder, and you will see a single package file named Pack_Package
Extract the Package
- Close and Open ArcMap again.
- Click the ArcToolbox icon and Open the ArcToolbox. Located to Data Management Tools -> Pakcage -> Extract Package
- Select the Pack_package file, and make a new folder (in the example, I used C:\Users\Muning\Desktop\GIS-Spring-2013\Pack_Forest) to store the map document and files.

- After extract the package, open the Project.mxd file from this new generated folder (Pack_Forest), you will see the whole map document and files were moved to the new space.

REMEMBER TO TAKE YOUR CD AND REMOVABLE DRIVE
WITH YOU!!!!
Return to top
 |
|
The University of Washington Spatial Technology, GIS, and Remote Sensing
Page is supported by the School
of Forest Resources
|
|
School of Forest Resources
|
 UW
Home
UW
Home