
Introduction to Geographic Information
Systems in Forest Resources |
Saving a document in Adobe Acrobat PDF Format
using Acrobat Distiller
Overview:
This describes how to "publish" an Adobe Acrobat PDF (Portable Document
Format) document using Adobe Acrobat Distiller.
PDF files can be created on any machine that has Adobe Acrobat PDF Distiller
installed. PDF files can be opened on any machine that has Adobe Acrobat Reader
installed. Ask the computer lab helpers if Acrobat PDF Distiller is installed
before you attempt to create PDF files.
Almost any document can be saved in PDF Format.
The following example uses a Microsoft Word document as the source.
****Use proper naming convention of your files - the following steps are for guidance only.
- Make sure the computer you are using has PDF Distiller installed.
- Make sure you have saved your document.
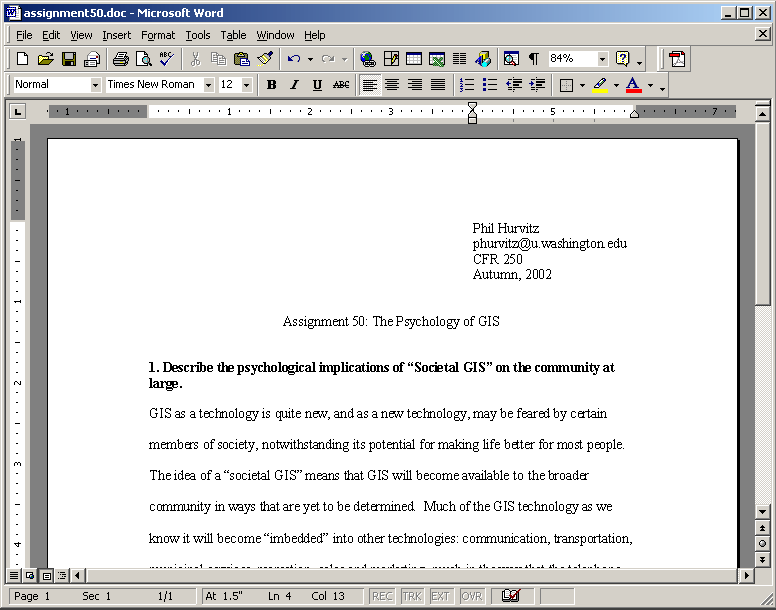
- From the File menu, select Print.
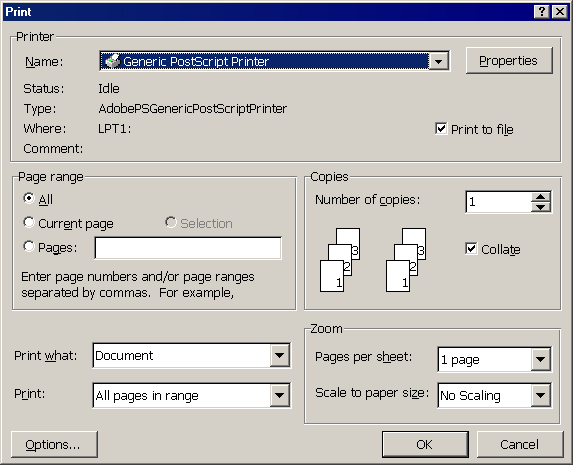
- The Print dialog will open.
- Select any PostScript printer as the Printer Name. In this example,
I have a generic PostScript printer driver, but any PostScript printer
will work.
If you are using the CRC in Mary Gates Hall, use
the color printer.
- MAKE SURE AND CHECK THE BOX FOR PRINT TO FILE or you will print
a hardcopy, which is not what you want to do.
- Click the OK button.
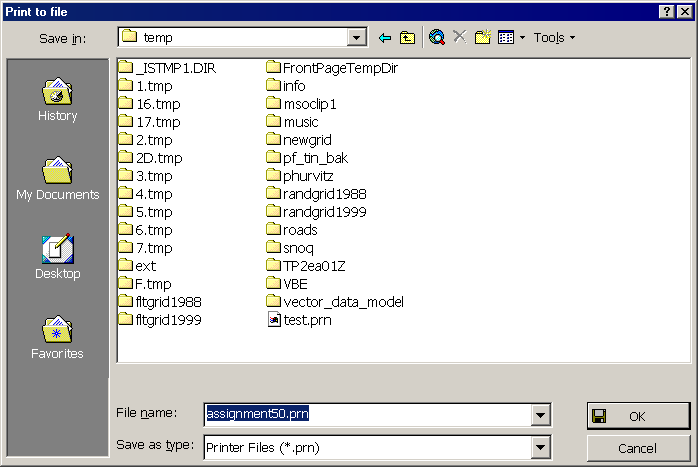
- You will be prompted for where to save the file. In this case, save the
file anywhere on the file system (I am using C:\temp, but you could
use any directory, or you could use your removable drive). The reason it does not
matter where you save the file is because it is a temporary intermediate file
that can be deleted later.
Save the file with a name you can remember, and use the .prn filename
extension. In this example, my intermediate file is called assignment50.prn.
- Open Acrobat Distiller. It is most likely on the Start menu under Adobe
or Acrobat.
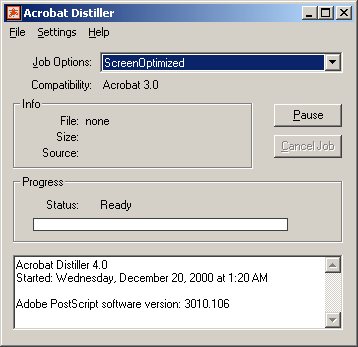
- Before you proceed, from the menu, select Settings > Job Options and
then click on the Compression tab. Turn off all Compression check boxes. This
will make the images in your PDF files clearly viewable.
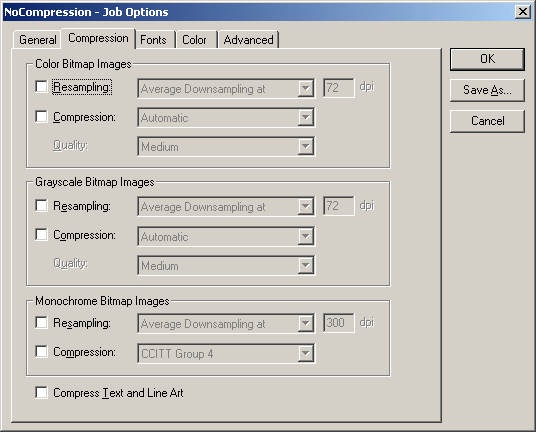
Click OK.
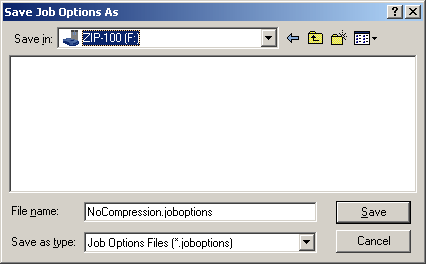
- You will be asked what you want to save the Job Options as. Use any description.
I suggest saving the settings on your removable drive as NoCompression.joboptions.
If you attempt to save the job options in the default directory, you may not
be able to save these options.
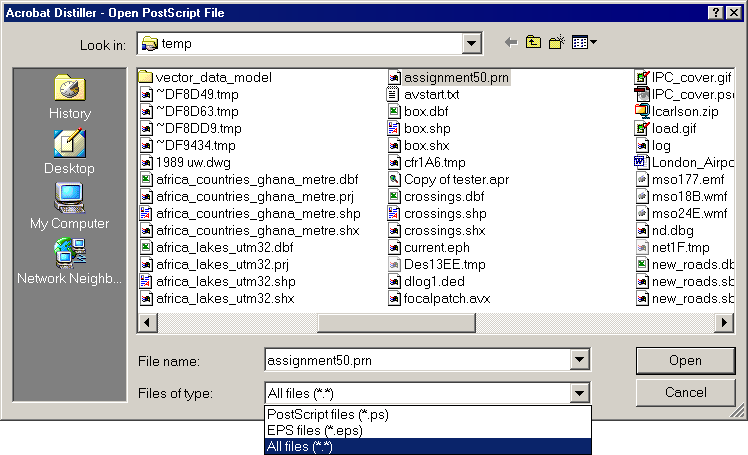
- From the File menu, select Open. Navigate to where you saved your .prn
file. Make sure and select All Files (*.*) from the Files of Type:
pulldown. Once you have found your .prn file, select it and click the
Open button.
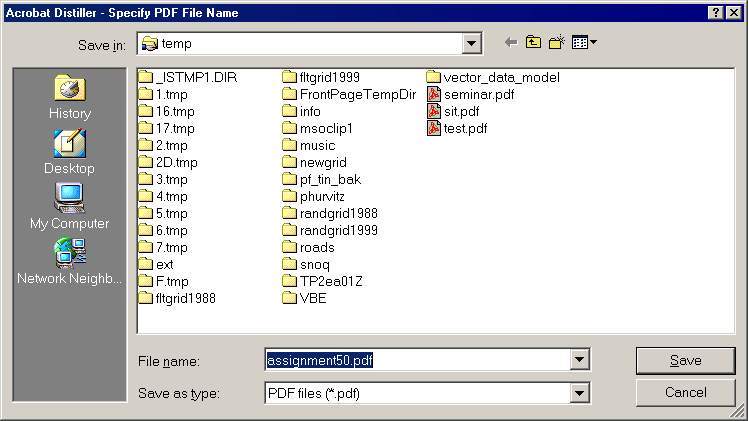
- Next you will be prompted for where you want to save the .pdf file. This
is the important file, so navigate to a place where the file will be safe,
and give the file a descriptive name.
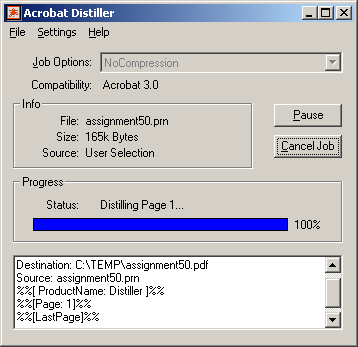
- Click the OK button. You will see a progress indicator as the .prn
file is "ripped" into a .pdf file.
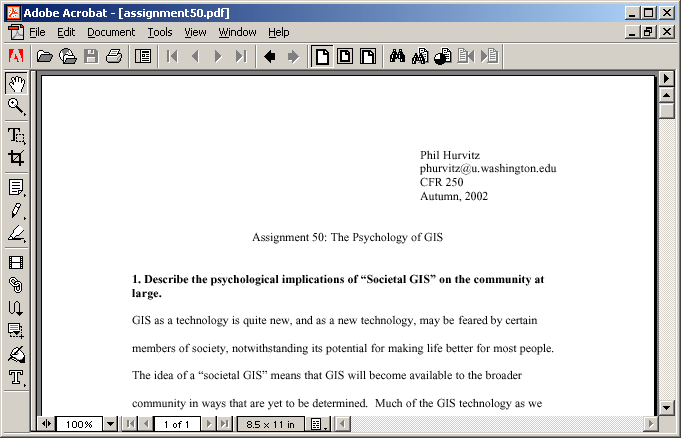
- Once the file is saved, you should be able to open it by double-clicking
in the Windows Explorer. The PDF document should look almost exactly as the
source document. Always check that your PDF file looks like it should. If
you have images, make sure to zoom in to check that they are visible.
- If you are satisfied with the quality of your PDF file, you can delete the
.prn file that you created previously (this can be a very large file,
and can take up quite a lot of space on your removable drive.
- Zip the pdf file so it takes
up less space.
- Upolad your assignment to the Catalyst E-submit page.
Return to top

|
|
The University of Washington Spatial Technology, GIS, and Remote Sensing
Page is supported by the School
of Forest Resources
|
|
School of Forest Resources
|


