| XNA Game-Themed CS1 Examples (XGC1) | |
|
Release 3.0 (XNA V4) |
|
Reference: This is the sixth tutorial on how to work with the XNACS1Lib library. It is assumed you have read and understand the previous five tutorials:
Goals : This tutorial concentrates on describing how to work with the particle emitter by:
1. Obtain the example code

|
2. The Source Code Files/Structure
Take a look at the ExampleProgram folder that you have unzipped and you will see a structure identical to that of the previous tutorials.
3. The Solution Explorer:
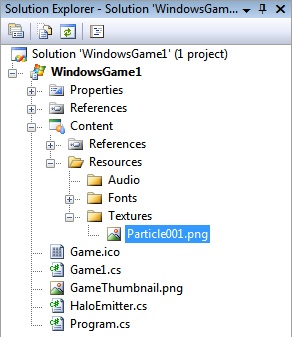
Now double click on the
*.sln
file in the
ExampleProgram
folder to start the
project in the IDE. Notice the structure of the
SolutionExplorer
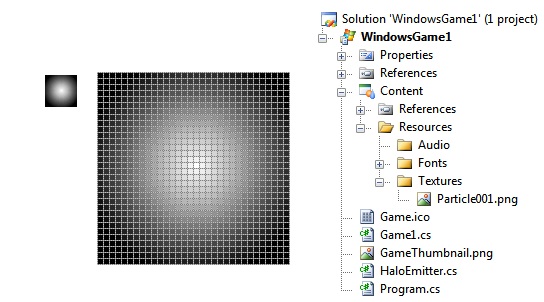
follows the source code folder structure we have examined:

|

|
4. Examine the Predefined Emitters:
We are finally ready to examine our source code for predefined emitters. In this case we will be using the FireEmitter. The constructors arguments are:|
public
class Game1 :
XNACS1Base { XNACS1ParticleEmitter.FireEmitter campFire; protected override void InitializeWorld() { World.SetBackgroundColor(Color.Black); campFire = new XNACS1ParticleEmitter.FireEmitter(new Vector2(20, 10), 30, .5f, "Particle001", Color.OrangeRed, 20, 3, Vector2.One); campFire.ParticlesPerEmit = 5; } |
The contructors arguments are pretty straightforward.
You may also notice the line of code, "campFire.ParticlesPerEmit = 5;" What this line of code does, is make it so that every time the particle emitter would emit a single particle, it instead emits five. This gives the fire a fuller look. Try experimenting with this as well.
There are three predefinined emitters that come with the XNACS1Lib. These are the Explode Emitter, Fire Emitter, and the Tail Emitter. Experimenting with all three of these is a good way to practice for creating your own emitters.
5. Inheriting from the Particle Emitter:
Unfortunately, inheriting from the Particle Emitter to define your own particle effects can be difficult. This is no reason not to try however. Most of the time you won't end up with what you had originally wanted, but you usually do end up with something pretty cool.
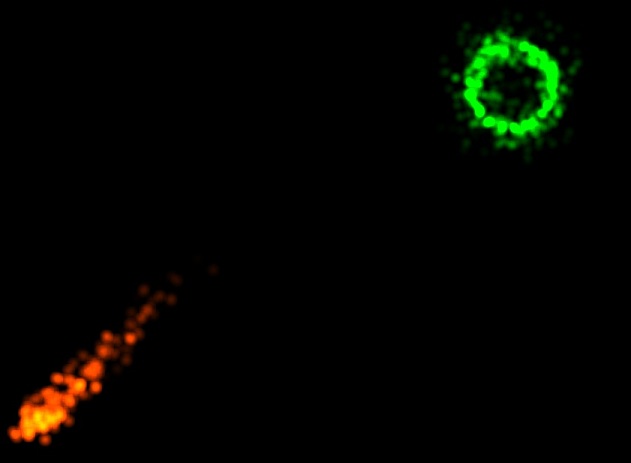
For this example we are going to develop a particle emitter that creates a sort of halo effect, the green ring when you run the .exe. The halo is going to be designed to only emit when the user calls the public method DrawHalo(). Now lets look at the source code.
|
public class
HaloEmitter :
XNACS1ParticleEmitter { public HaloEmitter(Vector2 center, int initialParticleLife, float particleSize, string tex, Color defaultColor, float radius) { } |
The first thing you need to do when inheriting from the Particle Emitter class is write the constructor. As you can see, the first five arguments are the default arguments for the Particle Emitter class, and are just passed right through. Next, you need to decide what other variables you want for the new emitter. Since this is a ring we decided that we would need a radius, and because we wanted it to have some sort of shimmer effect we thought a speed would be helpful as well. We decided to include radius as part of our constructor, because otherwise by default the halo wouldn't have a size. Inside of our constructor the first thing we did was set AutoEmitEnabled to false. This makes it so the emitter only emits when someone tells it to. Next we set the radius, and the speed. We decided that a good speed would be (the radius of the circle / the initialParticleLife).
|
protected override
void UpdateParticle(XNACS1Particle
particle) { } |
Second, we need to implement the abstract method UpdateParticle(). The UpdateParticle() method is how you define the behavior of each particle the emitter emits, after they have been created. For our emitter, we just want them to fade out, so all we do is calculate what percent of the InitialLife is remaining, and then making the particles more transparent the less life they have left.
|
protected
override void
NewParticle(XNACS1Particle newParticle) { float theta = XNACS1Base.RandomFloat(0, (float)(2 * Math.PI)); newParticle.CenterX += m_Radius * (float)Math.Cos(theta); newParticle.CenterY += m_Radius * (float)Math.Sin(theta); Vector2 randomVelocity = new Vector2(XNACS1Base.RandomFloat(-1, 1), XNACS1Base.RandomFloat(-1, 1)); randomVelocity *= m_Speed; newParticle.Velocity = randomVelocity; newParticle.ShouldTravel = true; } |
Next we overload the virtual method NewParticle(). The NewParticle() method is how you define the initial behavior of each particle the emitter emits. For our emitter, we wanted to make a halo. This ment we needed an angle to determine where the particle would start, and a direction the particle would travel. Using the XNACS1Base.RandomFloat sounded like a good idea, so we used that to get the starting location in radians, and then used it to get a direction. We then updated the new particle's center location (starting location) and its velocity, and set ShouldTravel to true, which makes the particles move by themselves.
|
public void
DrawHalo(int numParticles) { } |
Finally we created our own method for emitting particles. We take in the number of particles we want to emit, and then emit that many.
To test To test out our new Particle Emitter we can use the following code.
|
public class
Game1 :
XNACS1Base { HaloEmitter halo; protected override void InitializeWorld() { World.SetBackgroundColor(Color.Black); halo = new HaloEmitter(new Vector2(55, 35), 15, .4f, "Particle001", Color.Green, 3); } protected override void UpdateWorld() { halo.DrawHalo(30); } } |
The best way to develop your skill at creating your own particle effects is to create your own, and now you have the tools you need to start. Good luck!
| Kelvin Sung Computing and Software Systems University of Washington, Bothell ksung@u.washington.edu |
Michael Panitz Business And Information Technology Cascadia Community College mpanitz@cascadia.eduu |

|
This work is supported in part by a grant from Microsoft Research under the Computer Gaming Curriculum in Computer Science RFP, Award Number 15871 and 16531. |