TAPESTRY: The Art of Representation and Abstraction
SketchUp + Kerkythea: Animation
SketchUp Animations
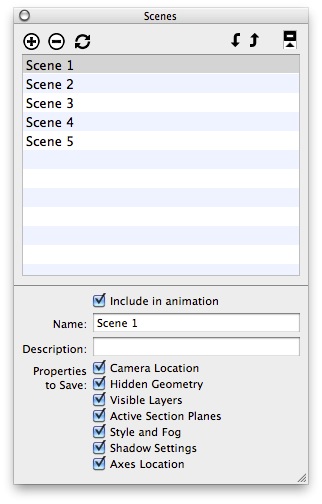
In SketchUp saved camera info (which includes more than just station point and focal point) is called a "scene". If your model has scenes defined, you will see a series of clickable buttons across the top of the model window, as shown below left. Click them to restore the saved view conditions.


You can also use the "Scenes" window to view, add, delete and reorder scenes. Open that window with "Window > Scenes".
You can create scenes by clicking on the circled-plus-sign in the upper left of the Scenes window, by using "View > Animation > Add scene" or it's keyboard equivalent.
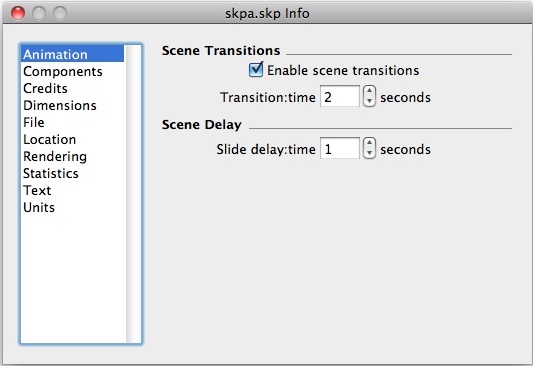
 You play an animation using "View > Animation > Play". The animation is created according to settings in the Model Info dialog shown at left and accessed via "Window > Model Info". If Enable scene transitions is checked, in-between frames are created by interpolating between scenes. The number of frames in the interpolation is controlled by the Transition: time value. At the end of each scene-to-scene transition, the camera dwells on a scene for the amount of time specified in the Slide delay:time.
Pure SketchUp Animations
Once you've defined your animation, you can render it with SketchUp itself by selecting "File > Export > Animation ...". In the export dialog you'll be able to select the format (.mov will get you a QuickTime movie), and (using the "Expert" settings within the "Options" dialog) the codec, the frame size, the frame rate, etc. Of course, you can't employ any rendering features that SketchUp doesn't usually provide (fancy textures, multiple lights, etc.) For those, you need Kerkythea.
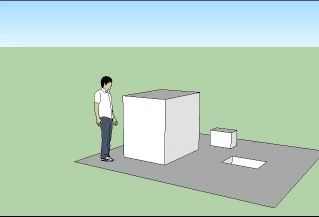
Here's a couple of sample animations. Both are 122 frames, 320x240 pixels. The file on the left was compressed as "Photo JPG" and is 1.1MB. The one on the right is "H.264" and only 414k, or about 40% of the size of the Photo JPG file.
Notes on SketchUp Animations
SketchUp lets you animate the camera, the sun, and (in theory) the "face me" components. That's it. No geometrical changes during the animation (moving or growing geometry, moving cars, etc). No texture changes (no live TV screens). Those are limitations, but when you're doing an animation about a building, most of it doesn't need to move.
A Helpful Tutorial on Kerkythea Animations
Tutorial on SKP+KT Animation for Architects
Notes on the Tutorial
- Set your SketchUp animation preferences ("View > Animation > Settings") to have no "Scene delay" or you will find that the finished Kerkythea animation includes the pauses at each scene boundary.
- I recommend you save the SKP model to a new folder to start the process. Let's say you call the folder (animation) and let's say you call the file (model). So folder (animation) contains file (model).skp at this point.
- When you're ready, first use "Plugins > Kerkythea Exporter > Export Model" (geometry & textures). This will create (model).xml in your (animation) folder. Open it in Kerkythea. Maybe render a frame and make sure the render-settings are what you want.
- Now use the plugin to Export the Animation Path. DO NOT ask for "face me" component animation (or, go ahead and try it and if your export fails, try again without it). Same for sun/light motions. This should create a (model).kst file in the (animation) folder. It will also create an "Anim_(model)" folder, containing many .xml files sequentially numbered 0000.xml, 0001.xml, and so on. These describe how each frame is rendered.
- The exporter will ask if you want to open/generate the animation in Kerkythea. DON'T (it tends to open a new Kerkythea window, without a model, and render blank frames -- no harm, but no progress either). Instead, bring the Kerkythea window to the front and pick "File > RunScript..." and pick the (model).kst scrpt file that you saved a second ago. This should begin grinding through the individual frame, creating a 0000.jpg 0001.jpg (etc) in the Anim_(model) folder. You can open one or two of the finished frames and check that (a) it's rendering with the right settings, (b) it's the right dimensions, and (c) if you compare a frames, you ought to be able to see changes between them. If all is well, relax and let it render.
- When it's all done, you'll need to put the individual frames together to make a movie file. There are expensive ways to do this, and cheap ones. One way, requiring QuickTime Pro (available on the Macintosh computers in the Digital Commons--use QT Player 7 located in the Applications > Utilities folder), is to "Open Image Sequence...", pick 0000.jpg, set the frame rate, view the animation and save-as (model).mov (or whatever) to make a quicktime movie out of it. This does require the QT-7 player, so it may not be an option for you (or come talk to me). There are other ways to do it, including using Adobe Premiere, which we'll be looking at soon, but that's a big (expensive) hammer for a fairly simple task.
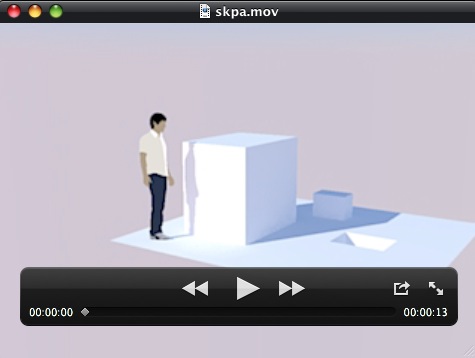
A Sample Kerkythea Movie

Saving Time on Long Animations
IF you have multiple computers available with Kerkythea on them, you can place a duplicate of your (animation) folder on each, edit the (model).kst text file to divide the work between computers, run the animation scripts on each, and then merge the folders of finished frames back together to make the final animation. If that sounds like something you might want to do, read on ...
Each of your rendering machines will need the same setup, including any special textures, etc.. Each will need a copy of the (animation) folder, but each will need an edited copy of the animation script, which is in the (model).kst file. The (model).kst file itself is pretty simple. It looks something like this. The "messages" are script commands that Kerkythea executes and the general pattern is "merge a frame-definition (xml) file, render the frame, save the frame". If you keep the first few lines intact, you can delete groups of merge/render/save commands to avoid rendering those frames.
So, if you have two machines, you need two versions of the (model).kst file, one for each machine. If you're doing 200 frames in total, you could edit the first file to do frames 0 through 100, and modify the second file to do frame 0 plus frames 101 through 200. Put one script on machine "A" and one on machine "B" and follow the instructions above for running the script on each.
CAUTION!
If you are rendering in such a way that you are re-using light-cache or photon-map data from frame to frame, you may need to pre-render and save a complete photon-map prior to splitting the kst script file into parts.
Last updated: April, 2014

