TAPESTRY: The Art of Representation and Abstraction
form•Z Introduction
Window
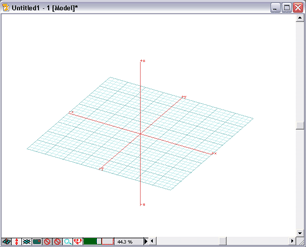 The form•Z window usually includes the axes and xy-plane grid shown here, though they can be turned off (see options in the Windows menu). Overlaid on this window will be a number of "floating palettes". These can be turned off and on individually (or hidden as a group) using the Palettes menu.
Along the bottom edge of the window are a number of important tools:
 Reference Planes selection between xy, yz, xz, and arbitrary reference planes.
 Perpendicular Switch interprets mouse input as being perpendicular to the reference plane, above or below the previous point (in contrast to being in or parallel to the reference plane.
 Grid-Snap Switch. Toggles between unchanged coordinates and coordinate input rounded off to specified grid intervals.
 Directional Snaps. Locks coordinate input interpretation to lines which are horizontal or vertical (plus a couple of others). Default is NONE.
Object Snaps. Interprets coordinate input in terms of existing data positions. Default is NONE.
 Pan & Zoom Tools. Use these to zoom in or out in various ways. Try holding down the option key with this one.
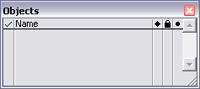
The Objects palette provides an alternate means of selecting data. Objects selected in the graphical display (by clicking on them) will be "checked" along the left-most column. Similarly, you can select or deselect data by clicking in that column next to the object's name. You can change the name by clicking on the existing name and then typing a new name.
To the right of the object's name are controls  , which permit you to modify some object attributes [ visible | locked | snapable ].
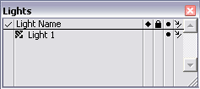
The Lights palette provides a means of controlling light sources. By double-clicking on the light-source name you can bring up the complete lights dialog box, but within the palette are  controls for [ visible | locked | shining | casts-shadows ].
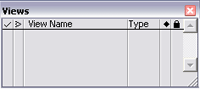
The Views palette lets you save any particular view setup with a name, and restore it with a mouse-click. To save a current viewing condition with a name, click in the
"name" column of the view palette, under the existing names. Type in the new name. Press return to complete the operation.
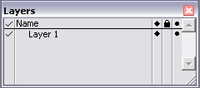
The Layers palette lets you assign portions of the model to named categories. This greatly facilitates management of the overall model, and can also help if you transfer data to a 2D CAD program or to a different modeling or rendering program. Layer options are identical to those for objects: [ visible | locked | snapable ].
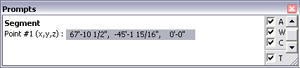
The Prompts palette is an important source of information during modeling operations. Here is where you can get a hint about what form•Z is expecting next. This is also where form•Z echoes keyboard input. Further, you can also control the interpretation of that input using the options along the right edge. The first check box selects between Absolute and Relative coordinates, the second between World (global) and Local coordinates, and the third between Cartesian and Polar (or Cylindrical) coordinates.
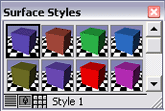
The term Surface Styles describes everything from simple color to complex textures in form•Z. Select from existing styles by clicking on them in this palette. Create new styles by clicking in empty space and responding appropriately to the prompts.
form•Z Toolbar
 The icon strip shown at left is form•Z's main tool menu. Notice that several items appear to be highlighted at the same time, some with a black background, some with teal. There is a reason for this multi-part display. Form•Z has an interface which you may find slightly confusing at first, but which is really quite powerful once you get used to it. Some of the confusion derives from form•Z's hierarchical approach to both data and commands: that is, the same tools can be applied at different levels in the hierarchy of data.
Thus, some menu items represent actual commands which create, select or change data, while others represent modifiers or option settings for those commands, determining the kind of data created or selected, or the kind of change applied. Black and white icons are for commands, teal and white, or magenta and white represent modifiers.
This "two-step" character means the program actually has a great many command options available through a fairly simple set of menu items, but it also means you have to keep track of what the modifier settings are, which will take a little getting used to. Let's look at a couple of examples:
Form Generation Options
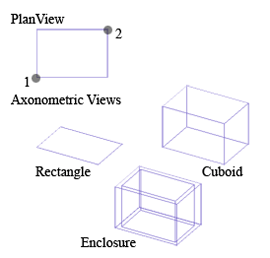 When you think about it, a rectangle drawn in plan view, by clicking on points 1 and 2 (as shown at right), might create any of the three shapes shown in the axonometric views. Rather than using different "tools" for these, form•Z permits you to create them all using just one tool, though you must pre-declare the kind of results you want. That is, the drawing tools must be pre-set for the kind of data desired.
The Object Generation options are shown below. They are accessed by clicking and holding the mouse button down on the first icon in the main tool bar. When the pop-out menu appears to the right, slide the cursor to the desired item and release the mouse button.
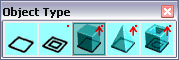
The single rectangle drawing tool (in the second row) can thus be modified to generate each of the different kinds of data shown at right (and a few more).
Topological Level
Notice the fourth item in the main menu, which says "Object". This setting displays the current topological level. It can be set to any of the options shown below.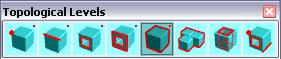
By changing this to different topological levels, you can change what the selection tool (the arrow) selects. In it's current setting one click on any part of an object will select the whole object.
If you wanted to select just one face of the object, you would first set the topological level to Face, then click on the selection tool, and then click on the face in question. (The dot in the upper right corner of this icon indicates that an option-click on this menu item will bring up a dialog box. In this case that dialog will offer the choice between selecting a face by clicking anywhere on the face, or by selecting any two edges of the face, a powerful feature and the only good way to select faces in wire frame view.]
Seeing Ghosts
In addition to the differences in user interface, form•Z takes a slightly different approach from many programs to the question of what to do with "used data". Once an operation is complete, there really isn't any more need for the "operands" (the parts that went into it). In form•Z, when you use a piece of data to generate additional data the "operand" data will generally be "ghosted" at the completion of the operation. This means it's "there", but not necessarily visible, selectable, etc. (there are ways to "resurrect" for further editing). Ghosted shapes are usually shown in light gray (if at all), and you can use "Clear all Ghosted" in the Edit menu to permanently remove them if desired.
UNDO, Undo, undo, undo
One of the really nice features in form•Z is an almost unlimited UNDO capability. You can back up through a series of edits and try again if they didn't work out. Try it.Last updated: April, 2014
