TAPESTRY: The Art of Representation and Abstraction
Whirlwind Premiere
Adobe Premiere is a program for editing and manipulating QuickTime movies. You may use it to organize a sequence of stills or animations, insert transitions, overlay titles or other graphics, and add sound. The final product is a QuickTime movie which you may then record to video tape, store on a disk or CD, or place on your web site.
The Premiere screen area is somewhat cluttered, as illustrated by the screen shot shown below, but each window has a specific purpose, and you will not usually need to have them all visible at the same time.
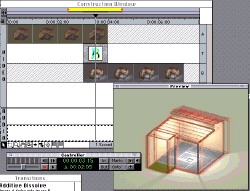
THE WINDOWS
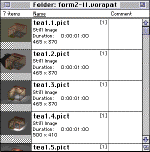 | Project Window This window displays a thumbnail and information about each separate media object in your project, whether that is a sound, a still image, or an animation. Objects must be added to the Project Window before they may be used in a composition, so this is usually the first stop. |
| Construction Window The Construction window displays a wealth of information about the project. The two video tracks are visible as horizontal gray bars at the top, labled "A" and "B" along the right edge. An object like a still image is placed in the composition by dragging it from the Project Window to the desired track in the Construction Window, and then stretching/shrinking it until the desired duration is achieved. A sequence of still images might be laid out by placing them alternately in the A-track and the B-track. The reason there are two is to permit them to overlap in time, and to permit the insertion of transitions into the overlap. | 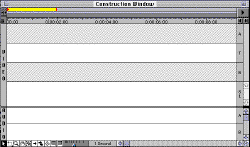
|
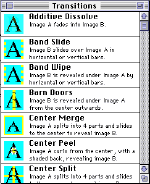 | Transitions Transitions describe the process of blending or shifting from one image to another. One of the "cutest" windows in Premiere, the Transitions menu displays the name and a thumbnail animation of each available. To place a transition, simply drag it from the window and drop it into the Transitions ("T") track in the Construction Window. If placed between two overlapping graphics, the transition will (1) size itself to perfectly fill the overlap, and (2) adopt the corect sense (A-to-B or B-to-A). Caution! one of the most common mistakes is to get the sense of the transition backwards, so that it transitions from A to B instead of B to A. Double-click the transition in the Construction Window to see or change the direction of transition.
|
 | Construction Window: Simple Layout This graphic illustrates a simple layout in which two still images have been placed in the Construction window with a one-second overlap during the fourth second of play. If you place the two stills first and add the transition later Premiere will automatically size the transition to cover the overlap period. Note that if a third still were to be added to this sequence, it would be placed in the A-track, and the transition would be from B to A, rather than from A to B as it is in this example.
|
| Construction Window: Details The yellow bar indicates the "work area". Analagous to a zoom window in a 2D drawing system, this indicates the area in time that we are currently working on. Move it by dragging it from the center. Resize it by clicking at either end and dragging. The black triangle and the vertical line mark the "Now" point. The light and dark gray stripe immediately beneath the yellow bar but only partly filling the light blue region, indicates the availability of preview files. Whenever Permiere is displaying a clip from a project it has to compute previews. When possible it saves these and makes a rough-cut clip from the previews. When preview files are not present, it may take significantly longer to generate the clip. | 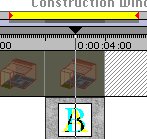
|
 | Preview Controller This window may sometimes appear at the bottom of the associated Preview Window, or separately, as shown in the initial screen shot above. Like the front panel of a VCR, it includes buttons to stop, play, rewind, fast forward, and so on. If you are viewing a preview of the project, the black triangle/line of the "Now" position will also be moving in the Construction Window. |
HINTS
- Premiere does NOT create a single project document containing all the data you will be working with. The Premiere project document references most of the graphics files. This means it keeps track of where they are on the disk, not their contents. If you move them or rename them after you have included them in the Premiere projejct, you will have problems.
- You will need to get maximum performance out of the computer system. You should make sure File Sharing is off. You may want to turn Virtual Memory off. Use the fastest disk on the computer to hold the project files. If you could defragment the hard disk, you would want to do that.
- Work exclusively off of the hard disk, not your ZIP disk. This means you will need to copy a big block of files from your floppy to the hard disk at the start of a session, and then copy them back at the end. If they are ALL IN THE SAME FOLDER, this will work MUCH more easily and you won't run into problems with the first hint.
- Collect all the material you expect to work with in one folder before beginning. If there is a very large amount of material, you might divide it into collections, each in it's own folder. These can be added to a project easily.
- Playback depends, in part, on the video hardware used for the playback. Thus, playback on the computer monitor may occur at a different rate than playback on the NTSC video monitor. Be sure to preview on this monitor.
- NTSC monitors (TVs) utilize "overscan" logic. That means the edge of the image is intentionally made to extend under the outer rim of the screen, where you cannot see it. Computer monitors, on the other hand, use "underscan" logic. The edge of the image is held away from the edge of the screen. If you position text or grapphics near the edge of the screen, don't be suprized if it is obstructed when viewed on your TV at home.
- NTSC monitors do not have the same color ranges as computer monitors. Certain colors, notably saturated primaries like "RED", cause undesirable blurring in the TV image and should be avoided.
- When preparing to record, don't forget to include several seconds of lead-in and trailer, so that your video content isn't too close to the previous project, and so there is ample time at the end to depress the STOP button on the recorder before the actual end of the playback.
Last updated: April, 2014
