TAPESTRY: The Art of Representation and Abstraction
Textures - Defining - VRay
What's this about?
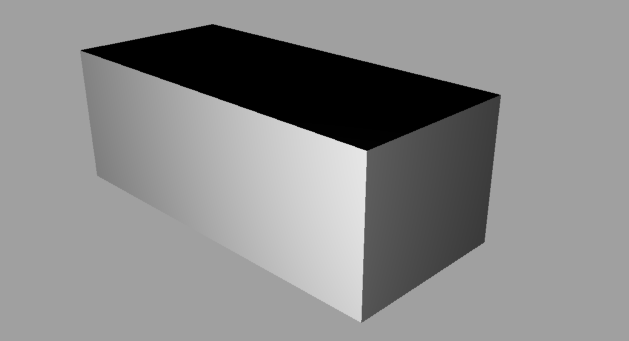
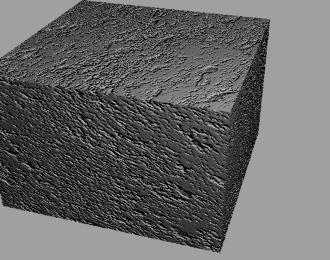
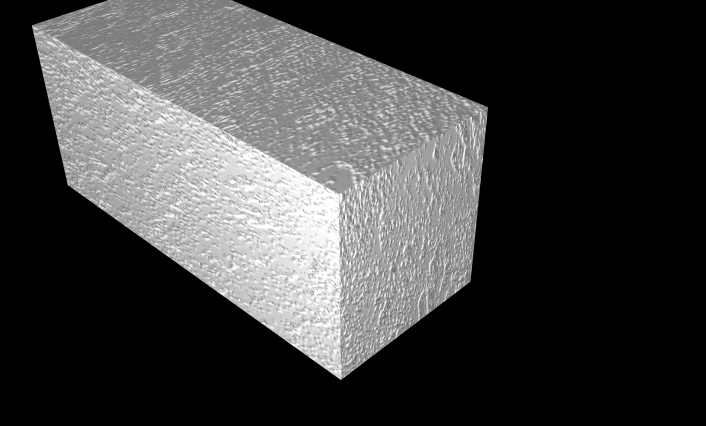
Geometry made in the modeler is pure, smooth, monochrome, as shown at left. Geometry in the real world is often multi-hued and bumpy, like the image on the right. Turning the simple gray prism into the bumpy concrete block is done by changing the way the surface is rendered, not by changing the geometry. The data attribute we want to change is called "Material" or "Texture" in most programs.
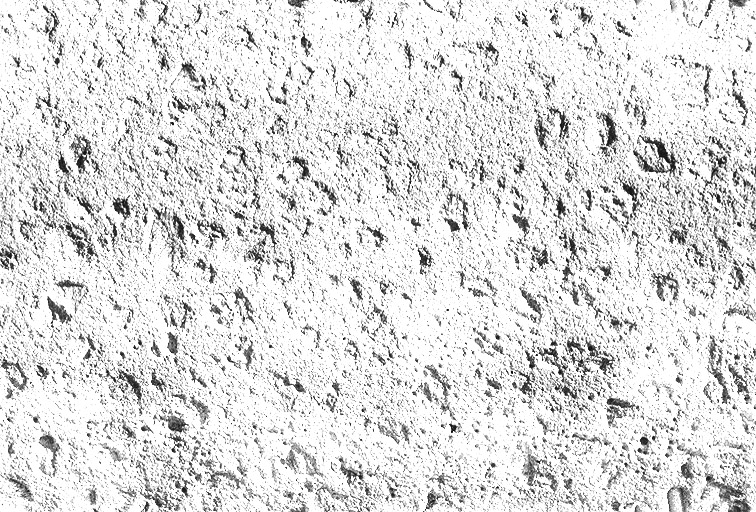
Each material has a variety of contributing characteristics, including color, transparency, and bumpiness. Not all materials customize all of these. For example, to make the rough concrete shown here, we use a uniform color (gray), and a "bump map" texture provided by a gray-scale image (below). On the rest of this page we'll see how to do that.
Two Ways to Make a New V-Ray Material
Starting from the menus
- Make sure V-Ray is the current renderer
- From the application menus, pick Render
- From the Render pull-down menu, pick Current Renderer
- From the fly-out menu, pick V-Ray for Rhino
- From the application menus, pick V-Ray
- From the V-Ray pull-down menu, pick Material Editor
This will launch the Material Editor.
- In the dialog box, use the Right Mouse Button (RMB) to click on "Default_VRay_Material".
- From the pop-up, pick "Duplicate"
Starting with Geometry...
- Make sure V-Ray is the current renderer (as above).
- Select a portion of your model.
- Examine or call up the Object Properties dialog.

- Activate the "Material" panel with the pop-up at the top of the dialog
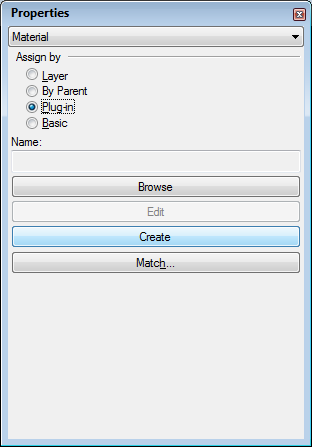
- Set the material type to "Plug-in" in order to define a V-Ray material.
- From the bottom of the dialog, pick "Create"
This will launch the Material Editor.
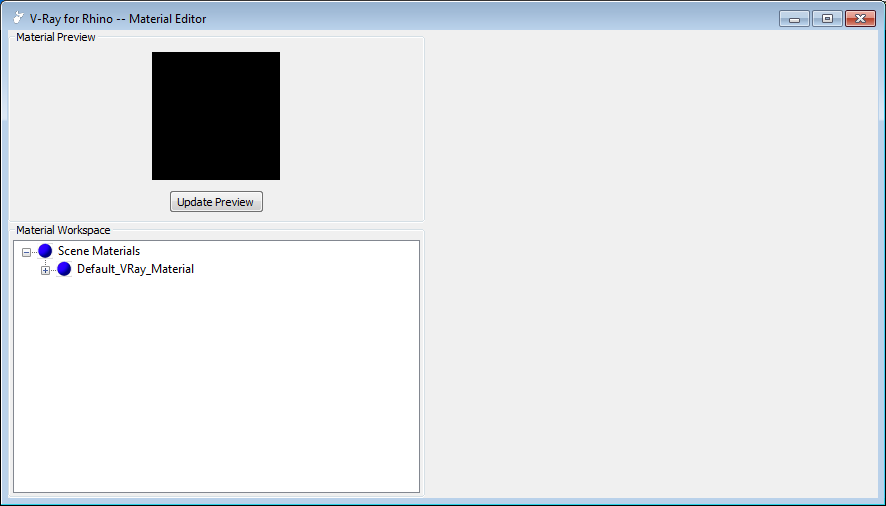
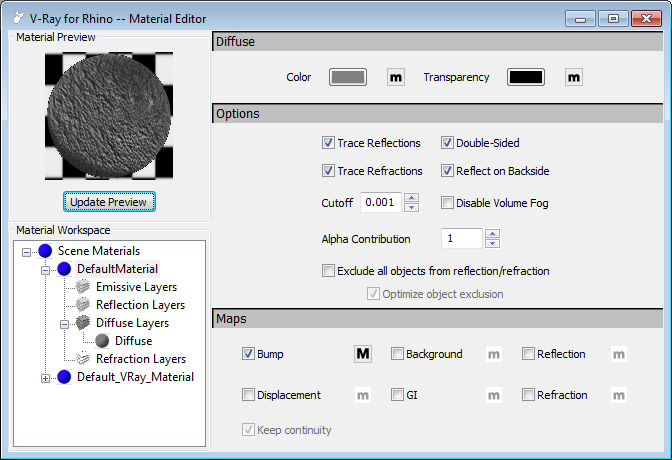
The V-Ray Material Editor
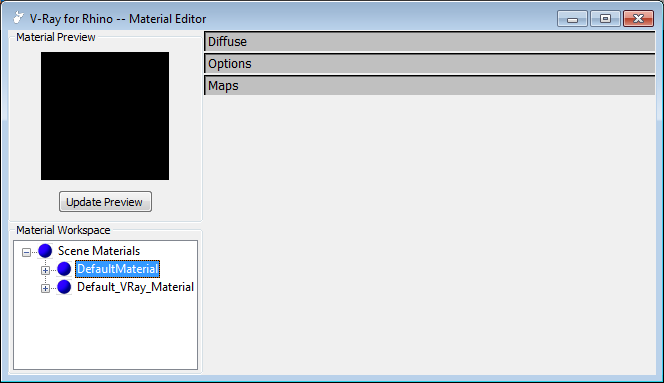
This is the way a new, undefined material appears in the V-Ray material editor. On the left, we see a list of all materials defined in the project, one of which is selected. Details of the selected material appear on the right (divided into categories), and in the Material Workspace (if expanded by clicking on the "[+]").
- In the Material Workspace (lower-left corner), left click on the material you wish to edit.
- You should probably right-click the name of the material to select "Rename" from the pop-up and give it a new name.
- You can expand the material properties tabs by clicking on the names of the data categories ("Diffuse", etc.)
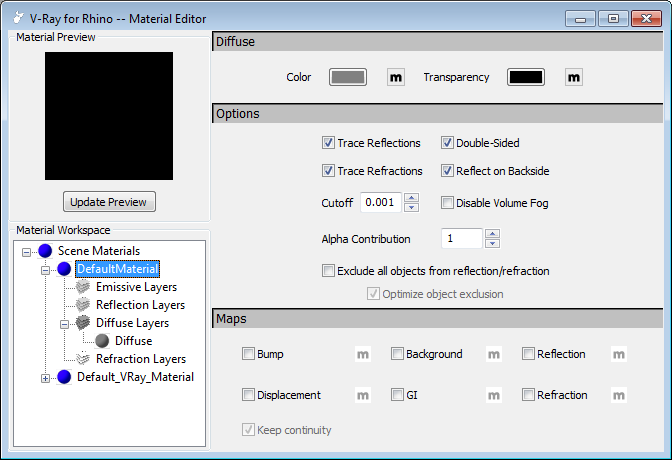
- You can set the color in the "Diffuse" area.
- Click the colored rectangle next to the word "Color". This shows the current color.
- Use the resulting color-picker to to pick the desired color (gray in this case).
- You also need to add a "Bump Map" to your material
- In the "Maps" portion of the material definition, click the check-box next to "Bump"
- Now click the
 slightly to the right. This indicates that you want to define a bump "map"
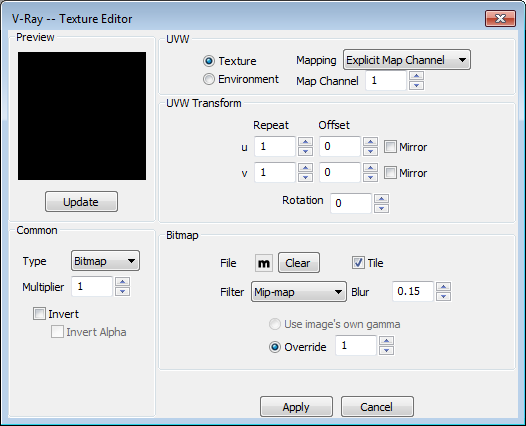
- On the left side of the dialog we've selected Bitmap as the "Type" of map. This means we want to use an image to specify the amount of bumpiness. Just to the right and below the center of the dialog, we've clicked the and selected the black and white image shown at the top of this page. Note how the gray lower-case "m" has been replaced by a black upper-case one--that means a file has been specified. The "Clear" button can be used to discard the image.
- With the color and bump map defined, we can click the "Update Preview" button (upper left of the dialog box) to check out how our material definition is coming along. IF it looks OK, click Apply to save the changes.
Sharing Texture Data Between V-Ray and Rhino
BOTH V-Ray and Rhino allow you to define new materials. BOTH allow those materials to include bump-maps. In the Object Properties dialog, when you select "Plug-in" or "Basic" you are selecting whether the texture definition will be a Rhino (Basic) texture or a V-Ray (plug-in) texture. Geometry in your model may have BOTH a Basic and a Plug-in material definition associated with it. The material definition used will depend on the Renderer selected for a rendering. However, when a material is defined in only ONE environment (Basic or Plug-in), the software will attempt to access and use the "other" definition when rendering. Often this will work just fine, but sometimes it will not work well.
The following images are rendered from the same Rhino model and V-Ray material, using Rhino render, Flamingo nXt, and V-Ray. They don't look exactly the same.
Flamingo nXt
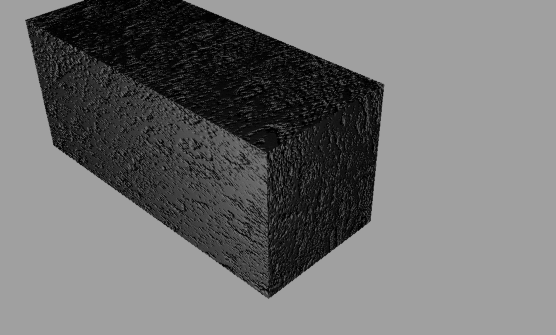
Rhino render
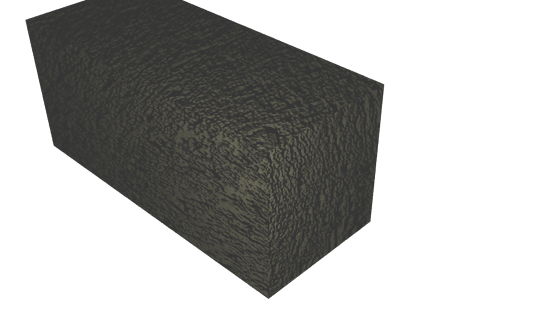
V-Ray for Rhino
Related Video Tutorials
- CBE tutorial: The VRay Material Editor Overview
- CBE tutorial: Making a custom glass texture
- CBE tutorial: Adding a Wood floor with a bump map
- CBE tutorial: Making a drywall texture (aka Sheetrock) using procedural "noise" as a bump map.
- CBE tutorial: Custom Photoshop Texture (part 1)
- CBE tutorial: Custom Photoshop Texture (part 2)
- CBE tutorial: Custom VRay materials - Intro
- CBE tutorial: Custom VRay materials - BRDF
Last updated: November, 2015
