THE WINDOWS
Some of these screen-shots were taken from an earlier version of Premiere. The overall screen arrangement and colors have changed, but these are mostly the same as in that earlier version. You should be able to follow the steps illustrated regardless.
 | Project Window
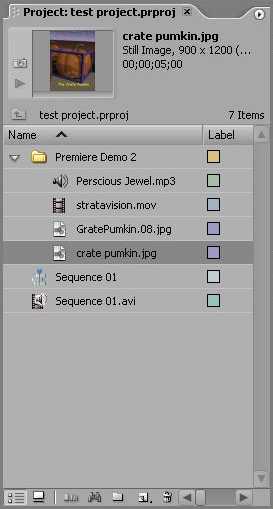
This window displays a thumbnail and information about each separate media object in your project, whether that is a sound, a still image, or an animation. Objects must be added to the Project Window before they may be used in a composition, so this is usually the first stop.
To add files to the project, use File > Import. You may add individual files or entire folders of files (as shown here). |
Timeline Window
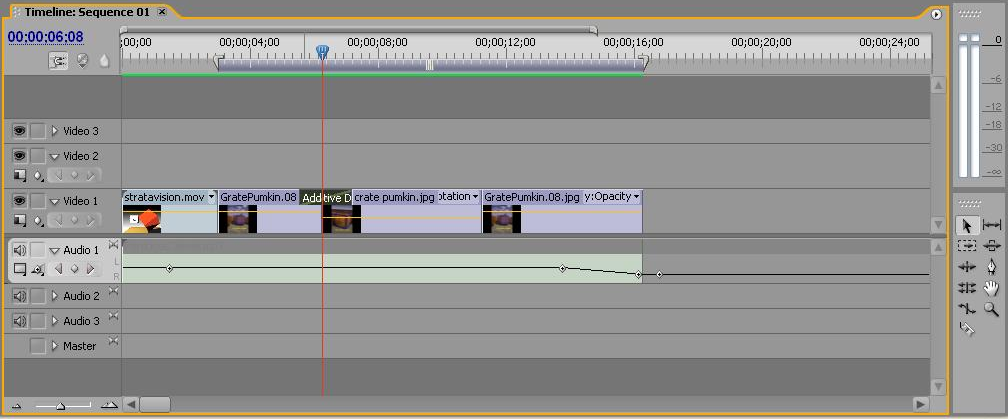
The Timeline or construction window displays a wealth of information about the project. By default, the project has three video tracks and threee audio tracks. Think of the contents of the video tracks as being "layers"--content in the upper layers will obscure content in the lower layers unless it is transparent. Since most of your still images are fully rendered scenes, you won't be using the 2nd and 3rd video tracks much (but you may use them for titles). A media object such as a still image is placed into the composition by dragging it from the Project Window to the desired track in the Timeline Window, and then stretching/shrinking it (click and drag on it's ends) until the desired duration is achieved.
|
|
|
| Constructing a Simple Layout
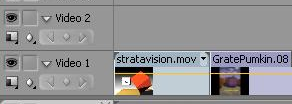
A sequence of still images can be laid out by dragging them onto the Video 1 track and "stacking" them left to right. As you add each image, you will find that it has a default display time, and you can drag it to the left until it "bumps into" the existing content.
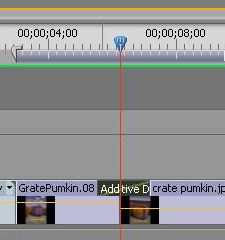
This graphic illustrates a simple layout in which two still images have been placed in the timeline window.
|
Construction Window: Details
The gray bar and it's "bookends"  indicate the "work area". Analagous to a zoom window in a 2D drawing system, this indicates the area in time that we are currently working on. Move it by dragging it from the center. Resize it by clicking at either end and dragging. indicate the "work area". Analagous to a zoom window in a 2D drawing system, this indicates the area in time that we are currently working on. Move it by dragging it from the center. Resize it by clicking at either end and dragging.
The blue triangular shape and the vertical red line mark the NOW point. If you drag it left or right (called "scrubbing") you can get a crude preview of the resul in the preview window.
The green stripe immediately beneath the workarea bar indicates the availability of rendered preview data. Whenever Permiere is displaying a clip from a project it has to compute previews. When possible it saves these and makes a rough-cut clip from the previews. When preview files are not present, it may take significantly longer to display the clip. |
 |
 | Preview Window
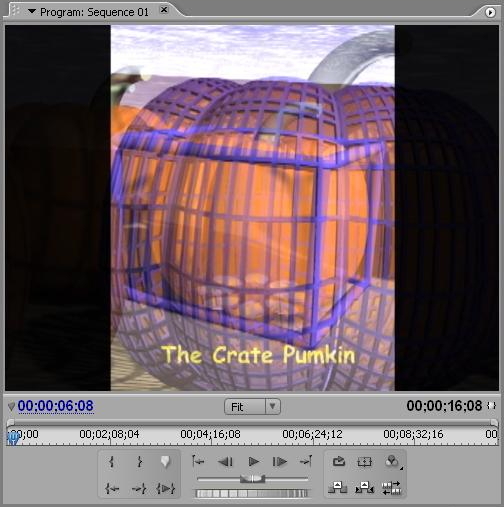
The Preview Window allows you to view the results of your composition. Like the front panel of a VCR, it includes buttons to stop, play, rewind, fast forward, and so on. If you are viewing a preview of the project, the black triangle/line of the "Now" position will also be moving in the Timeline Window.
|
 | Transitions (& other Effects)
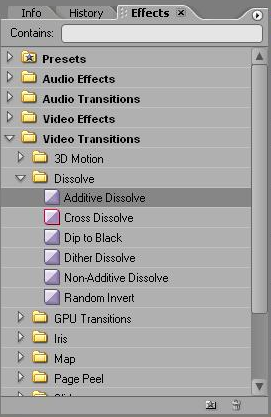
Transitions describe the process of blending or shifting from one image to another. To place a transition, simply drag it from the Effects window and drop it into the "crack" between two clips in the Timeline Window. The transition will size itself to provide a brief overlap, but you may drag it's edges in the Timeline to adjust the duration.
|
HINTS
- Premiere does NOT create a single project document containing all the data you will be working with. The Premiere project document references most of the graphics files. This means it keeps track of where they are on the disk, not their contents. If you move them or rename them after you have included them in the Premiere projejct, you will have problems.
- Work exclusively off of the hard disk, not your thumb drive or external disk. This means you will need to copy a big block of files to the hard disk at the start of a session, and then copy them back at the end. If they are ALL IN THE SAME FOLDER, this will work MUCH more easily and you won't run into problems with the first hint.
- If possible, collect all the material you expect to work with in one folder before beginning. If there is a very large amount of material, you might divide it into collections, each in it's own folder. These can be added to a project easily.
- Playback depends, in part, on the video hardware used for the playback. Thus, playback on the computer monitor may occur at a different rate than playback on the NTSC video monitor. Be sure to preview on this monitor.
- NTSC monitors (TVs) utilize "overscan" logic. That means the edge of the image is intentionally made to extend under the outer rim of the screen, where you cannot see it. Computer monitors, on the other hand, use "underscan" logic. The edge of the image is held away from the edge of the screen. If you position text or grapphics near the edge of the screen, don't be suprised if it is obstructed when viewed on your TV at home.
- NTSC monitors (TVs) do not have the same color ranges as computer monitors. Certain colors, notably saturated primaries like "RED", cause undesirable blurring in the TV image and should be avoided.
- If preparing a movie to record to video tape, don't forget to include several seconds of black lead-in and trailer, so that your video content isn't too close to the previous project, and so there is ample time at the end to depress the STOP button on the recorder before the actual end of the playback.
Last updated: April, 2014

 [report bug]


 indicate the "work area". Analagous to a zoom window in a 2D drawing system, this indicates the area in time that we are currently working on. Move it by dragging it from the center. Resize it by clicking at either end and dragging.
